9-16 BODY SERVICE
5) Clean the glass surfaces to be glued in the body with a
clean rag and if you use cleaning solvent let it dry for more
than ten minutes.
6) Install new moulding in glass.
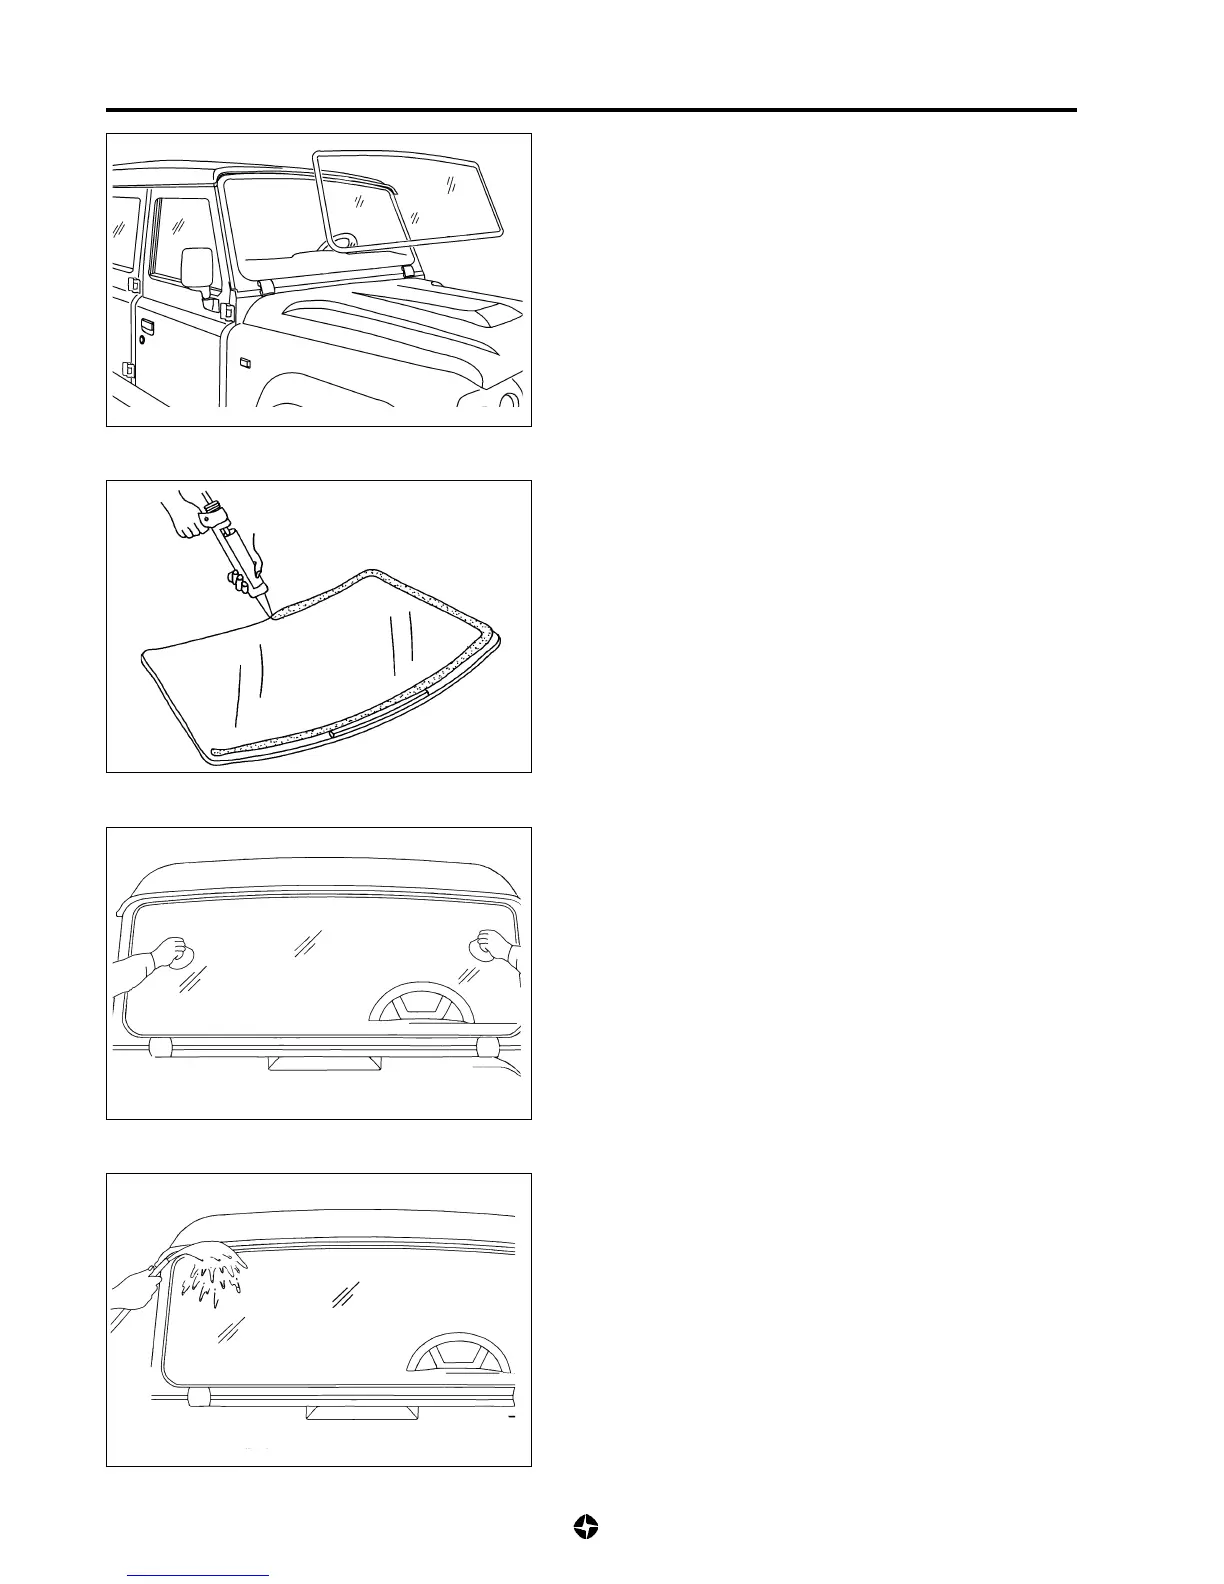
7) Apply enough primer in the entire glass surface to be glued
to the body.
8) Apply primer for moulding in the moulding coupling face to
the body.
9) Apply recommended adhesive all the glass coupling face to
windscreen.
NOTE:
• Begin applying the adhesive from the lower side of
glass.
• Be carefull to not damage the primer.
• The width of the adhesive strip must be 10 ÷ 12 mm.
• Press glass quickly against the body after applying
adhesive.
• Use a rubber suction pad to fix and transport the glass
after applying the adhesive.
10) Fix using rubber suction pad and place the glass against
the body, aligning the marks you did and press.
11) Inspect for impermeability, throwing water with a hose pipe
over the windscreen.
NOTE:
Do not use highly pressured water neither pressurized
air nor infrared radiation for drying.
12) If there is water coming in, dry the glass and fill the entrance
point with adhesive. If water keeps coming in dismantle the
glass and repeat assembly.
13) Wipe the water used in the impermeability test and assemble
the moulding.

 Loading...