EasyManuals Logo

Shimadzu GC-2010 Plus User Manual

Shimadzu GC-2010 Plus
352 pages
To Next Page IconTo Next Page
To Previous Page IconTo Previous Page
Page #141 background imageLoading...
Page #141 background image
12 Injection Port
12.4 Removing and installing the septum
121
GC-2010 Plus
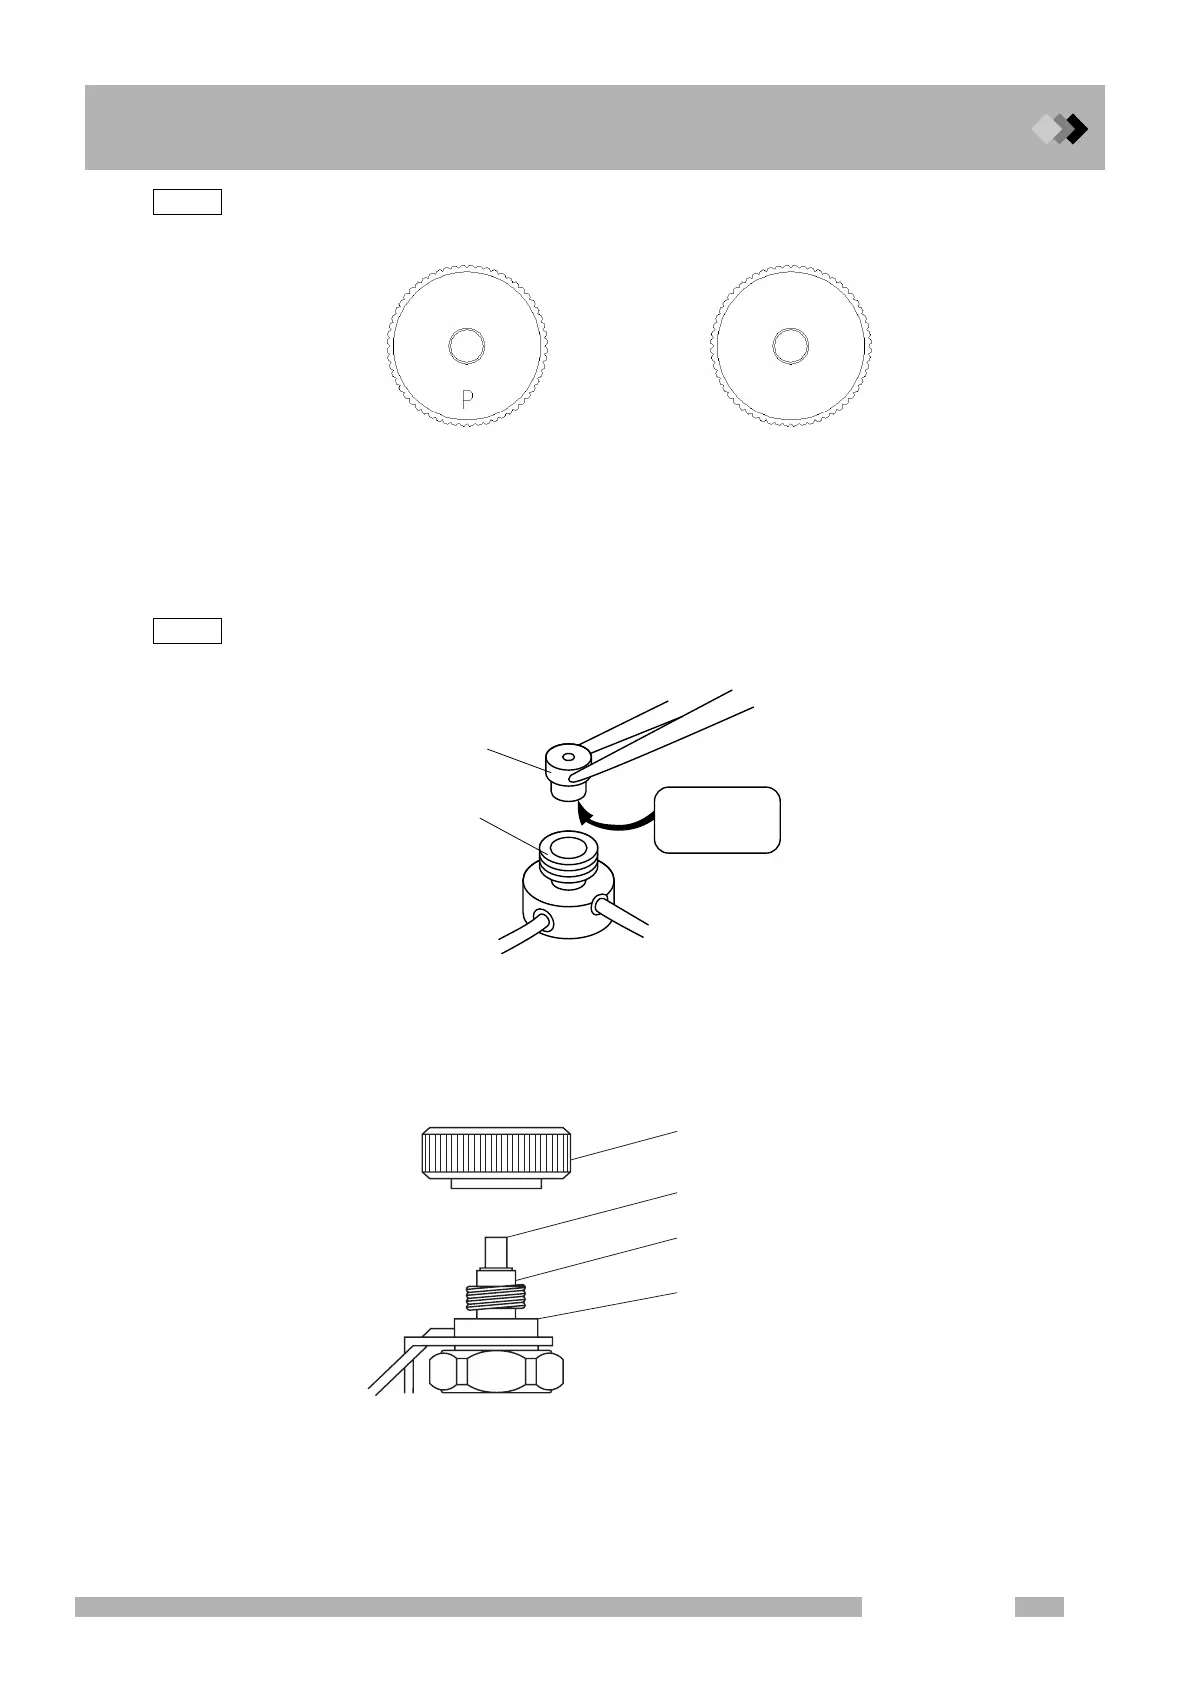
NOTE Septum nut for the SPL of the GC-2010 Plus has a “P” mark. Do not mix up the nut with the septum nut
for the WBI-2010 Plus or the injection port of the GC-2010.
Fig. 12.4.2  
Q Installing the new septum
(1) Insert the septum into the injection port.
NOTE Use tweezers to handle the septum. Touching the septum will contaminate it, causing ghost peaks.
Fig. 12.4.3  
(2) Replace the needle guide, then the septum nut. Tighten the septum nut by hand as far
as possible and return a semicircle.
Fig. 12.4.4  
Septum Nut for SPL Septum Nut for Others
Do not touch
the septum.
Tweezers
Septum
Injection port
Top of injection port
Septum nut
Septum
Needle guide

Table of Contents

Questions and Answers:

Question and Answer IconNeed help?

Do you have a question about the Shimadzu GC-2010 Plus and is the answer not in the manual?

Shimadzu GC-2010 Plus Specifications

General IconGeneral
TypeGas Chromatograph
ModelGC-2010 Plus
ManufacturerShimadzu
Maximum Temperature Ramp Rate120 °C/min
Detector OptionsFID, TCD, ECD, FPD, NPD, MS
Electronic Flow Control (EFC)Yes
Data Sampling RateUp to 250 Hz
Column Oven Temperature RangeAmbient +5°C to 450°C
Maximum Oven Heating Rate120 °C/min
Injection PortSplit/Splitless, PTV
DisplayLCD

Related product manuals