Importing/Exporting Control Points
P/N 7010-0628
2-55
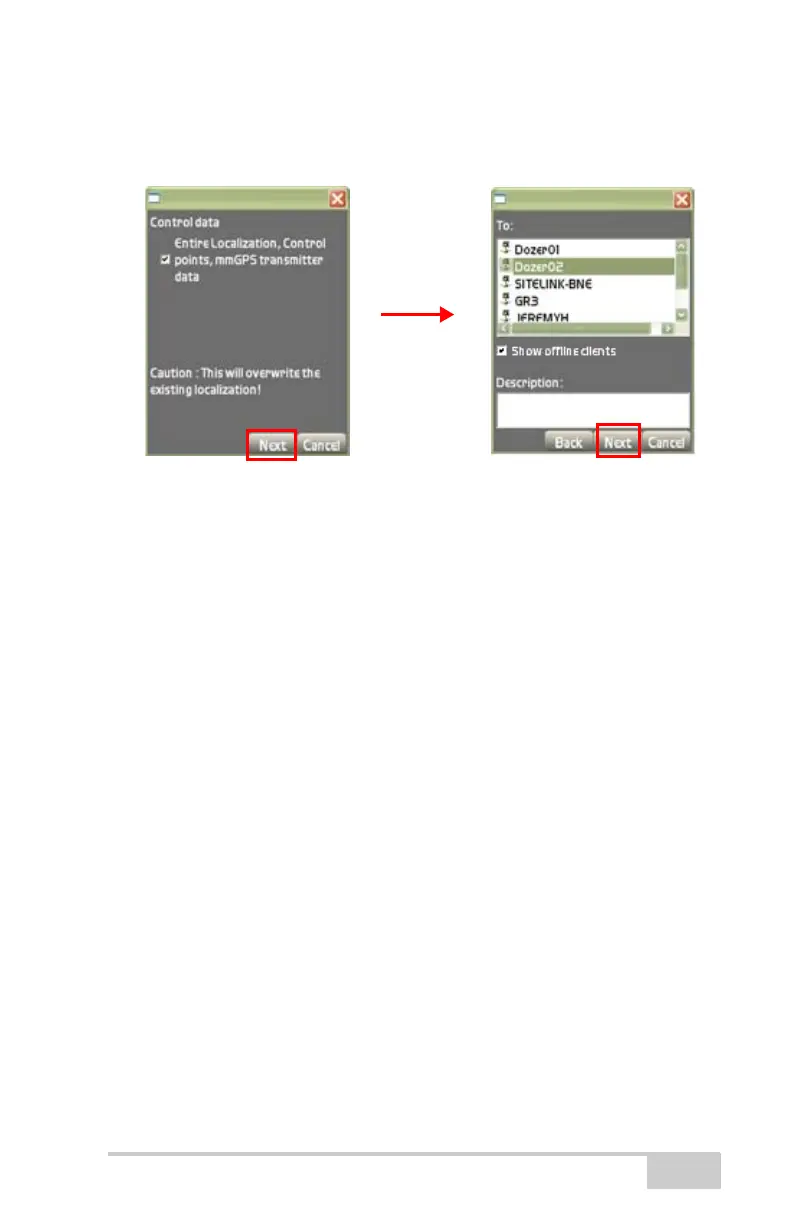
3. Press Next to display the Control Points To: dialog box
(
Figure 2-75).
Figure 2-75. Control Data Dialog Box for Control Points
4. On the Control Points To: dialog box, do the following:
• To: field – highlight the selected client(s) to send localization/
control points. To send to multiple clients, “tab and hold” the
stylus on the screen.
Active clients will be at the top of the list with a green icon.
• Show offline clients – check mark this box to view clients
offline, as well as those online. Uncheck to show only those
online.
Offline clients will be at the bottom of the list with a red icon.
• Description field – enter a brief description of the file
(optional)
• Back – press to return to Control data dialog box
(Figure 2-76 on page 2-56).
• Next – press to display the confirmation dialog box
(
Figure 2-76 on page 2-56).
• Cancel – press to quit and return to the Main Menu
(
Figure 2-76 on page 2-56).
5. On the confirmation screen (Figure 2-76 on page 2-56), do the
following:
• Check mark the Import into recipients current active project
box to import the control points into an active project.