Control
P/N 7010-0628
3-15
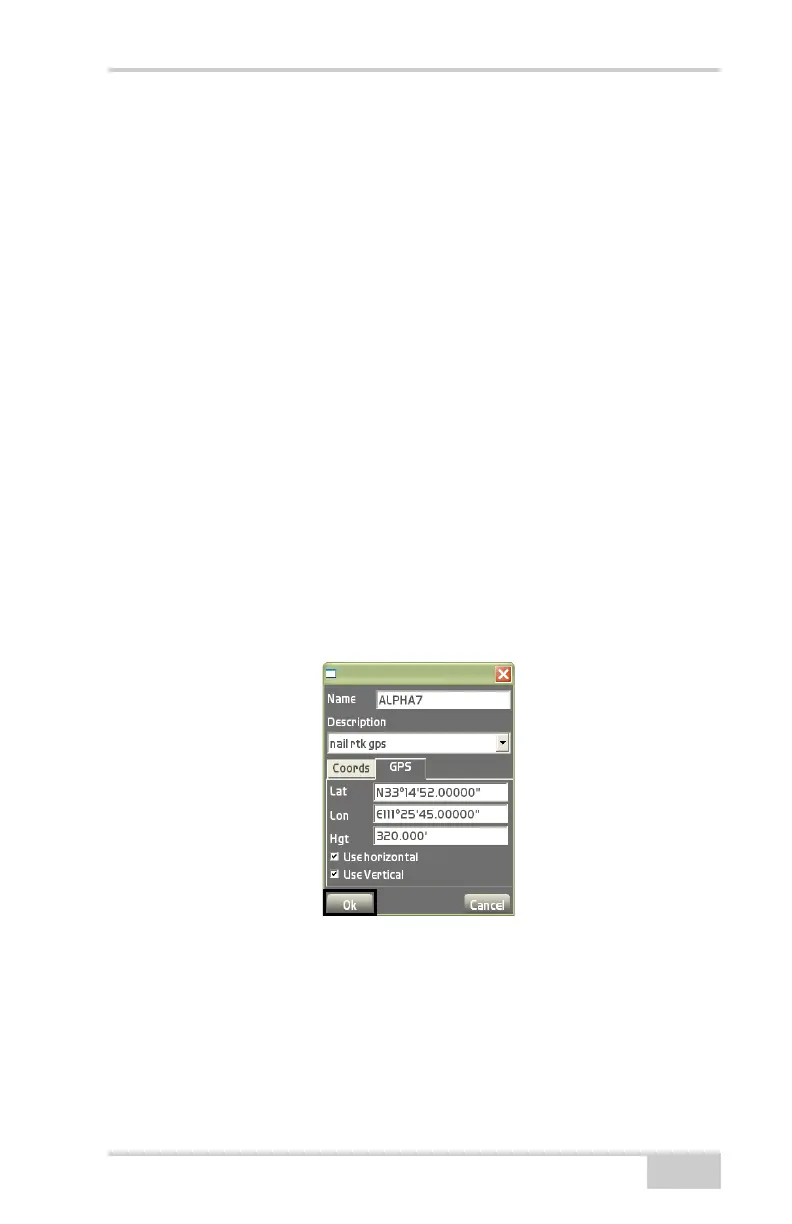
• GPS tab – displays the Latitude, Longitude, and Height for the
control point (
Figure 3-24). Either manually enter the lat/long and
height or obtain this information using the GPS+ receiver.
Measuring each point is the standard practice for localization.
– If you have precise GPS coordinates, enter the coordinates for
Latitude (Lat), Longitude (Lon), and Height (Hgt). Skip this
step when measuring points for localization.
– Use horizontal: used for the purpose of localization. Enable to
use the control point as a horizontal control point.
– Use Vertical: used for the purpose of localization. Enable to
use the control point as a vertical control point.
– Measure: used in localization to acquire precise GPS
coordinates. Press Measure when ready to collect a point; the
measurement dialog box opens and the Rover begins to
measure the Control Point.
After a successful measurement, measured GPS coordinates
display in the Lat (latitude), Lon (longitude), and Hgt (height)
entry boxes. Press Ok to save the measurements and return to
the control points dialog box.
Figure 3-24. Add Control Points – GPS Tab
Edit Control Point On the control points dialog box, press Edit to
edit the selected control point. See
“Add Control Point” on page 3-14,
Figure 3-23 on page 3-14 and Figure 3-24 above for details.
Delete Control Point On the control points dialog box (Figure 3-22
on page 3-14), press Delete to delete the selected control point.