Connecting the Optical Cables
1. Read the installation plan and identify the first module in the first shelf that has one or
more connections defined.
2. Verify that you are properly grounded with an anti-static wrist strap or heel strap
connected to the grounded ESDjack.
3. Prepare the module
a. Remove the dust plugs from the relevant connectors.
b. Inspect the connectors for damage. If you find any damage, do not use this
connector. Contact ADVA Optical Networking Technical Support for assistance.
Do not attempt to repair it yourself.
4. Select the correct cable types (according to your installation plan).
5. Prepare each cable
a. Remove the protective cap from each end.
b. Inspect the plug for damage. If you find any damage, replace the jumper.
c. Clean the plug using a standard cleaning kit. Be careful not to contaminate the
surfaces after cleaning.
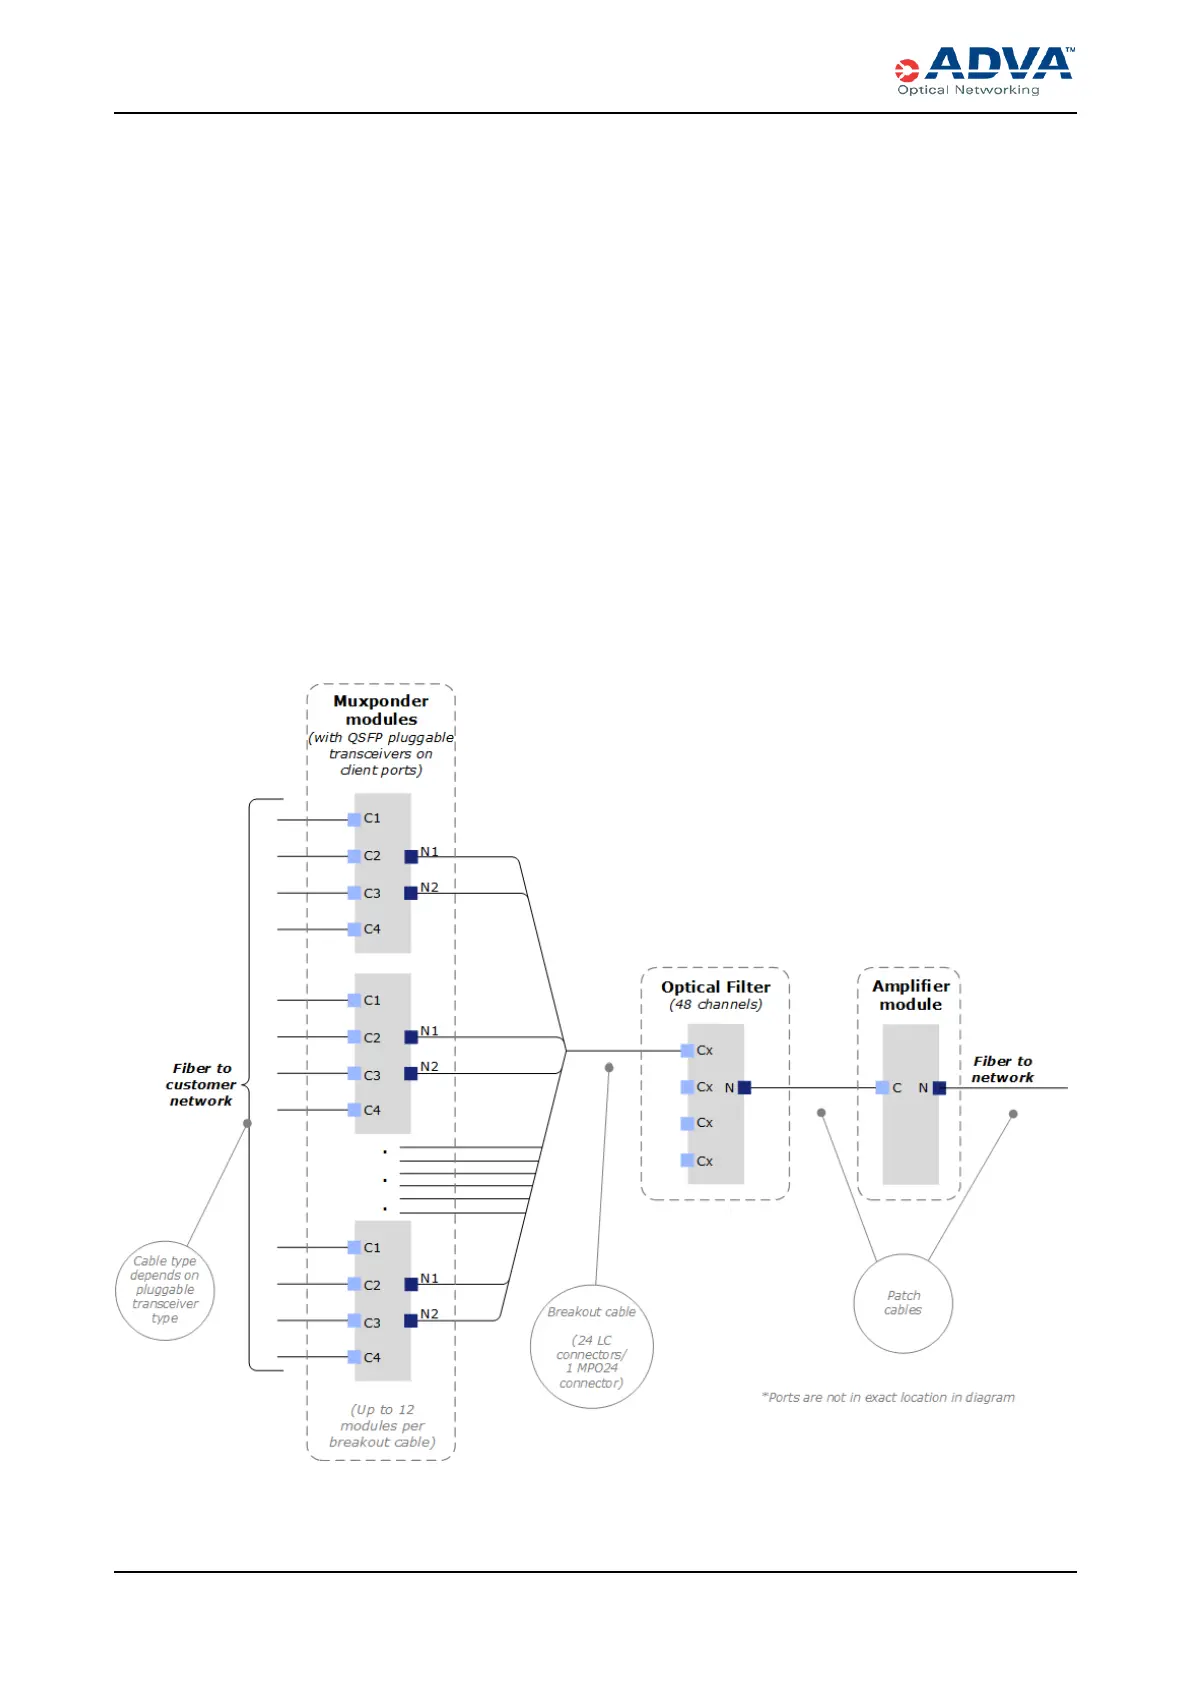
6. Connect the FSP 3000 C components (both client and network sides) according to
the appropriate cabling diagram.
Figure 71: Cabling Diagram with 48Optical Filter Channels
246 FSP3000 C Hardware Guide - R1.1 - Issue:A (12/09/2016)