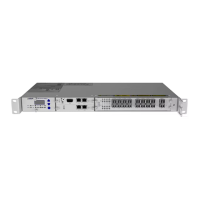
Replacing a Pluggable Transceiver
1. Verify that you are properly grounded with an anti-static wrist strap or heel strap
connected to the grounded ESDjack.
2. If mounted, remove the front cover from the shelf as described in Removing and
Installing Front Covers.
3. Disconnect the various cables.
4. Hold the pluggable transceiver between your thumb and forefinger and orient it so
that the label is on the left. If the pluggable transceiver has a bale clasp, hold the
pluggable transceiver between your thumb and forefinger and orient it so that the
optical port is toward you, and the bale clasp is on the right.
5. Carefully pull the pluggable transceiver from the cage.
6. Place the malfunctioning pluggable transceiver on a static-dissipative mat.
7. Return the defective traffic module to ADVA Optical Networking as described in
Returning Equipment.
l Electrostatic Discharge Damage Prevention and Warning
l Laser and LED Safety Guidelines and Warnings
l Handling Fiber-Optic Cables
l Handling Pluggable Transceivers
Installing a QSFPPluggable Transceiver
This procedure assumes that:
l The shelf is properly grounded to the rack;
l The replacement pluggable transceiver have been properly inspected;
and
l The module is installed in the shelf.
To make reattaching the cables easier, make sure your cables are
labeled.
LASERRADIATIONWARNING
Each pluggable transceiver is a Class 1 laser product.
1. Check the operating status of the equipment and the present hazard level. Please
keep in mind that the laser hazard level of the network element will be influenced
when any module is operating in "Forced On" mode. Do not proceed unless you are
familiar with the laser safety and you are protected accordingly.
2. Verify that you are properly grounded with an anti-static wrist strap or heel strap
connected to the grounded ESDjack.
3. Identify the port on the traffic module where the pluggable transceiver is to be
installed.
298 FSP3000 C Hardware Guide - R1.1 - Issue:A (12/09/2016)