Replacing a PSM
14. When the CEM-4is inserted completely, hand tighten the thumb screws to prevent
inadvertent dislodging.
15. Use a Torx T10 screwdriver to gently tighten the thumb screws. Do not overtighten.
16. Reconnect the RJ-45 Management ports, if necessary.
17. Reconnect the Interconnect ports, if necessary.
18. Check the module LEDs to ensure they are operating correctly. For LEDinformation,
see the FSP 3000 C Troubleshooting Guide.
19. Reinstall the front cover as described in Removing and Installing Front Covers.
20. If a firmware mismatch alarm is raised on this module, upgrade your CEM-4
software. Refer to the appropriate software document for procedures. See FSP 3000
C Documentation Suite for a list of available documents.
21. Return the defective CEM-4 to ADVA Optical Networkingas described in Returning
Equipment
If the replacement CEM-4 does not work or the LEDs are not responding
as expected, remove and reinstall it. If it still does not work, immediately
install another replacement.
l Electrostatic Discharge Damage Prevention and Warning
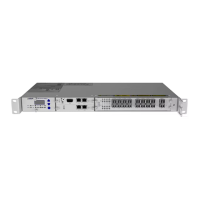
l CEM-4
l Handling Modules
l FSP 3000 C Troubleshooting Guide
Replacing a PSM
Overview 288
Required Tools and Equipment 289
Replacing a PSM-DC 290
Replacing a PSM-AC4 291
Overview
The PSMs are hot swappable, which means they can be removed and replaced while the
FSP 3000 C system is powered on and running.
l Redundant power configuration — You can replace or upgrade a PSM while the
system is operating. Only one PSM can be replaced at a time. The second PSM must
remain connected to the AC or DC power source.
l Non-redundant power configuration — You will need to completely power off the
system when removing and replacing a PSM.
288 FSP3000 C Hardware Guide - R1.1 - Issue:A (12/09/2016)