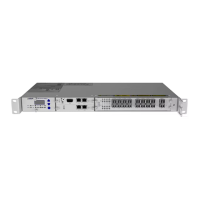
Replacing a Traffic Module
l Electrostatic Discharge Damage Prevention and Warning
l Laser and LED Safety Guidelines and Warnings
l Handling Modules
l Handling Fiber-Optic Cables
l Handling Pluggable Transceivers
Installing a Traffic Module
This procedure assumes that:
l The shelf is properly grounded to the rack; and
l The replacement module have been unpacked and properly
inspected.
To make reattaching the cables easier, make sure your cables are
labeled.
ELECTRIC VOLTAGEWARNING
Risk of short circuit.
If a backplane connector of a shelf has bent or broken off pins, do
not slide in the traffic module into that shelf slot. If the plug-in
board connector of the traffic module is damaged, do not install
this module.
Damaged connectors could cause a short circuit or malfunction.
1. Verify that you are properly grounded with an anti-static wrist strap or heel strap
connected to the grounded ESDjack.
2. Hold the traffic module with the faceplate toward you and the levers extended.
3. Align the module edges with the guides of the shelf slot.
4. Lift out on the levers and gently apply pressure to the faceplate while pushing the
module into the appropriate slot.
5. Push on the faceplate to fully seat the module .
6. Press down on the locking levers to secure the module and connect it to the
backplane. The module is completely inserted when
o
Its faceplate is flush with the faceplates of the adjacent modules and the shelf
panels; and
o
It receives power. The Mod LED turns green when the module makes contact
with the backplane. The module's admin state is "unassigned" so the other LEDs
are off.
FSP3000 C Hardware Guide - R1.1 - Issue:A (12/09/2016) 295