Replacing a Pluggable Transceiver
Do not install a pluggable transceiver with the optical fiber pair
attached. You could damage the optical fibers, the optical fiber
connectors, or the optical port of the module.
4. If installed, remove the dust cover from the module port and store it in a resealable
container for future use.
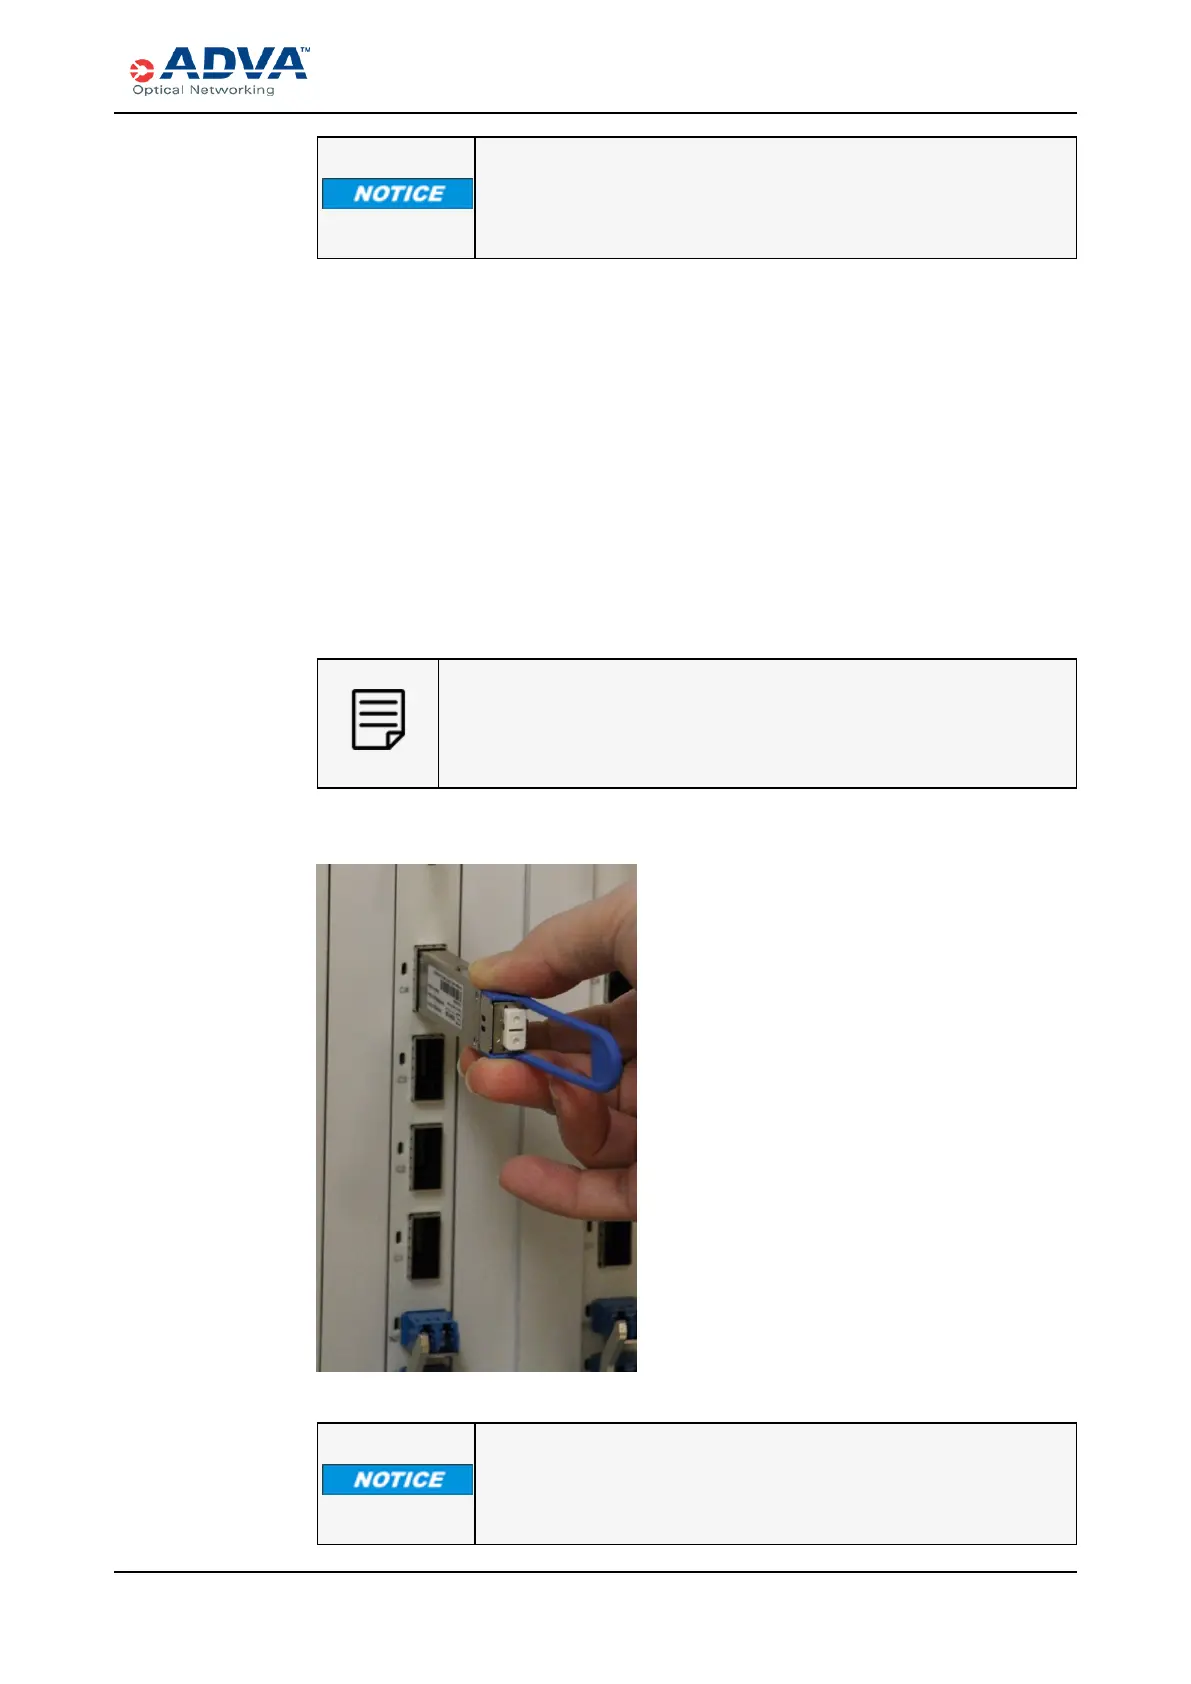
5. Insert the desired pluggable transceiver into the empty port:
a. Hold the pluggable transceiver between your thumb and forefinger and orient it so
that the label is on the left.
b. Align the pluggable transceiver with the cage opening and gently insert it into the
empty cage.
c. Apply light pressure to the pluggable transceiver until it snaps into place. A click
indicates that the transceiver is completely inserted and securely seated in the
cage.
If there is resistance, remove the transceiver, realign it so that the bale clasp faces
the other direction, and insert the transceiver again.
The management software automatically detects when a pluggable
transceiver is inserted into a module. Each time a transceiver is inserted
into an interface cage of a channel module or network module, the internal
network management system is notified.
Figure 86: Inserting a QSFPPluggable Transceiver
Do not remove the dust plug from the QSFP pluggable transceiver at
this time. It will be removed when you connect the optical cables.
FSP3000 C Hardware Guide - R1.1 - Issue:A (12/09/2016) 299