Routing Optical Cables Through the FMT/1HU
1. Verify that you are properly grounded with an anti-static wrist strap or heel strap
connected to the grounded ESDjack.
2. Open the tray loosening the screws of the FMT/1HU for access to the fiber optic tray.
3. Pull out the tray completely.
4. Route the cables to the open tray. The cables may be routed from shelves rack-
mounted above or below the fiber management shelf to the left or right side of the
fiber optic tray.
5. Route the cables through the sliding radius limiter into the tray. Whether the cables
are routed through the left or right sliding radius limiter depends on the configuration
of the shelf from the which the cables originate.
6. Place the cables coming through the right sliding radius limiter around the right set of
storage radius limiters and the cables coming through the left sliding radius limiter
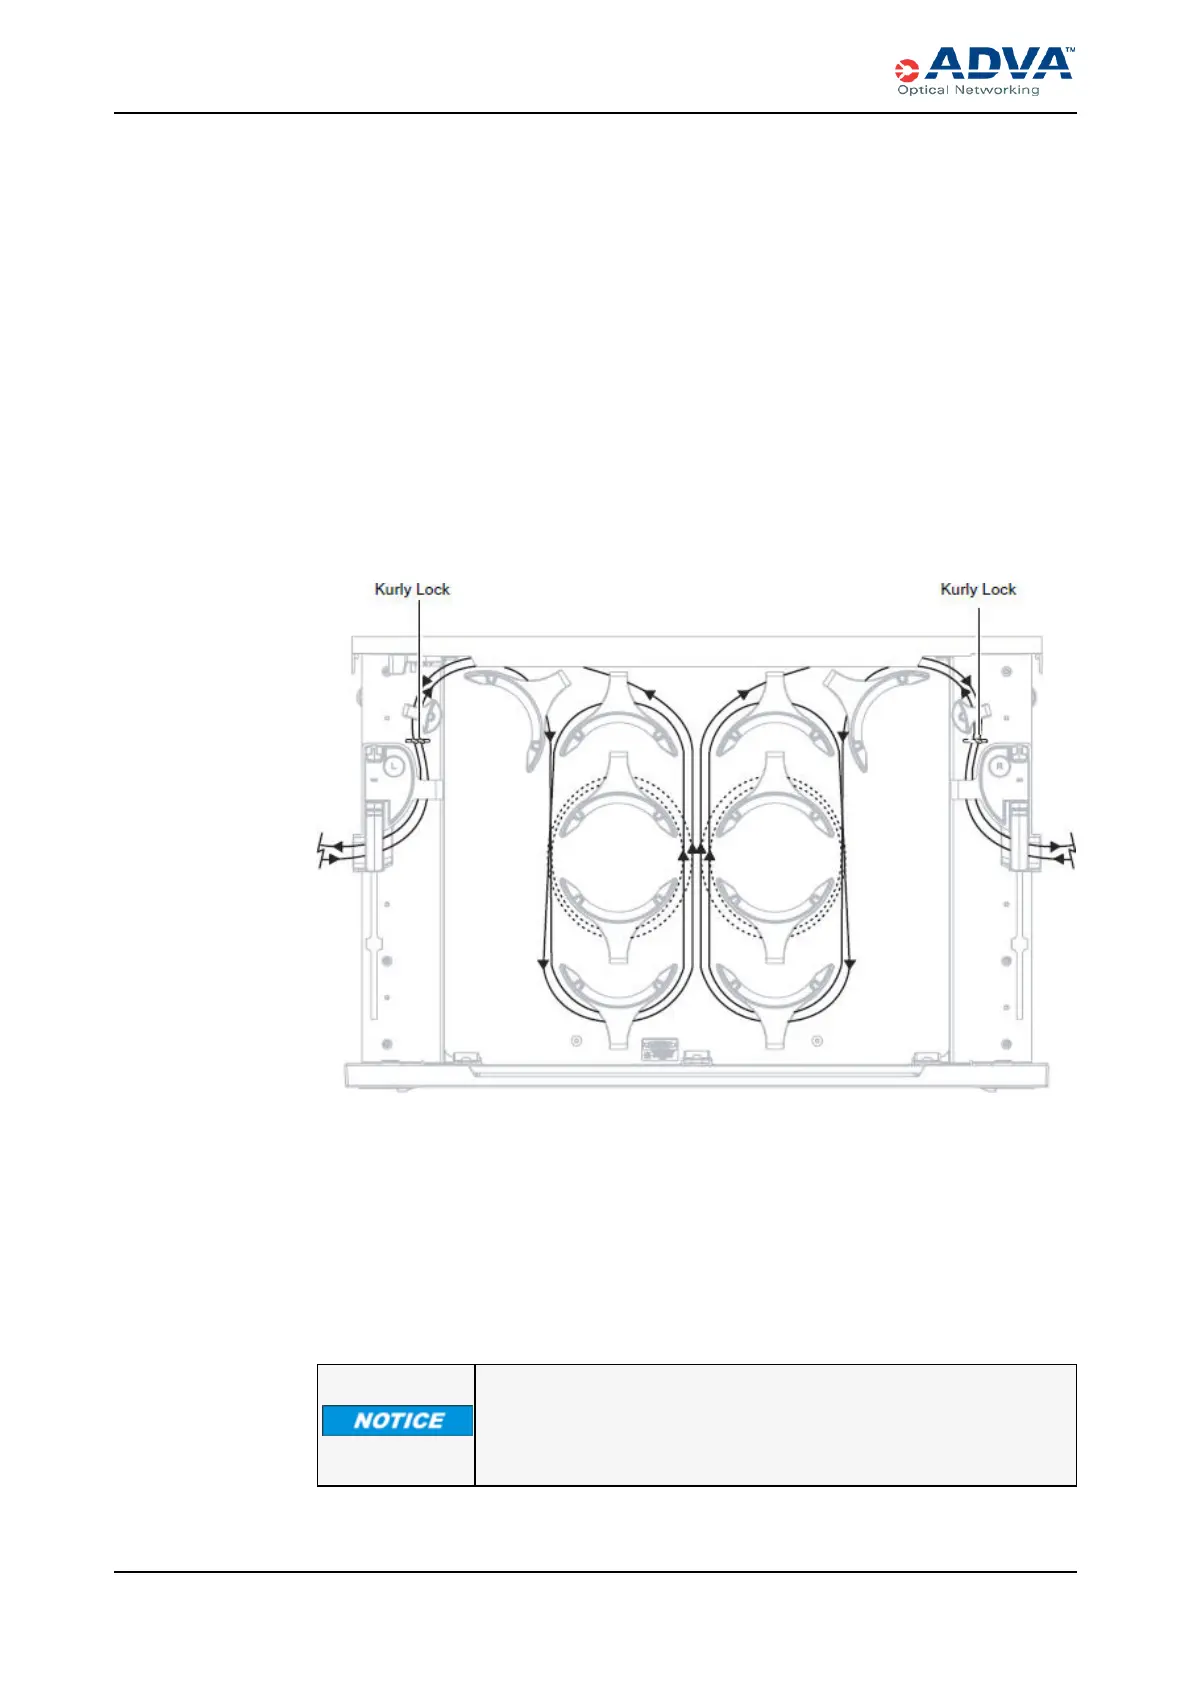
around the left set of storage radius limiters. The following figure shows cables
routing through the fiber-optic tray
Figure 73: Example of a Cable Configuration in the Fiber Optic Tray
7. Use the kurly locks to bundle cables together between the sliding radius limiter and
the rear radius limiter.
8. If you have installed cables in a fiber management shelf, close the tray as follows:
a. If provided, unlock the lock open latch.
b. Assure that all cables are properly secured and located below the top surface of
the tray.
c. Slowly close the tray.
Placing a load in excess of 9 kg (19.841 lbs) onto an open tray will
result in misalignment or damage to the tray.
248 FSP3000 C Hardware Guide - R1.1 - Issue:A (12/09/2016)