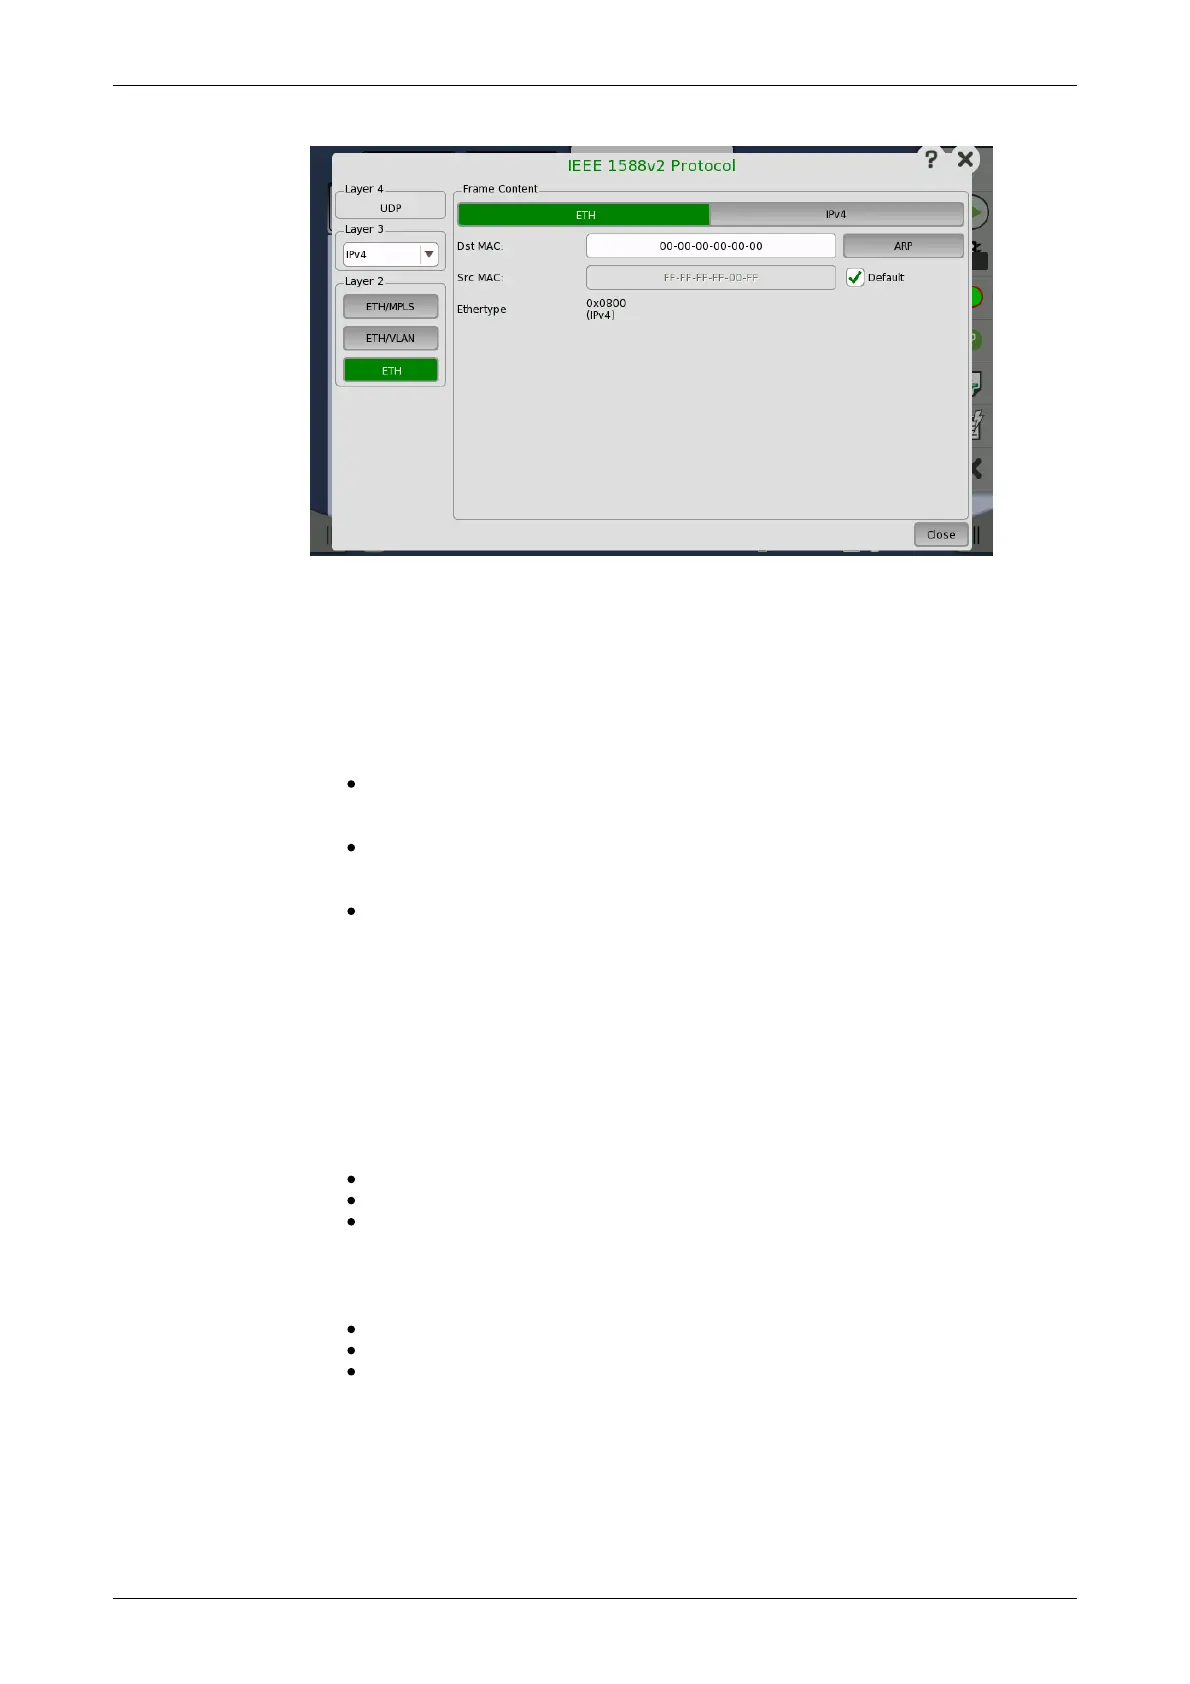
In the IEEE 1588v2 Protocol dialog box the buttons on the left-hand side
allow you to select the relevant layers. The current selection is shown at the
top of the Frame Content area. Touching one of the layer buttons in the
Frame Content area will display the setup parameters for that layer.
The following layers and parameters are available:
ETH layer
When None is set to the Layer 3, you can set Src MAC only.
Dst MAC - Type in the destination MAC address to be used with all PTP
unicast frames. Use the ARP button to solve any MAC setup in connection
with IPv4.
Src MAC - Type in the source MAC address to be used with all PTP
frames. Select Default to use the default MAC that comes with the
Ethernet port.
Ethertype - Ethernet type is user-selectable only in case of VLAN use.
VLAN layer
Select the number of levels using Level count drop down menu.
For each level select ID, CFI, Priority, and Ethertype.
MPLS layer
Select the number of levels using Level count drop down menu.
For each level select Label, EXP, and TTL. Stack displays the stack bit.
IPv4 layer
Src IP - Type in the IPv4 source address.
Dst IP - In unicast mode type in the IPv4 destination address.
DSCP(PTP events message) and DSCP(PTP other message) - Set
the DSCP value to be used for transmitted PTP event frames and a value
for all other PTP frames. Acceptable values are between 0x00 and 0x3F.
IPv6 layer
Src IP - Type in the IPv6 source address.
Dst IP - In unicast mode type in the IPv6 destination address.
Multicast scope - Select one of the predefined IPv6 multicast scope
values or choose User defined to manually enter a value. Acceptable
values are between 0x0 and 0xF.
6.1.2.7 OAM
Touching the OAM button in the navigation area will display the screen
shown below.
The Follow button appears when the Port 2 settings can follow Port 1.