4. Lift the chassis approximately 0.75 in. above the surface of the mounting shelf and
position it as close as possible to the shelf.
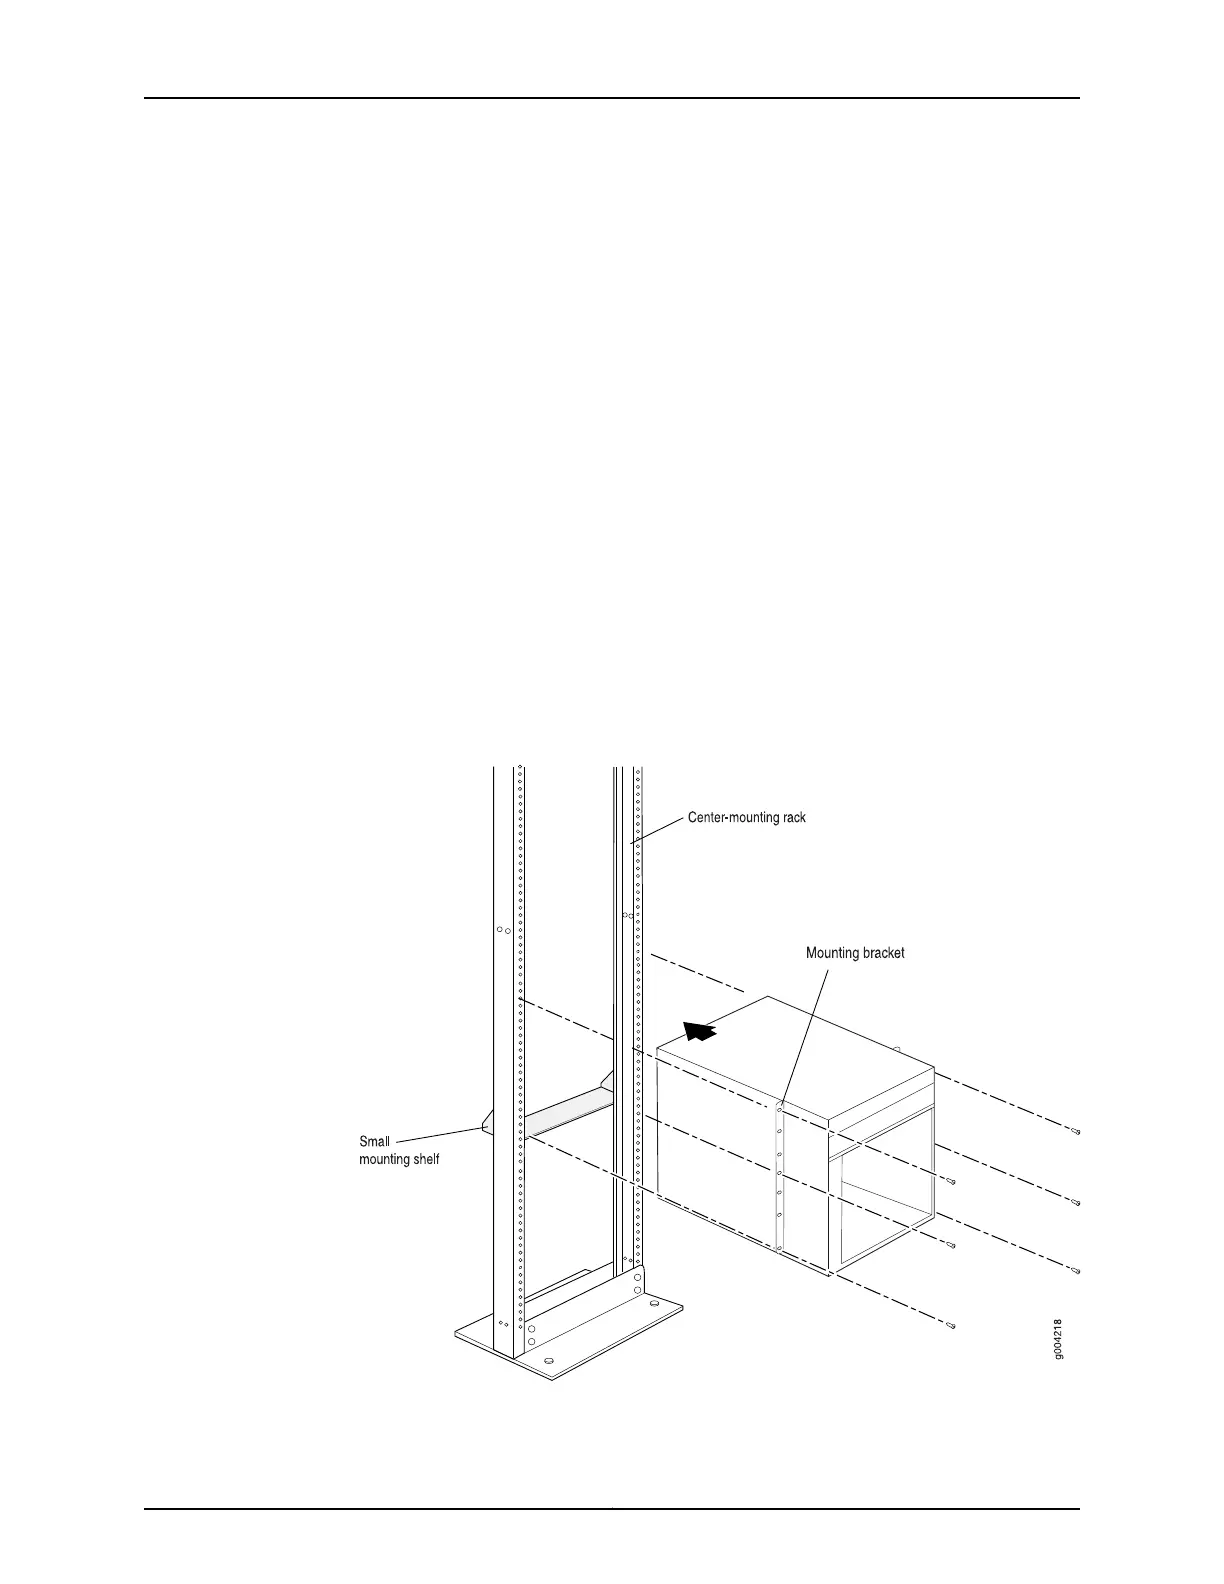
5. Carefully slide the router onto the mounting shelf so that the bottom of the chassis
and the mounting shelf overlap by approximately two inches.
6. Slide the router onto the mounting shelf until the mounting brackets contact the rack
rails. The shelf ensures that the holes in the mounting brackets of the chassis align
with the holes in the rack rails.
7. Move the lift away from the rack.
8. Install a mounting screw into each of the open mounting holes aligned with the rack,
starting from the bottom.
9. Visually inspect the alignment of the router. If the router is installed properly in the
rack, all the mounting screws on one side of the rack should be aligned with the
mounting screws on the opposite side and the router should be level.
Figure 57: Installing the Router in the Rack
195Copyright © 2017, Juniper Networks, Inc.
Chapter 16: Installing the MX480 Router