• Installing the MX480 Router Cable Management Bracket on page 215
Replacing the Management Ethernet Cable on an MX Series Router
One Ethernet cable with RJ-45 connectors is provided with the router. To replace the
cable connected to the ETHERNET port:
1. Attach an ESD grounding strap to your bare wrist and connect the strap to one of the
ESD points on the chassis.
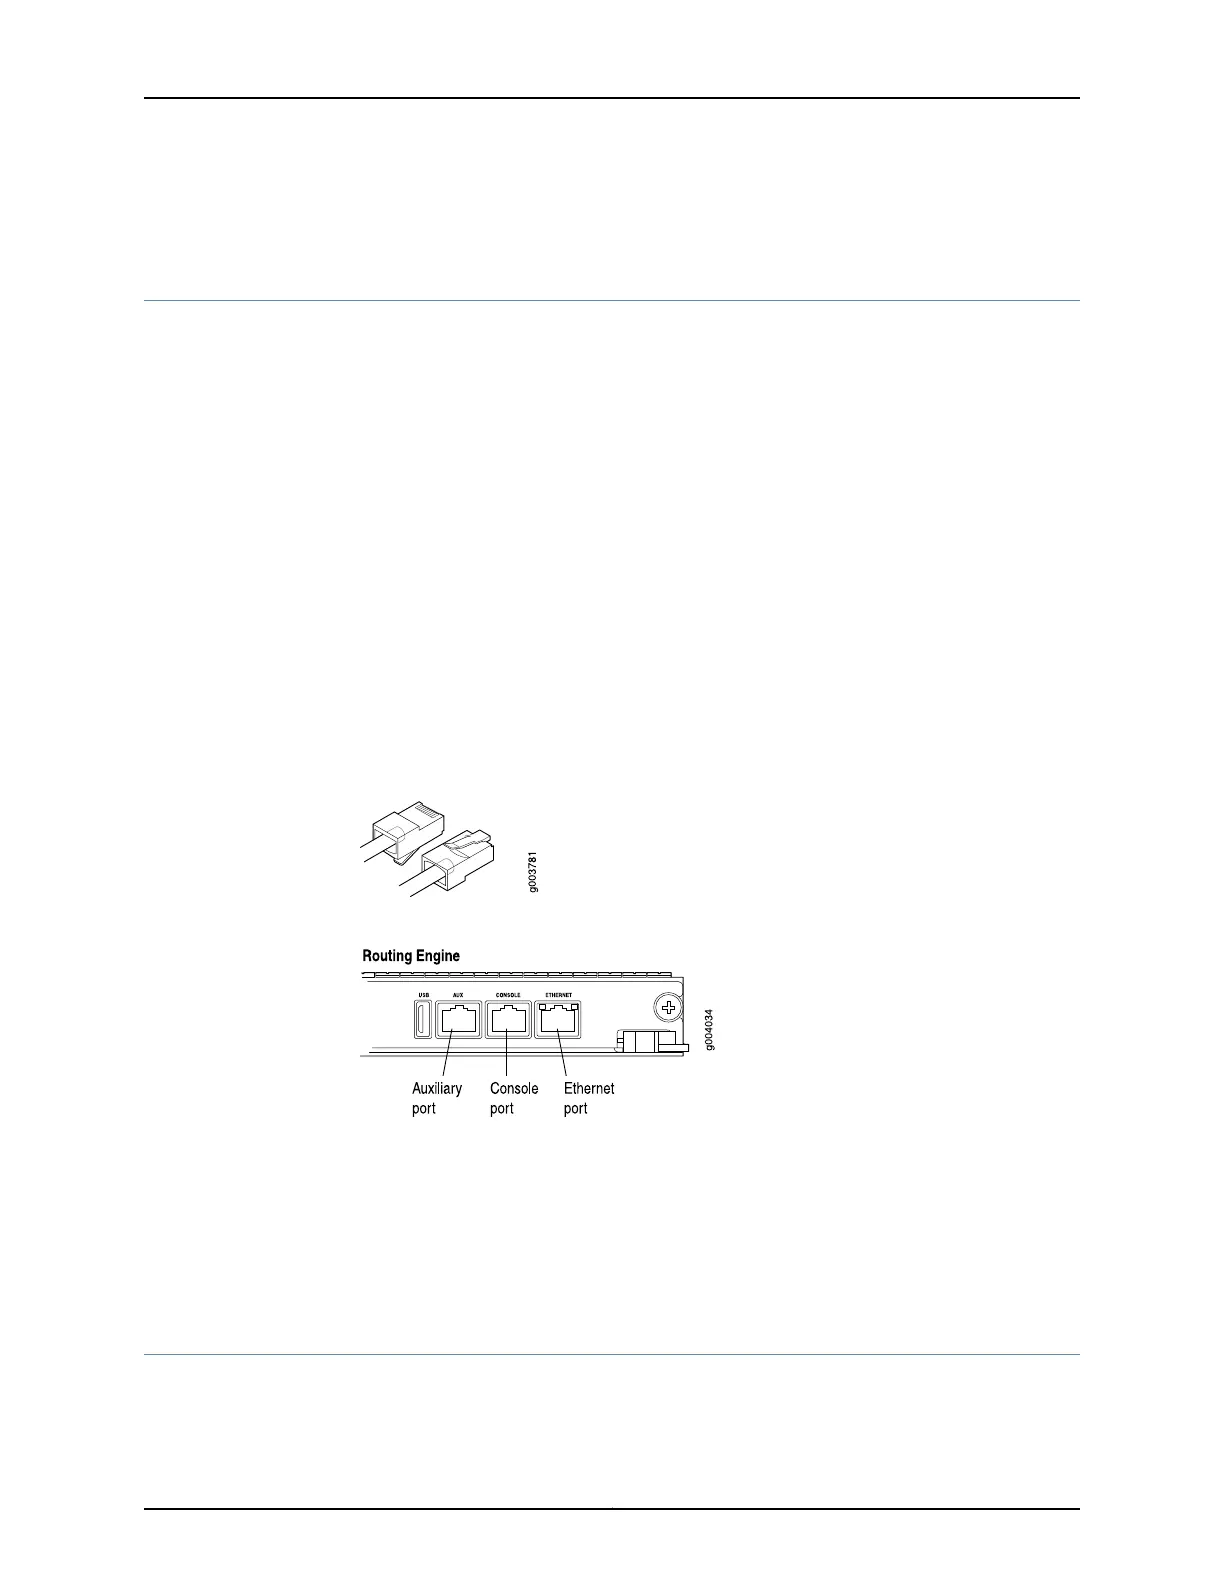
2. Press the tab on the connector, and pull the connector straight out of the port.
Figure 116 on page 292 shows the connector.
3. Disconnect the cable from the network device.
4. Plug one end of the replacement cable into the ETHERNET port. Figure 117 on page 292
shows the port.
5. Plug the other end of the cable into the network device.
Figure 116: Cable Connector
Figure 117: Ethernet Port
Related
Documentation
Preventing Electrostatic Discharge Damage to an MX480 Router on page 484•
• Connecting the MX480 Router to Management and Alarm Devices on page 231
• Replacing the Console or Auxiliary Cable on an MX480 Router on page 292
• RJ-45 Connector Pinouts for an MX Series Routing Engine ETHERNET Port on page 137
Replacing the Console or Auxiliary Cable on an MX480 Router
To use a system console to configure and manage the Routing Engine, connect it to the
CONSOLE port on the Routing Engine. To use a laptop, modem, or other auxiliary device,
Copyright © 2017, Juniper Networks, Inc.292
MX480 3D Universal Edge Router Hardware Guide