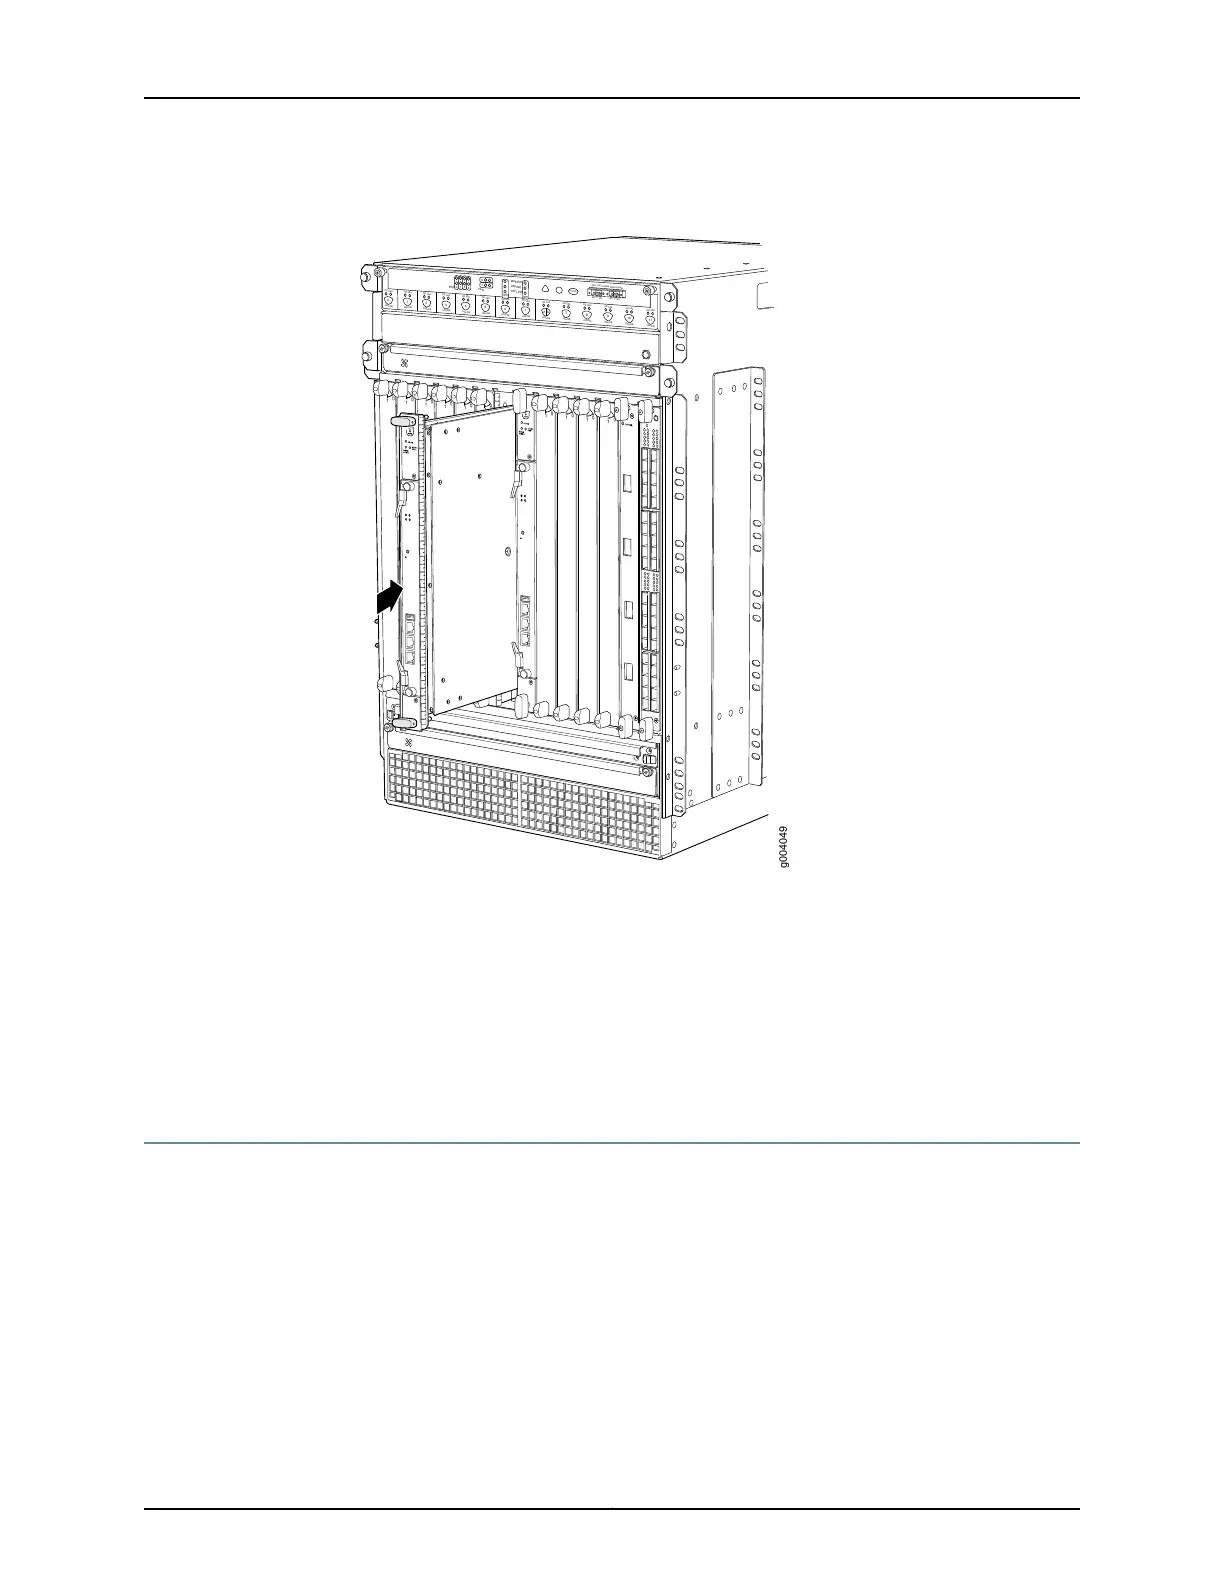
Figure 110: Installing an SCB
OK
0
FAIL
ONLINE
OK
1
FAIL
ONLINE
OK
2
FAIL
ONLINE
OK
3
FAIL
ONLINE
OK
4
FAIL
ONLINE
OK
5
FAIL
ONLINE
OK
0
FAIL
ONLINE
MASTER
ONLINE
OFFLINE
RE0
FAN
PEM
1
0
0
1
2
3
RE1
OK
1
FAIL
ONLINE
OK
7
FAIL
ONLINE
OK
8
FAIL
ONLINE
OK
9
FAIL
ONLINE
OK
10
FAIL
ONLINE
OK
11
FAIL
ONLINE
OK
2
6
FAIL
ONLINE
ACO/LT
YELLOW ALARM
RED ALARM
NC
NO
C
NC
NO
C
1
0
1
0
1
0
1
0
1
0
1
1
0
0
1
0
1
0
1
0
g004049
Related
Documentation
Preventing Electrostatic Discharge Damage to an MX480 Router on page 484•
• Removing an MX480 SCB on page 381
• Operating and Positioning the MX480 SCB Ejectors
• Effect of Taking the MX480 Host Subsystem Offline
• Taking an MX480 Host Subsystem Offline
Installing an SFP or XFP Transceiver into an MX480 DPC, MPC, MIC, or PIC
To install an SFP or XFP:
1. Attach an ESD grounding strap to your bare wrist and connect the strap to one of the
ESD points on the chassis.
2. Take each transceiver to be installed out of its electrostatic bag, and identify the slot
on the component where it will be installed.
3. Verify that each transceiver is covered by a rubber safety cap. If it is not, cover the
transceiver with a safety cap.
285Copyright © 2017, Juniper Networks, Inc.
Chapter 21: Installing Components