4. Secure the power cable lug to the terminal studs, first with the flat washer, then with
the nut. Apply between 23 lb-in. (2.6 Nm) and 25 lb-in. (2.8 Nm) of torque to each
nut (see Figure 77 on page 228). Do not overtighten the nut. (Use a 7/16-in. [11 mm]
torque-controlled driver or socket wrench.)
CAUTION: Ensure thateach power cablelugseatsflushagainstthe surface
of the terminal block as you are tightening the nuts. Ensure that each nut
is properly threaded onto the terminal stud. The nut should be able to spin
freely with your fingers when it is first placed onto the terminal stud.
Applying installation torque to the nut when improperly threaded may
result in damage to the terminal stud.
CAUTION: The maximum torque rating of the terminal studs on the DC
power supply is 36 lb-in. (4.0 Nm). The terminal studs may be damaged
if excessivetorque is applied. Use only a torque-controlled driver or socket
wrench to tighten nuts on the DC power supply terminal studs.
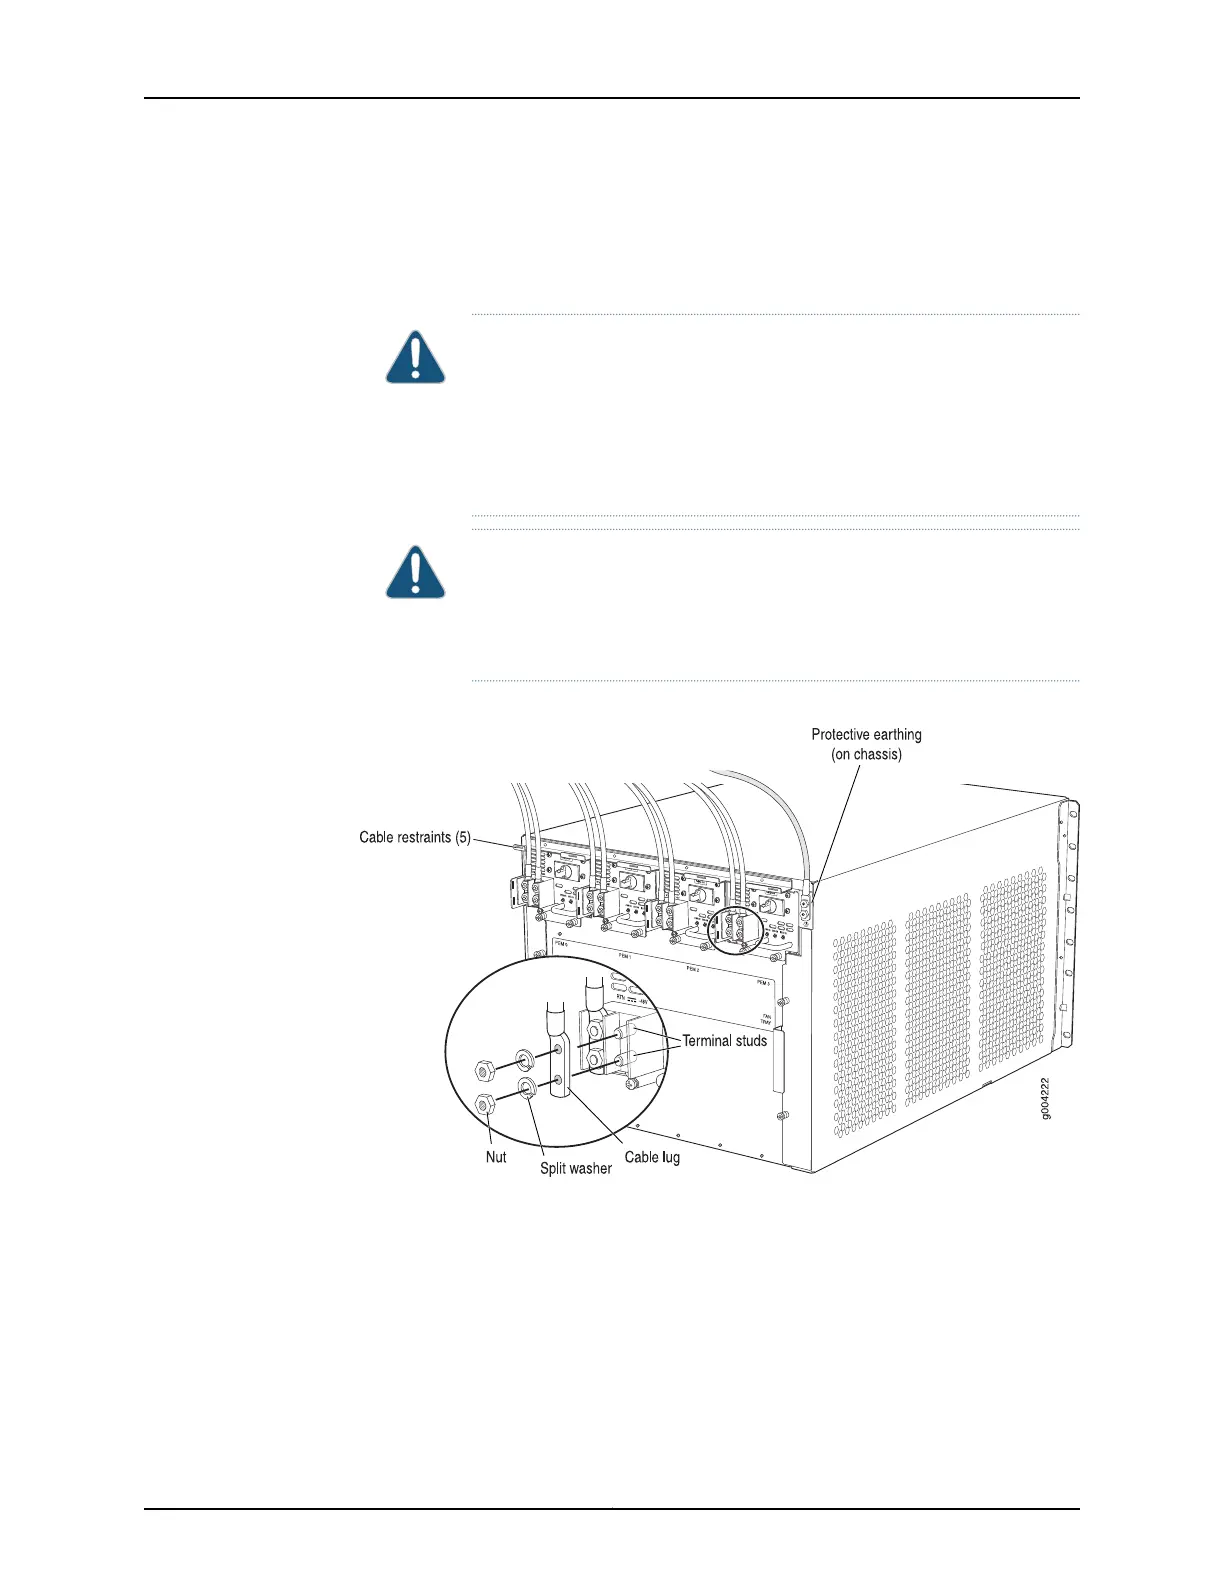
Figure 164: Connecting Power Cables to the DC Power Supply
5. Route the power cable along the cable restraint toward the left or right corner of the
chassis. If needed, thread plastic cable ties, which you must provide, through the
openings on the cable restraint to hold the power cable in place.
6. Verify that the DC power cable is connected correctly, that it does not touch or block
access to router components, and that it does not drape where people could trip on
it.
379Copyright © 2017, Juniper Networks, Inc.
Chapter 26: Replacing Power System Components