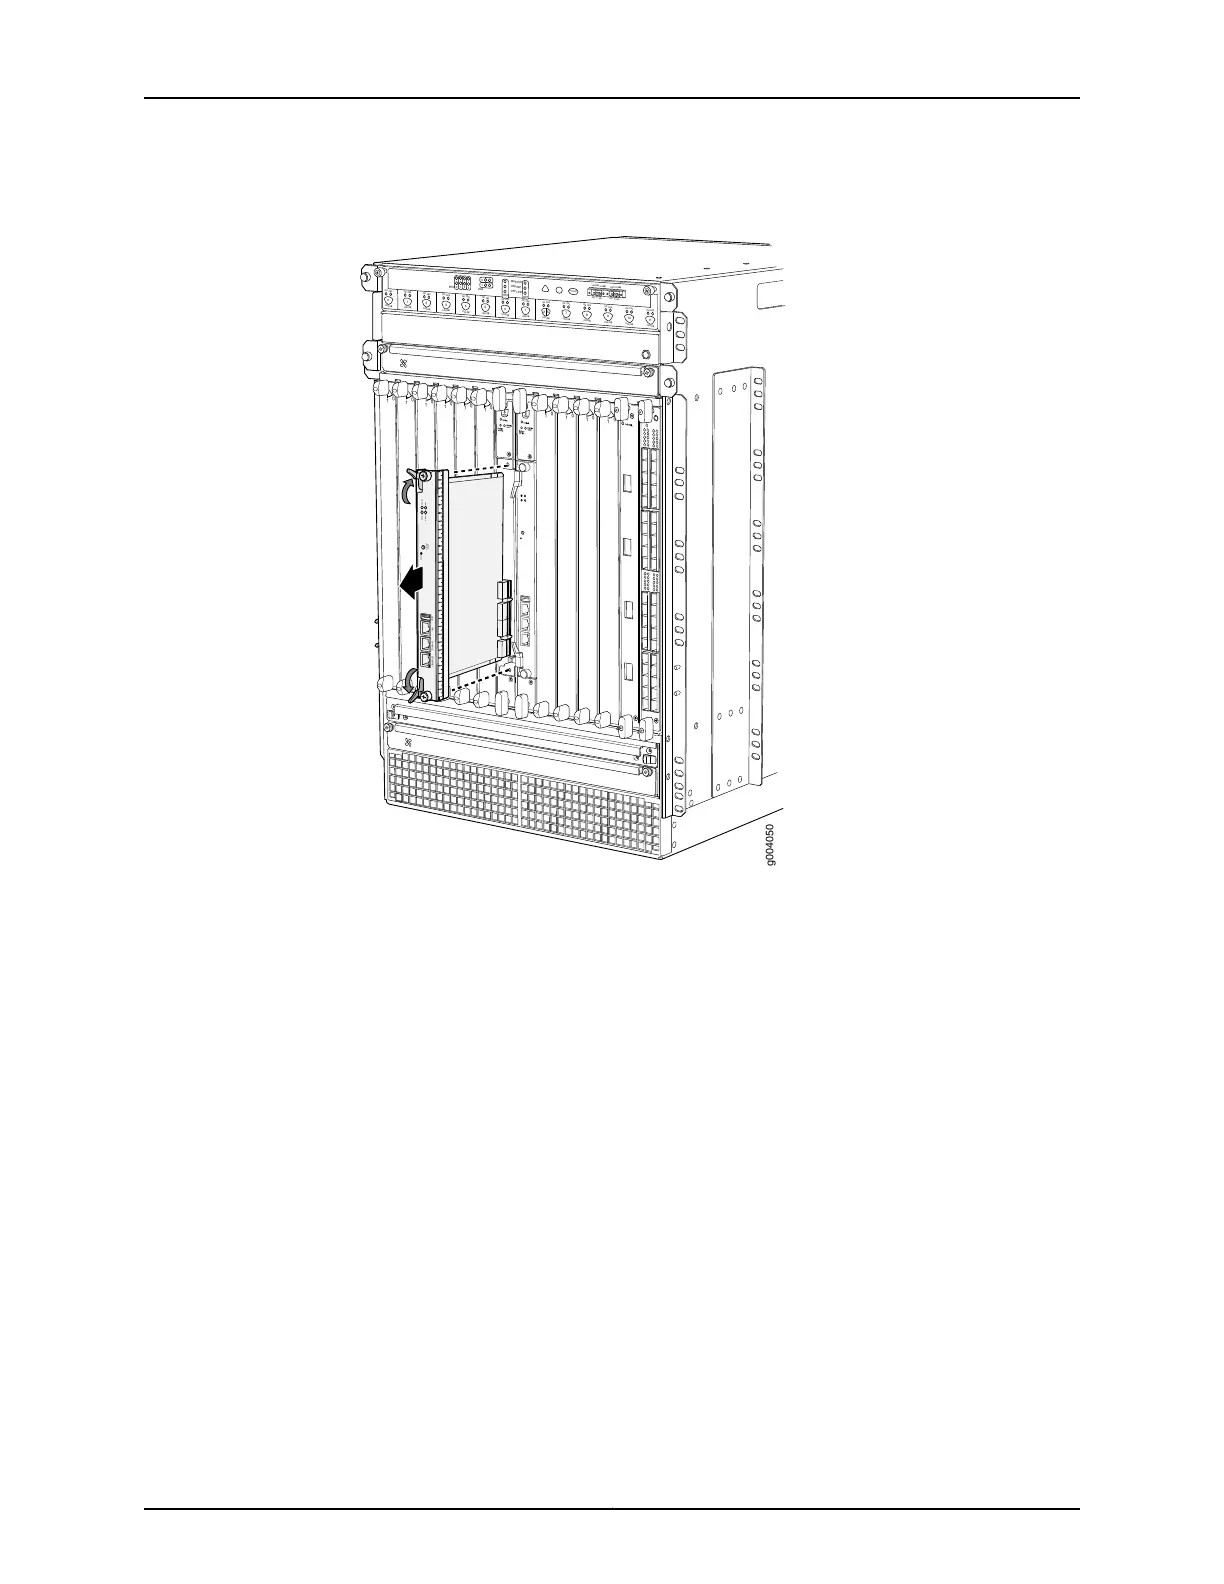
Figure 123: Removing a Routing Engine
OK
0
F
AIL
ONLINE
OK
1
F
AIL
ONLINE
OK
2
F
AIL
ONLINE
OK
3
F
AIL
ONLINE
OK
4
F
AIL
ONLINE
OK
5
F
AIL
ONLINE
OK
0
F
AIL
ONLINE
MASTER
ONLINE
OFFLINE
RE0
F
AN
PEM
1
0
0
1
2
3
RE1
OK
1
F
AIL
ONLINE
OK
7
F
AIL
ONLINE
OK
8
F
AIL
ONLINE
OK
9
F
AIL
ONLINE
OK
10
F
AIL
ONLINE
OK
1
1
F
AIL
ONLINE
OK
2
6
F
AIL
ONLINE
ACO/L
T
YELLO
W ALARM
RED ALARM
NC
NO
C
NC
NO
C
1
0
1
0
1
0
1
0
1
0
1
1
0
0
1
0
1
0
1
0
g004050
CONSOLEAUXUSB
RESET
ONLINE/
OFFLINE
HDD
OK/F
AIL
ONLINE
MASTER
ETHERNET
See Also Replacing Connections to MX480 Routing Engine Interface Ports on page 311•
• Effect of Taking the MX480 Host Subsystem Offline
• Preventing Electrostatic Discharge Damage to an MX480 Router on page 484
• Installing an MX480 Routing Engine on page 254
Installing an MX480 Routing Engine
To install a Routing Engine into an SCB (see Figure 94 on page 255):
1. Attach an ESD grounding strap to your bare wrist and connect the strap to one of the
ESD points on the chassis.
2. Ensure that the ejector handles are not in the locked position. If necessary, flip the
ejector handles outward.
3. Place one hand underneath the Routing Engine to support it.
303Copyright © 2017, Juniper Networks, Inc.
Chapter 24: Replacing Host Subsystem Components