When the DPC is out of the chassis, do not hold it by the ejector handles,
bus bars, or edge connectors. They cannot support its weight.
Do not stack DPCs on top of one another after removal. Place each one
individually in an electrostatic bag or on its own antistatic mat on a flat,
stable surface.
11. If you are not reinstalling a DPC into the emptied DPC slot within a short time, install
a blank DPC panel over the slot to maintain proper airflow in the DPC card cage.
CAUTION: Afterremovinga DPC from the chassis,wait at least 30 seconds
before reinserting it, removing a DPC from a different slot, or inserting a
DPC into a different slot.
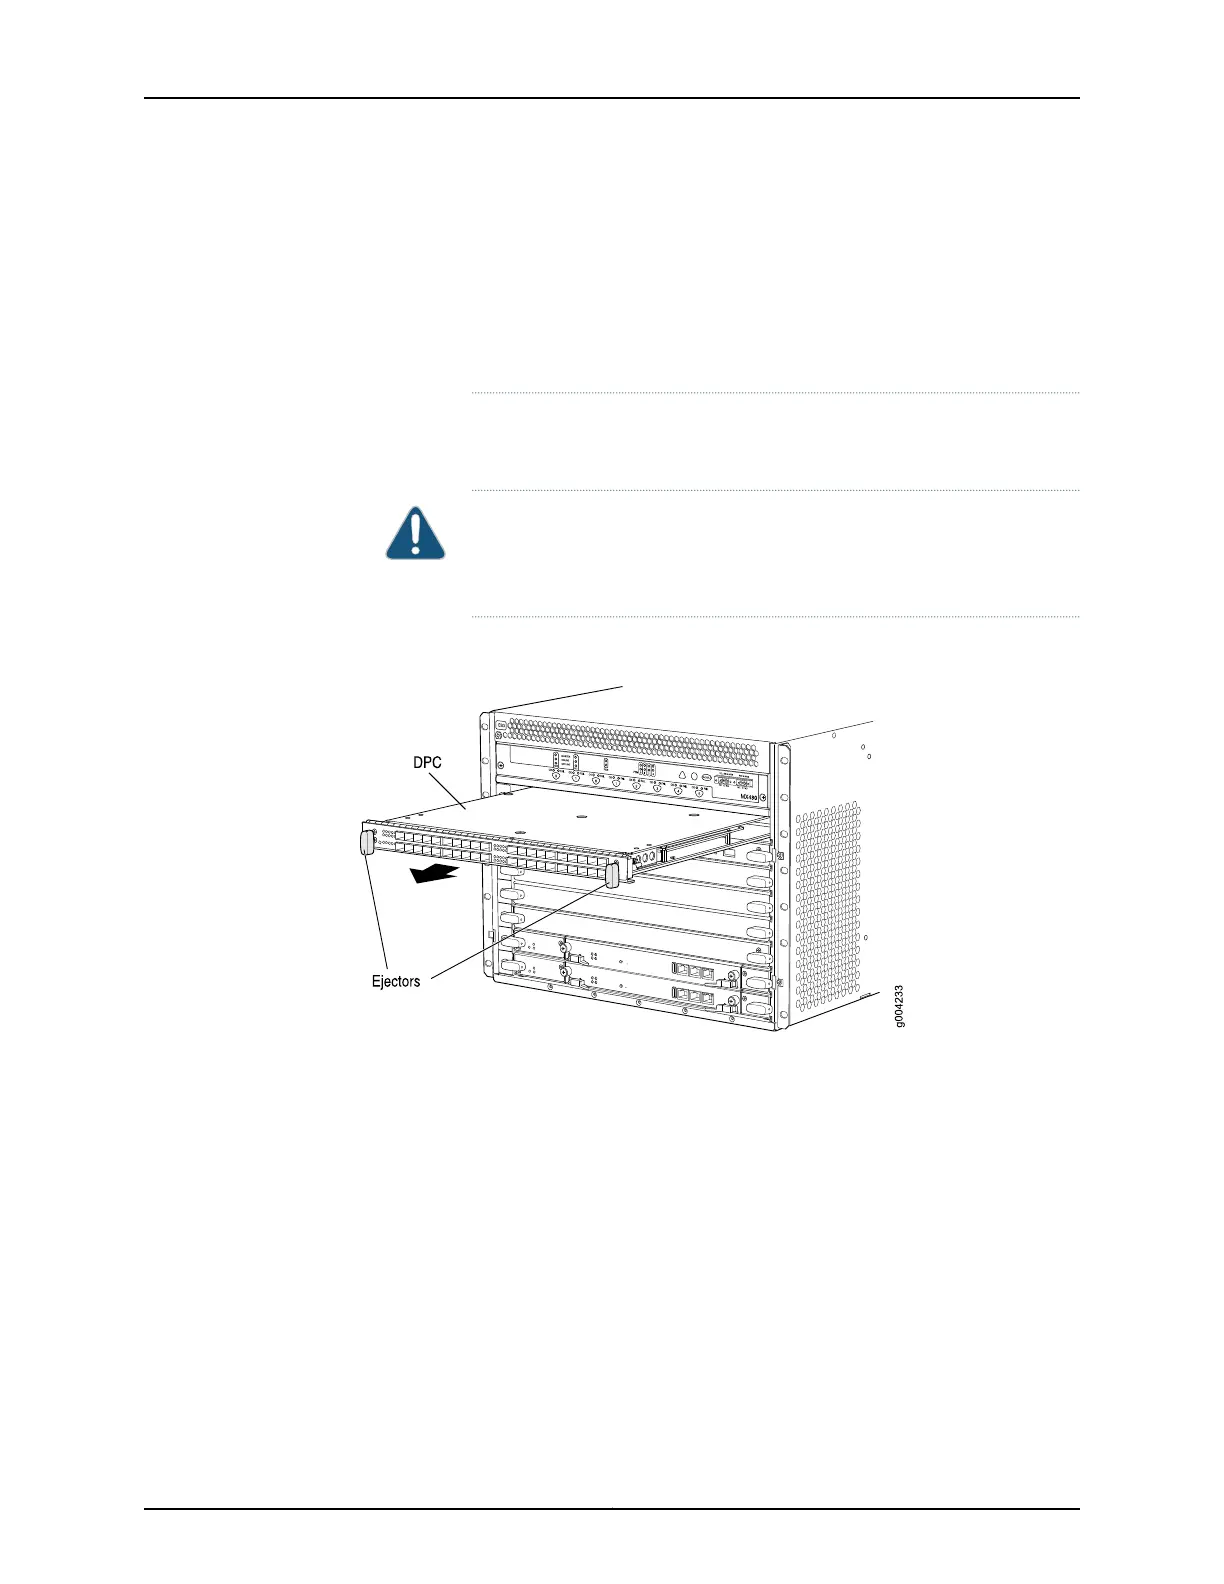
Figure 138: Removing a DPC
See Also Installing an MX480 DPC on page 256•
• Preventing Electrostatic Discharge Damage to an MX480 Router on page 484
Installing an MX480 DPC
A DPC weighs up to 14.5 lb (6.6 kg). Be prepared to accept its full weight.
To install a DPC (see Figure 95 on page 258):
1. Attach an ESD grounding strap to your bare wrist and connect the strap to one of the
ESD points on the chassis.
2. Place the DPC on an antistatic mat, or remove it from its electrostatic bag.
325Copyright © 2017, Juniper Networks, Inc.
Chapter 25: Replacing Line Card Components