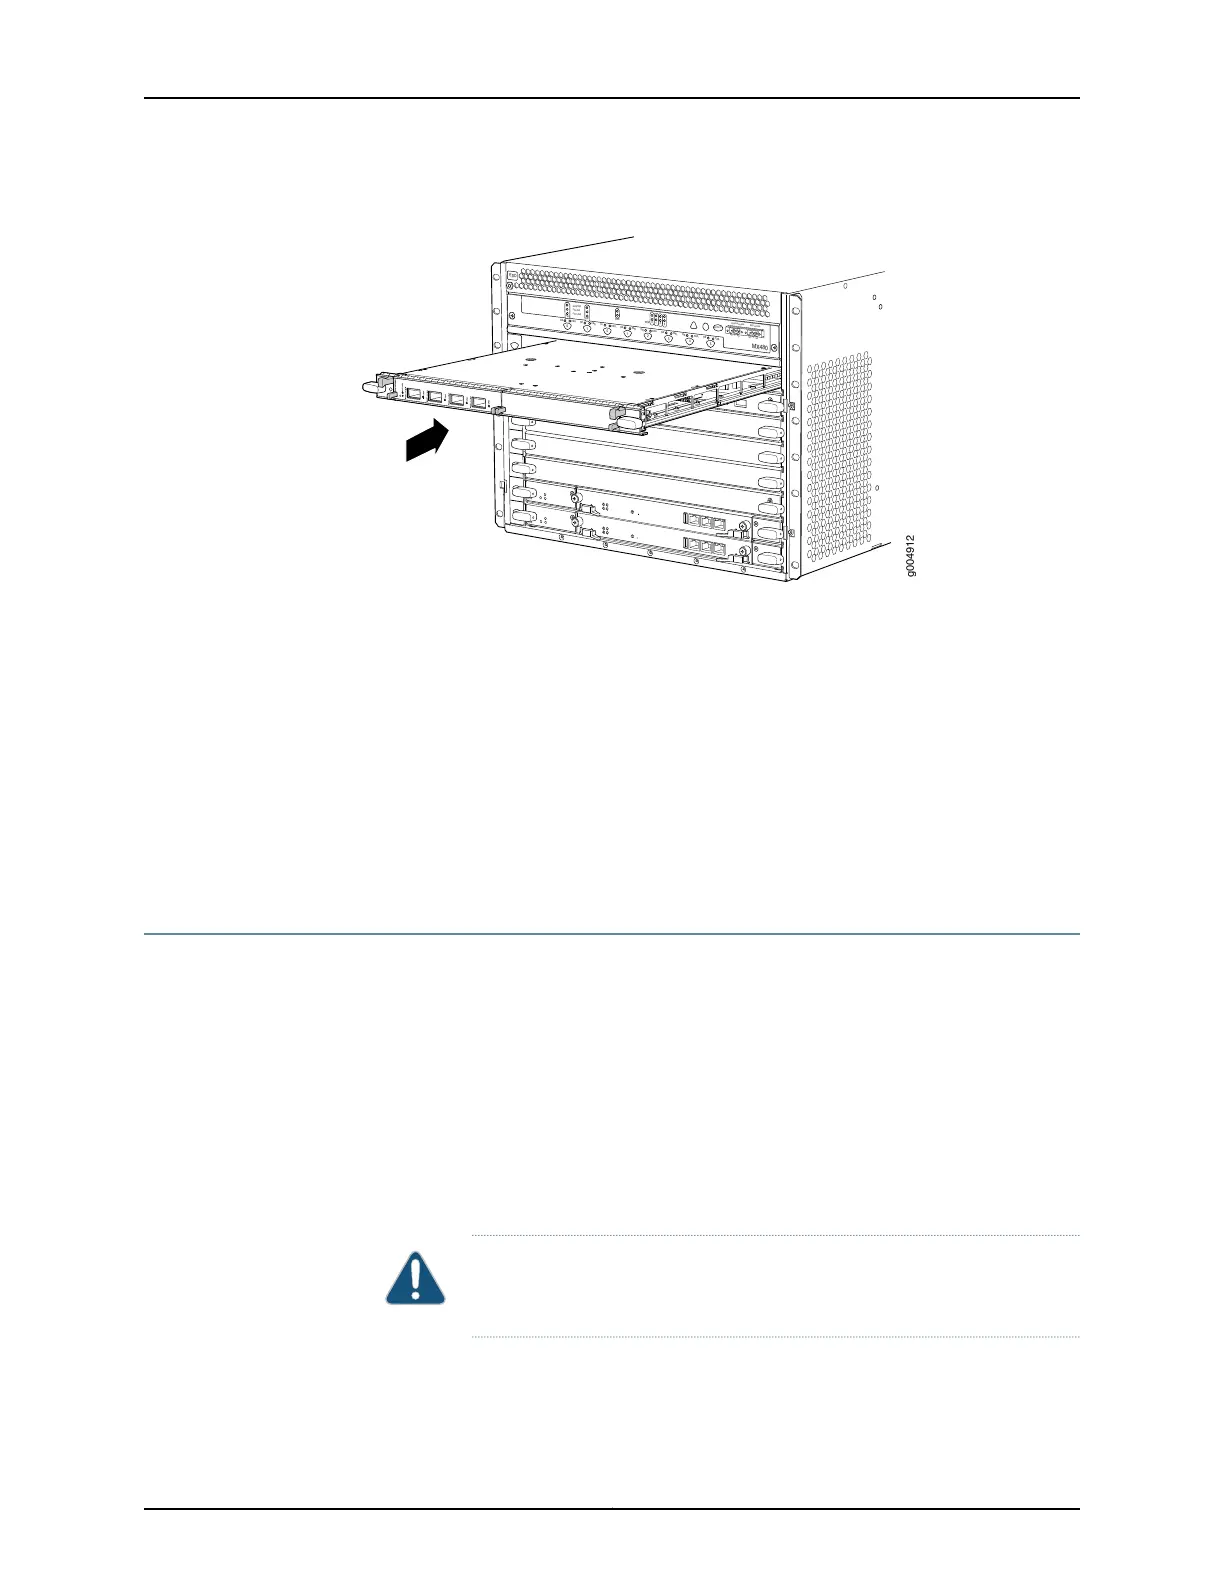
Figure 102: Installing an MPC
OK
MASTER
FAN
ONLINE
OFFLINE
0
1
1
0
FAIL
FAIL
PEM
FAIL
FAIL
FAIL
FAIL
FAIL
FAIL
ESD
OK
OK
OK
OK
OK
OK
OK
2
3
4
5
ACO/LT
YELLOW ALARM
RED ALARM
NC
NO
C
NC
NO
C
MX480
REO
RE1
0
1
2
3
SCB
SCB
g004912
Related
Documentation
MX480 Modular Port Concentrator (MPC) Description on page 87•
• Maintaining MX480 MPCs on page 431
• Tools and Parts Required to Replace MX480 Hardware Components on page 248
• Removing an MX480 MPC on page 345
• Installing an MX480 MIC on page 264
• Preventing Electrostatic Discharge Damage to an MX480 Router on page 484
• MX480 MPC Serial Number Label on page 467
Installing an MX480 PIC
To install a PIC (see Figure 103 on page 273):
1. Attach an ESD grounding strap to your bare wrist and connect the strap to one of the
ESD points on the chassis.
2. If the PIC uses fiber-optic cable, verify that a rubber safety cap is over each transceiver
on the faceplate. Install a cap if necessary.
3. Align the notches in the connector at the rear of the PIC with the notches in the PIC
slot in the FPC and then slide the PIC in until it lodges firmly in the FPC.
CAUTION: Slide the PIC straight into the slot to avoid damaging the
components on the bottom of the PIC.
271Copyright © 2017, Juniper Networks, Inc.
Chapter 21: Installing Components