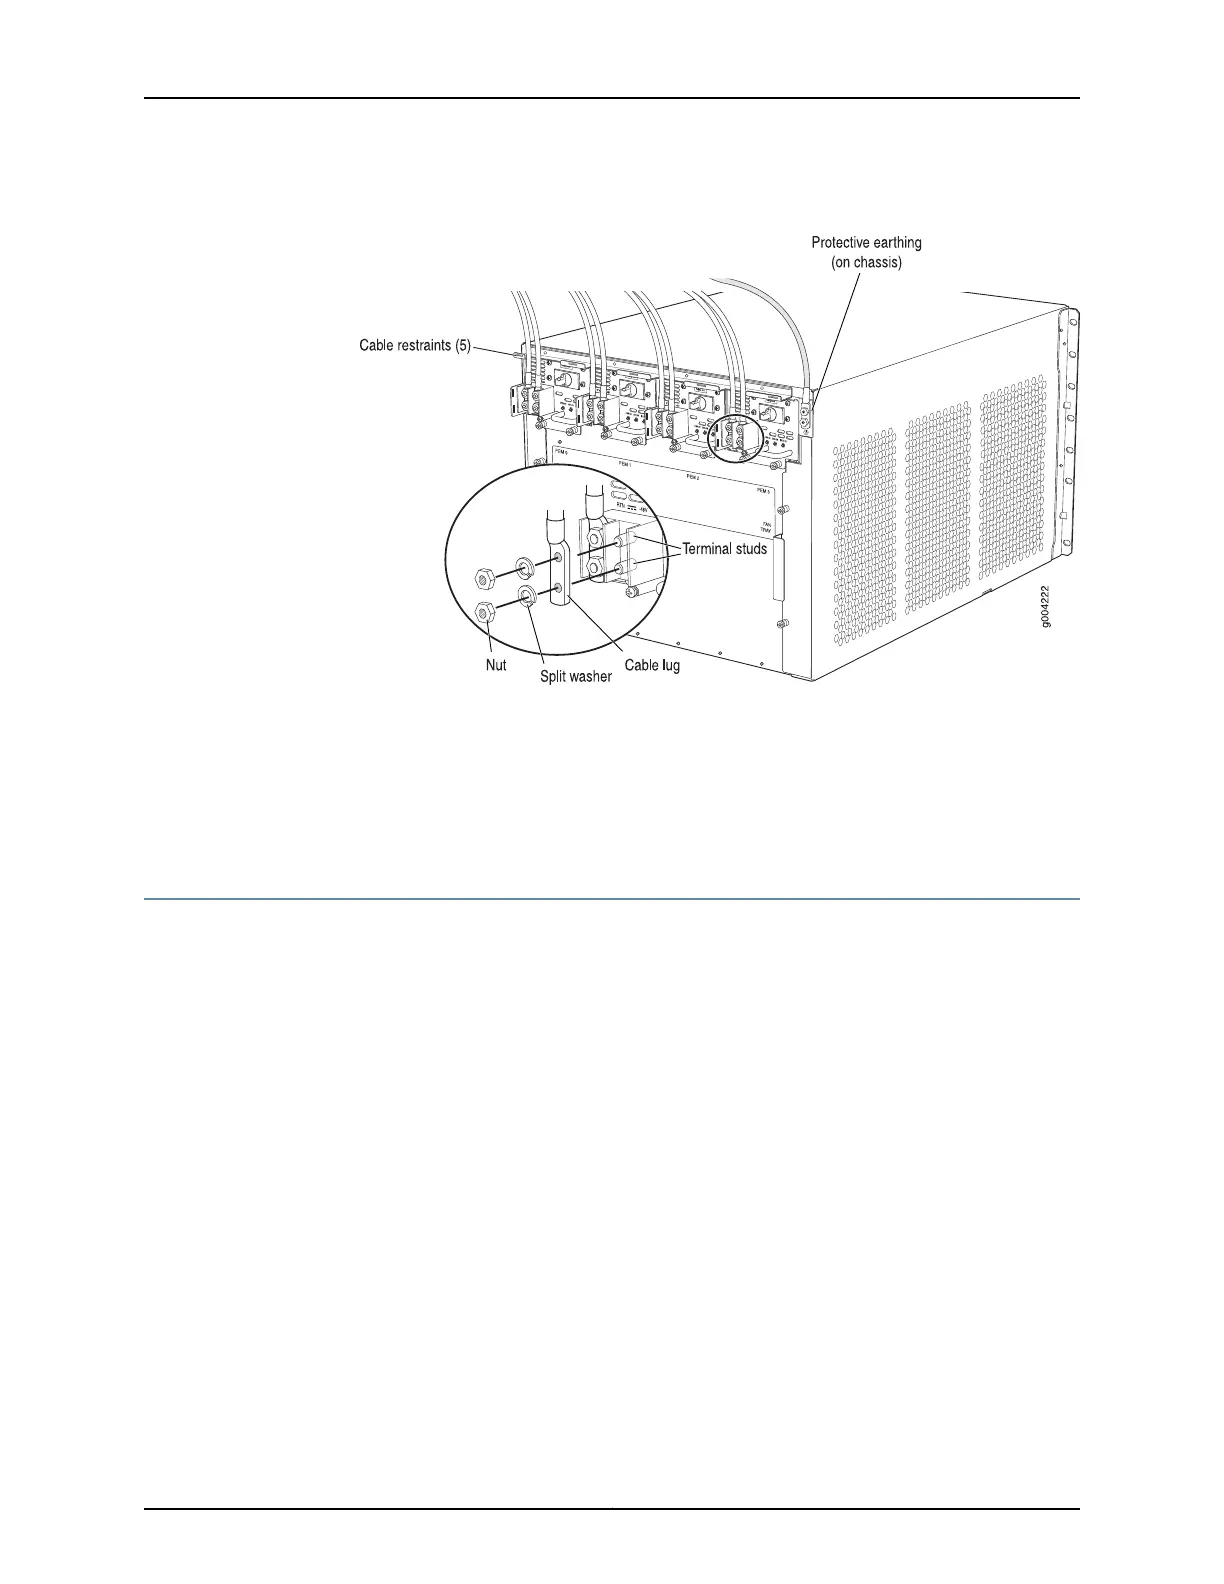
Figure 109: Connecting DC Power to the Router
Related
Documentation
Preventing Electrostatic Discharge Damage to an MX480 Router on page 484•
• Removing an MX480 DC Power Supply on page 370
• MX480 DC Power Supply Description on page 102
Installing an MX480 SCB
To install an SCB (see Figure 110 on page 285):
1. Attach an ESD grounding strap to your bare wrist and connect the strap to one of the
ESD points on the chassis.
2. Carefully align the sides of the SCB with the guides inside the chassis.
3. Slide the SCB into the chassis until you feel resistance, carefully ensuring that it is
correctly aligned.
4. Grasp both ejector handles, and rotate them simultaneously clockwise until the SCB
is fully seated.
5. Place the ejector handles in the proper position, vertically and toward the center of
the board.
6. Check the LEDs on the SCB faceplate to verify that it is functioning normally.
283Copyright © 2017, Juniper Networks, Inc.
Chapter 21: Installing Components