Replacing the MX480 Cable Management Brackets
To remove the cable management brackets (see Figure 115 on page 291):
1. Attach an ESD grounding strap to your bare wrist and connect the strap to one of the
ESD points on the chassis.
2. Loosen the captive screws on either side of the chassis.
3. Remove the cable management brackets.
To install the cable management brackets (see Figure 115 on page 291):
1. Attach an ESD grounding strap to your bare wrist and connect the strap to one of the
ESD points on the chassis.
2. Position the on the front sides of the chassis.
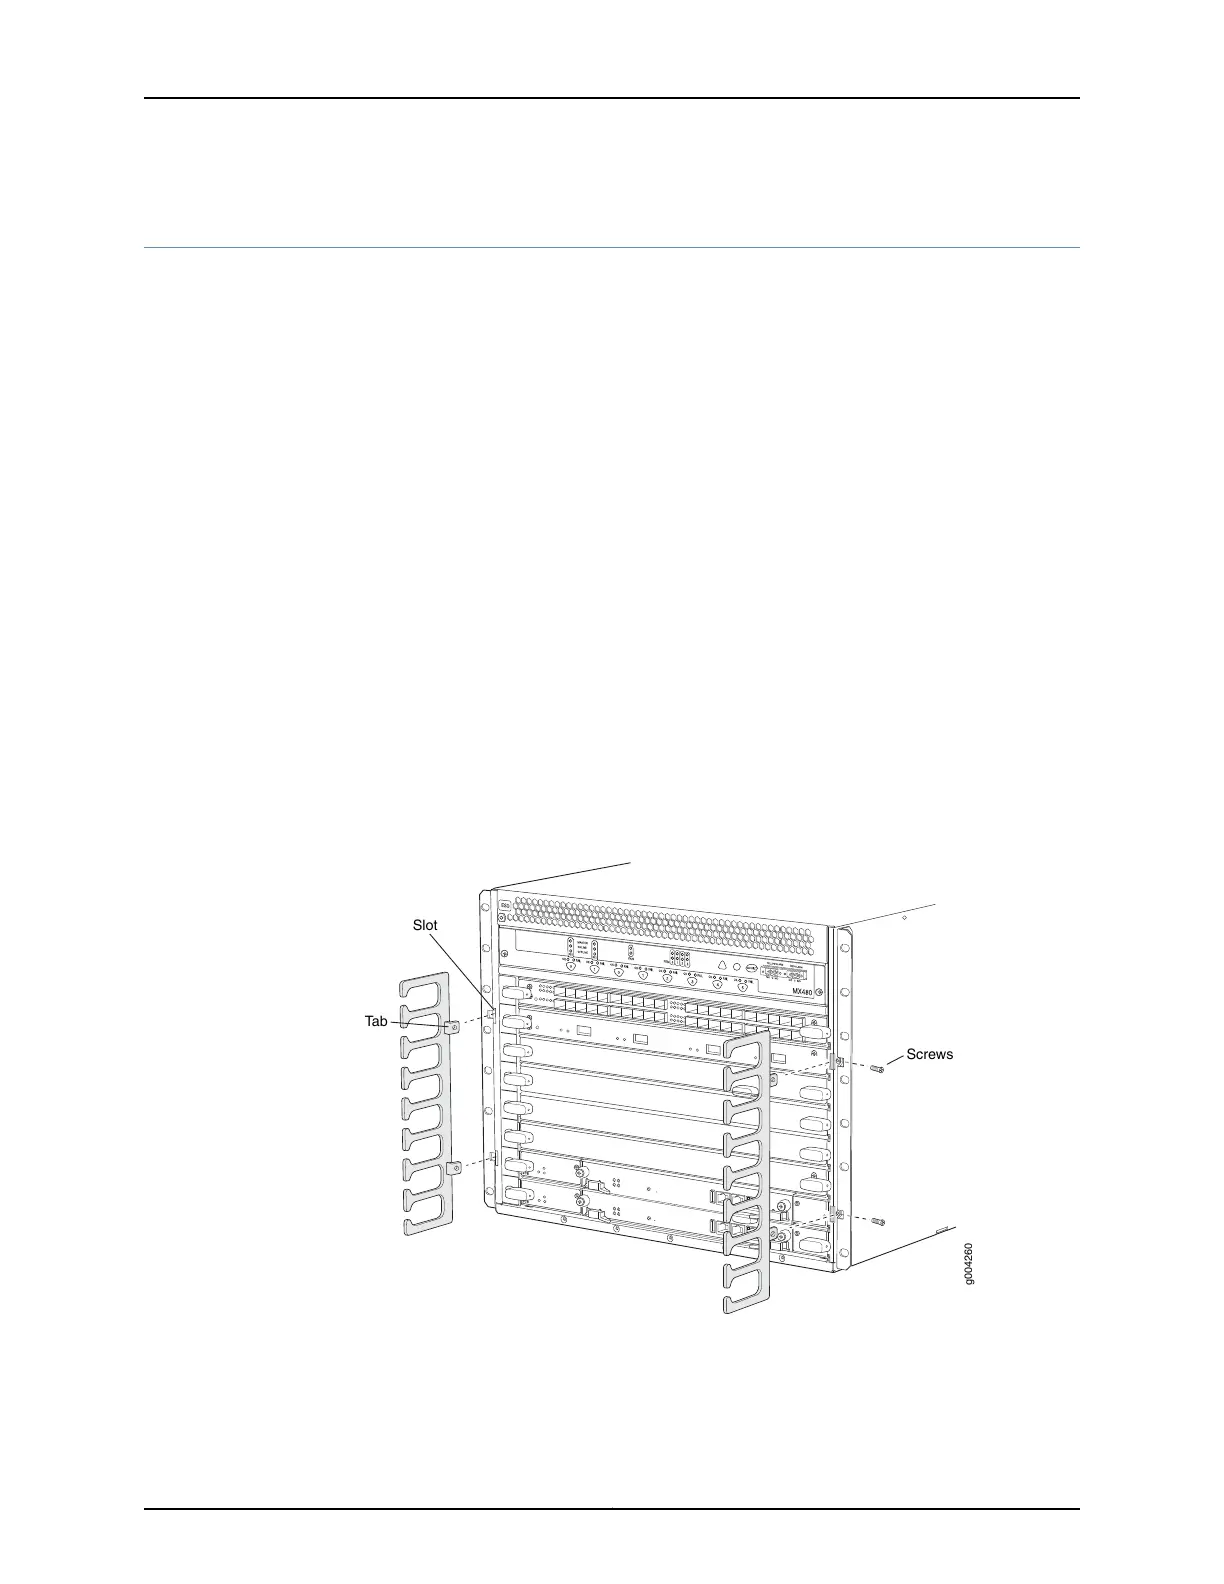
3. Insert the tabs into the slots.
4. Tighten the screws completely.
Figure 115: Removing the Cable Management Brackets
Related
Documentation
Preventing Electrostatic Discharge Damage to an MX480 Router on page 484•
• MX480 Cable Management Brackets on page 19
291Copyright © 2017, Juniper Networks, Inc.
Chapter 22: Replacing Chassis Components