SECTION 05: COOLING SYSTEM
DOB 1300-1556 | X3-45 Commuter PA-1648 Maintenance Manual First release Oct 2020
9. Also remove the CAC lateral support (3 hex
bolts Figure 49).
FIGURE 49: CAC LATERAL SUPPORT BOLTS
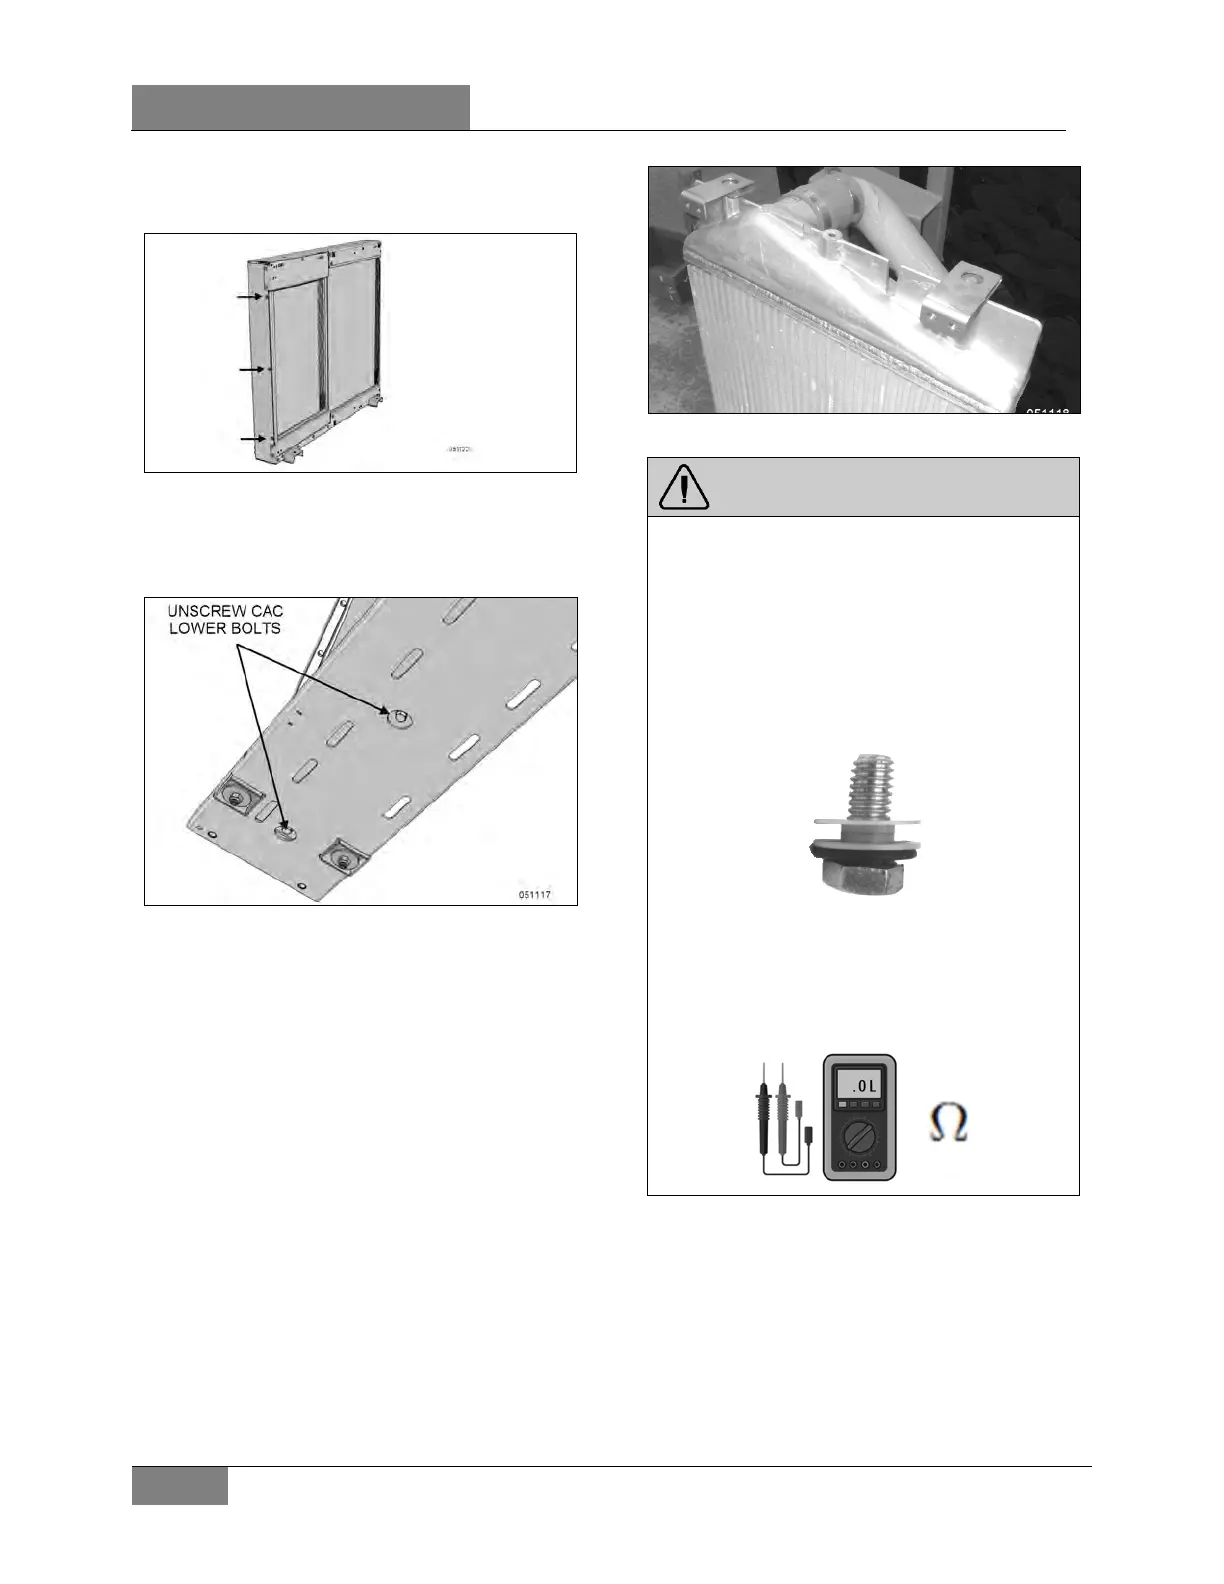
10. From under the vehicle, unscrew the CAC
from the lower support (two hex bolts with
plastic insulating bushings Figure 50).
FIGURE 50: LOWER CAC INSULATED BOLTS
11. Remove CAC (and two upper brackets) from
the vehicle.
12. If a new CAC is to be installed, transfer the
upper CAC pipe and upper brackets to the
new unit. Torque upper brackets with plastic
bushings & washers to specified torque
(Figure 51). Also reinstall the lower CAC
pipe if it was previously removed with the
CAC unit.
TORQUE: 9 lb-ft (12 Nm)
FIGURE 51: CAC UPPER BRACKETS & PIPE
WARNING
To prevent galvanic corrosion, the CAC upper
brackets need to be electrically insulated from
the CAC body.
When reinstalling brackets, make sure the
plastic insulating bushings (two per bracket) &
washers (one per bracket) are present and in
good condition (replace as necessary).
After installation, check for proper insulation
(lack of conductivity) between brackets and
CAC body with a suitable ohmmeter or
continuity tester (buzzer).
13. In preparation for reinstallation of the CAC,
install the inner insulating bushings in their
location (lower support).
 Loading...


