4B-10 REAR DRIVE SHAFT
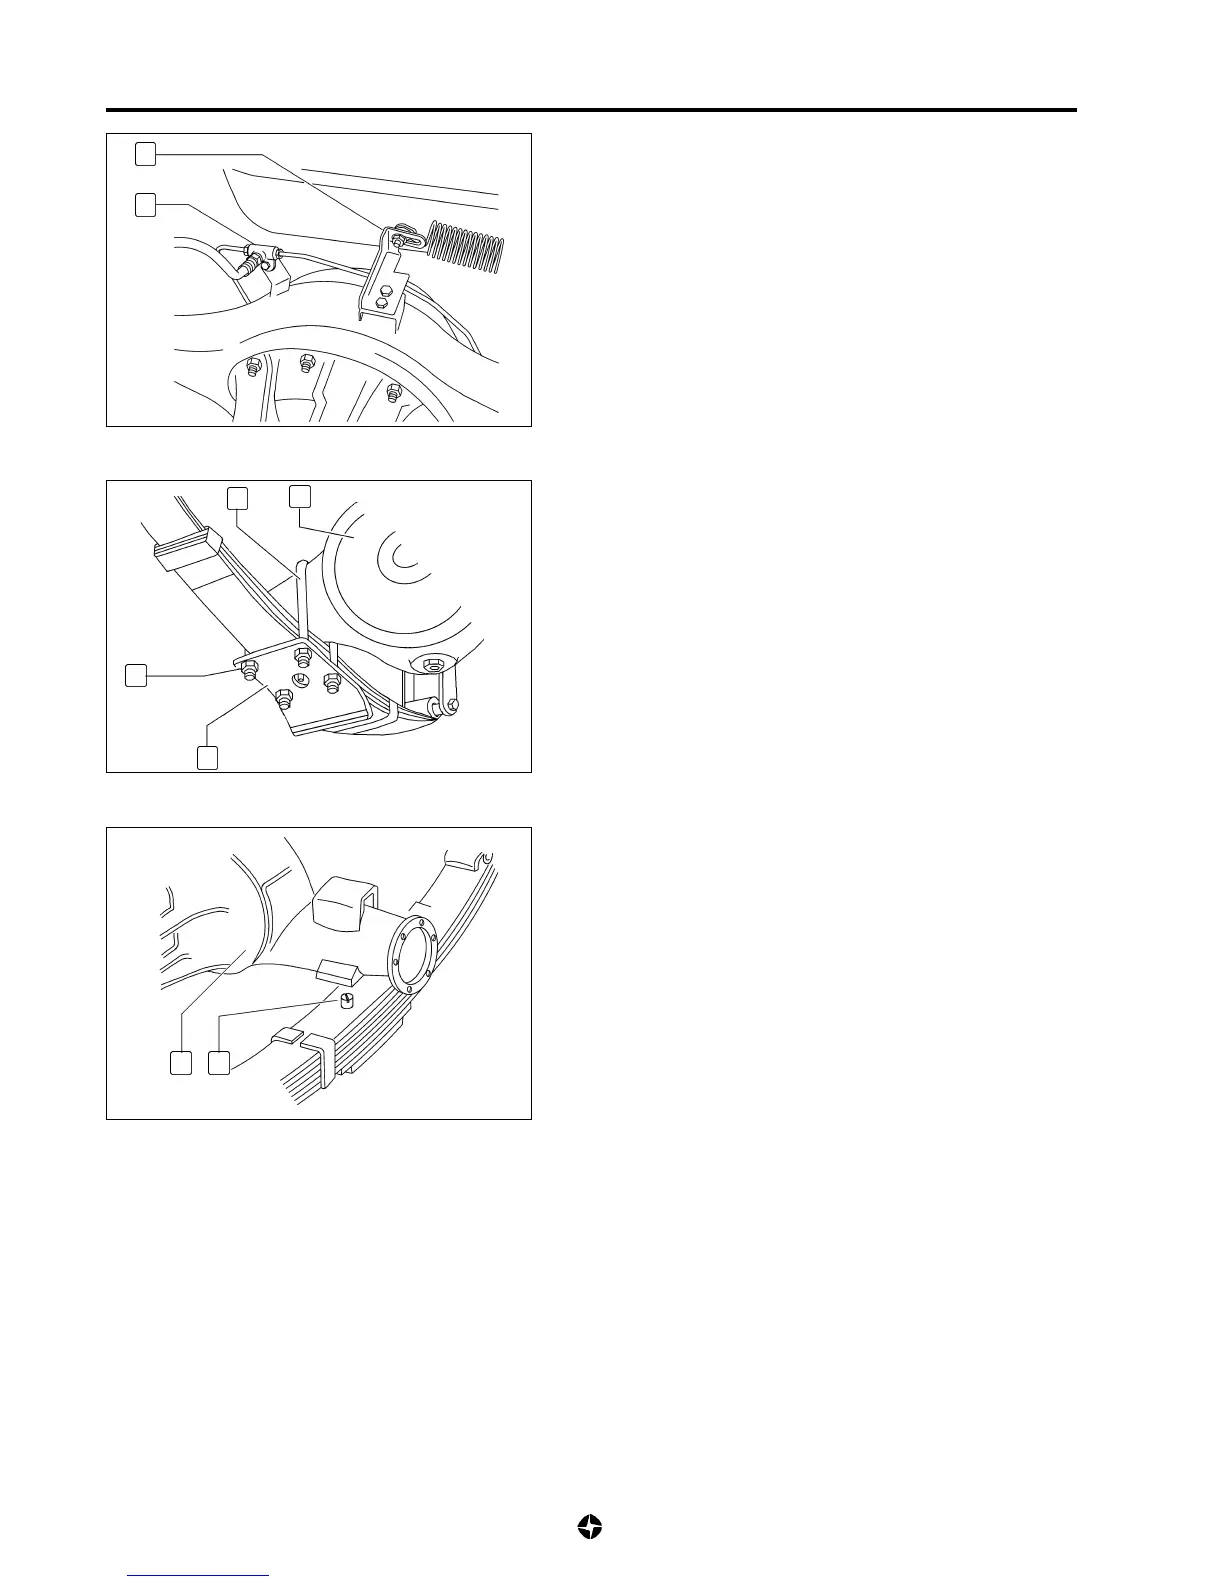
8
7
Installation
NOTE:
Install new self braking nuts and new Grower type
washers.
1) Install the new housing (9), align spring top (13) with its
lodging in housing, and install U-bolt, lower plates and fixing
nuts tightened to the specified tightening torque.
Tightening torque for nuts of the braces:
7 Kg-m (70 Nm)
2) Continue installation reversie removal procedures noting to
the following steps:
• Clean and wipe out sealant residues from the coupling
surfaces of the differential group, driving flange, hub, flange,
clamp and flange support of the flange housing for spindle;
apply while install a layer of recommended sealant.
• Apply specified tightening torques and those indicated in
the complementary tasks.
12
9
11
8) Disconnect "T" connection (8) and support (7) used for the
connection of the compensating braking spring and push
apart adequately all the disconnected pieces.
9) Remove hub, flange, and brake caliper support and protection
hubs of both wheels.
NOTE:
For removing, installation and hub adjustment, proceed
as for the front hub (see 4A-13).
10) Remove nuts (11); remove U-bolt (10) and plates (12).
11) Withdraw axle housing (9).
10
9
13

 Loading...