5.3 Basic Wiring Diagrams
This section provides the basic wiring diagrams. Refer to the reference sections given in
the diagrams for details.
SERVOPACK
EDM1+
EDM1-
FG
Frame ground
TH
5
/HWBB1+
/HWBB1-
/HWBB2+
/HWBB2-
24 V
0 V
6
3
4
5
8
7
*1
*1
CN1
CN8
1
2
5
6
ENC
PS
/PS
PG5V
PG0V
2
4
1
3
CN5
L1
U
V
W
M
B2
B3
L2
L1C
L3
L2C
1
2
B1/
2KM
1KM
1QF
R
S T
1FLT
3SA
1PL
1KM
2KM
1SA
2SA
1KM
1Ry
1KM
1Ry
CN2
/SO1+ (/BK+)
/SO1- (/BK-)
/SO2+
/SO2-
/SO3+
ALM+
ALM-
1
2
23
24
3
4
+24VIN
+24 V
4.7 kW
6
8
10
9
11
12
/SI0
/SI1 (P-OT)
/SI2 (N-OT)
BAT(+)
BAT (-)
13
14
15
7
/SO3-
General-purpose sequence input 1
(Forward Drive Prohibit input: OFF to prohibit drive)
Sequence input signal
power supply input
Battery for absolute
encoder
2.8 V to 4.5 V
General-purpose sequence input 0
General-purpose sequence input 2
(Reverse Drive Prohibit input: OFF to prohibit drive)
General-purpose sequence output 1
(Brake output: ON to release brake)
General-purpose sequence
output 2
General-purpose sequence
output 3
25
26
16
SG
*1
*3
PBO
PCO
/PBO
PAO
/PAO
/PCO
21
17
18
19
20
22
*5
*5
*5
Overheat protection input
Signal ground
Connect shield to connector shell.
Connector shell
Ground to
a resistance
of 100 W
or less.
Switch
Fuse
Safety
*4
Analog Monitors
(For servo alarm
display)
Servo power
ON
Servo power
OFF
Main circuit
terminals
Motor
terminals
Servo Alarm Output
(OFF for alarm)
Encoder Divided
Pulse Output,
Phase A
Encoder Divided
Pulse Output,
Phase B
Encoder Divided
Pulse Output,
Phase C
*2
/SI3 (/DEC)
/SI4 (/EXT1)
/SI5 (/EXT2)
/SI6
General-purpose sequence input 4
(Probe 1 Latch Input: latch when ON)
General-purpose sequence input 3
(Home Switch Input: homing when ON)
General-purpose sequence input 5
(Probe 2 Latch Input: latch when ON)
General-purpose sequence input 6
+
-
Fig. 47: Basic Wiring Diagram
*1. represents twisted-pair wires.
*2. Connect these when using an absolute encoder. If the Encoder Cable with a Battery
Case is connected, do not connect a backup battery.
*3. The 24-VDC power supply is not provided by YASKAWA. Use a 24-VDC power supply
with double insulation or reinforced insulation.
*4. Refer to the following chapter if you use a safety function device.
Ä
Chap. 12 ‘Safety Functions’ page 466
If you do not use the safety function, insert the Safety Jumper Connector (provided as an
accessory) into CN8 when you use the SERVOPACK.
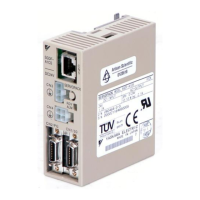
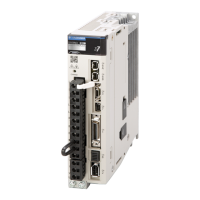
Sigma-7 Series SERVOPACKs
Wiring and Connecting SERVOPACKs
Basic Wiring Diagrams
| | PROFINET Communications - SIEP YEUOC7P 02A Revision 0 | en | 91
 Loading...