Matrix ETERNITY NE System Manual 325
To configure another SIP Trunk, click the respective SIP Trunk number (name) tab.
To save the settings, click Submit.
To assign default values to all the parameters of the SIP Trunk, click Default.
To copy the same SIP Trunk parameter values to the another SIP Trunks, use Copy.
If you have assigned names to the SIP Trunks on the “Trunks” page, it will appear on the tabs. For example, if you
have named SIP 1 as GlobalTalk, SIP 2 as Pulver, these names will appear in place of SIP Trunk1 and SIP Trunk2.
If you want to change the name of the SIP Trunk, you must go back to the “Trunks” page.
Follow the instructions provided below to configure the SIP Trunks.
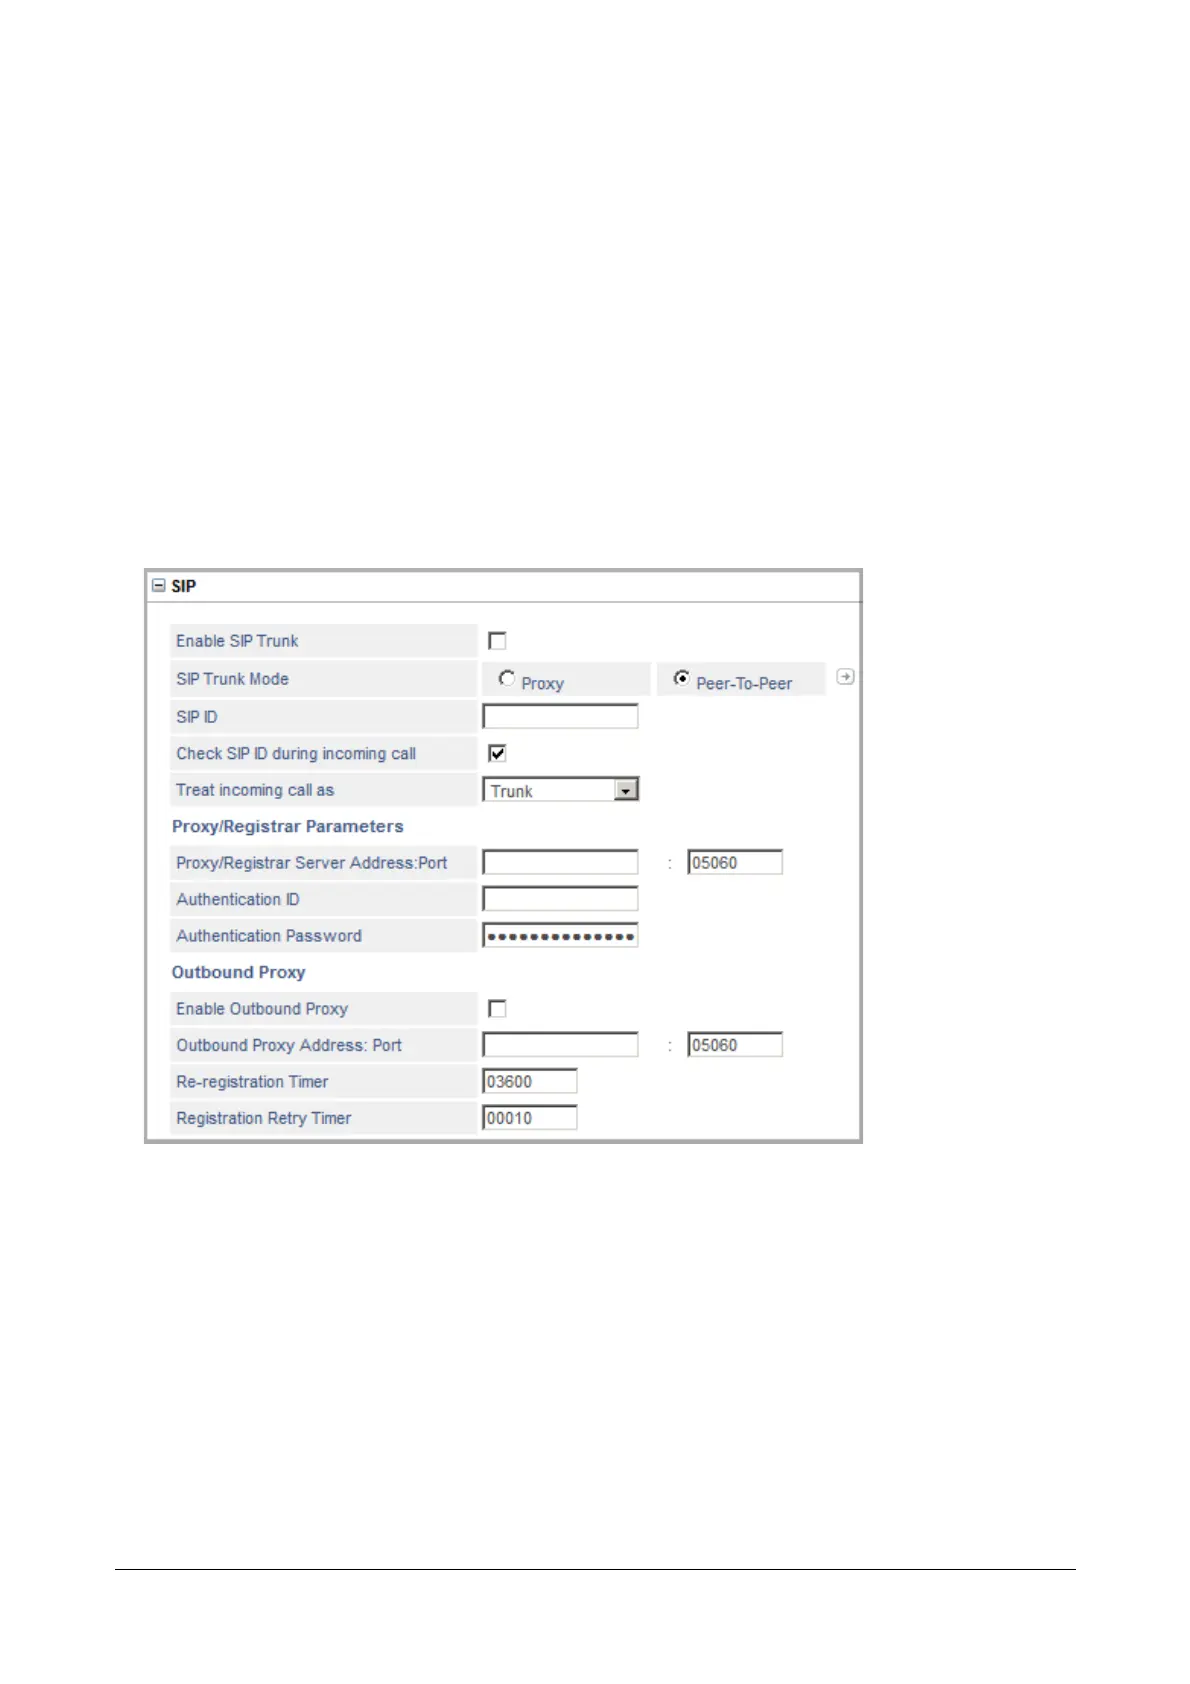
SIP
• Click SIP to expand.
• Select the Enable SIP Trunk check box to activate the SIP Trunk.
• Set the SIP Trunk Mode as Proxy or Peer-to-Peer, according to your requirement.
If you are using the services of an Internet Telephony Service Provider (ITSP), select Proxy to register this
SIP Trunk with the ITSP.
If you are not using the services of an ITSP, select Peer-to-Peer and click Settings icon to configure the
Peer-to-Peer Table. See “Peer-to-Peer Calling” feature for instructions.
• Enter the SIP ID for the trunk.