2. Create a tag to be used as index tag. In this example you create a "RoomNumber" tag that could be of type
UnsignedInt using Variable protocol.
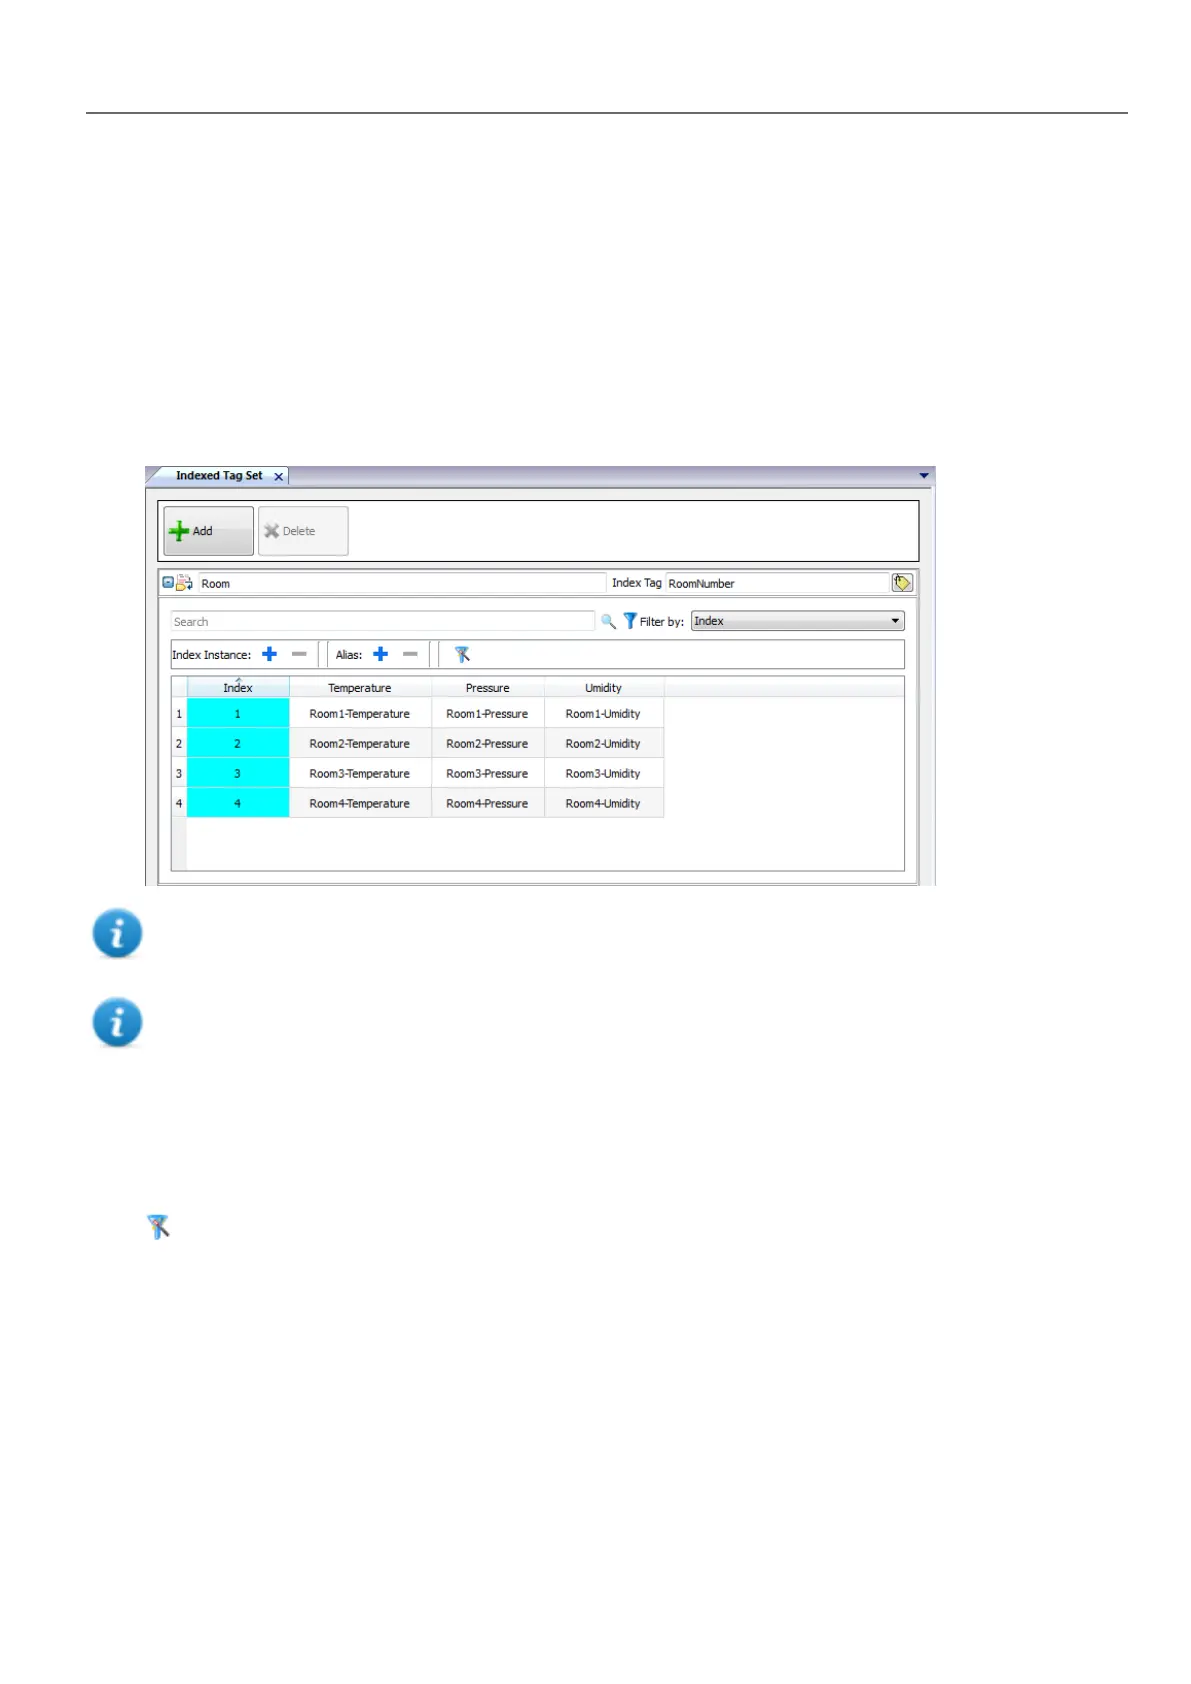
3. From ProjectView, select Config> Tags, double-click Indexed Tag Set: the Indexed Tag Set editor is displayed.
4. Click + to add an Indexed Tag Set. In this example you will call it "Room".
5. Select the tag "RoomNumber" to use as a selector for the room number.
6. Create an Index Instance for each set of data. In this example, one for each room.
7. Create an Alias for each type of data and rename the table columns appropriately. In this example "Temperature",
"Pressure" and "Humidity".
8. Double-click on each cell to associate the correct tag.
Note: The Index Tag datatype can be a number, a string or any type of simple data types.
Note: To reference an array data type use the array index = -1
Autofill function
An Indexed Tag Set table may become very complex and filling it may be an error prone procedure. Enable the Autofill
feature to make sure aliases are entered correctly.
Click to enable the Autofill feature: the Autofill Table is displayed.
HMWIN Studio |User Manual| v206 (2017-06-30) | EN| © 2014-2017 Panasonic Electric Works Europe AG
275
30 Indexed addressing