REAR DRIVE SHAFT 4B-5
Removal of a broken rear shaft
NOTE:
If a rear shaft has to be substituted because of
breaking, it is recommended to change both rear
shafts as, even if the other one looks alright it is qui-
te probable that it became weakened at the same
time the other one broke.
1) Find out in which side is located the broken rear shaft and
proceed to removing it as indicated before for removing a
worn rear shaft.
• If the breaking of the rear shaft took place near the groovings
by the side of the flange, try to extract both pieces without
removing more elements.
• If the breaking of the rear shaft took place near the groovings
by the side of the differential group (close to the planetary
gear), remove the rear shaft piece stuck inside, as follows:
•• Remove the hub and flange assembly according to the
broken rear shaft side (see 4B-8).
3
REAR SHAFTS OR DRIVING FLNAGES
SUSBSITUTION
Removal of a worn rear shaft
NOTE:
If replacement of a worn rear shaft but not broken is
required you should do as follows.
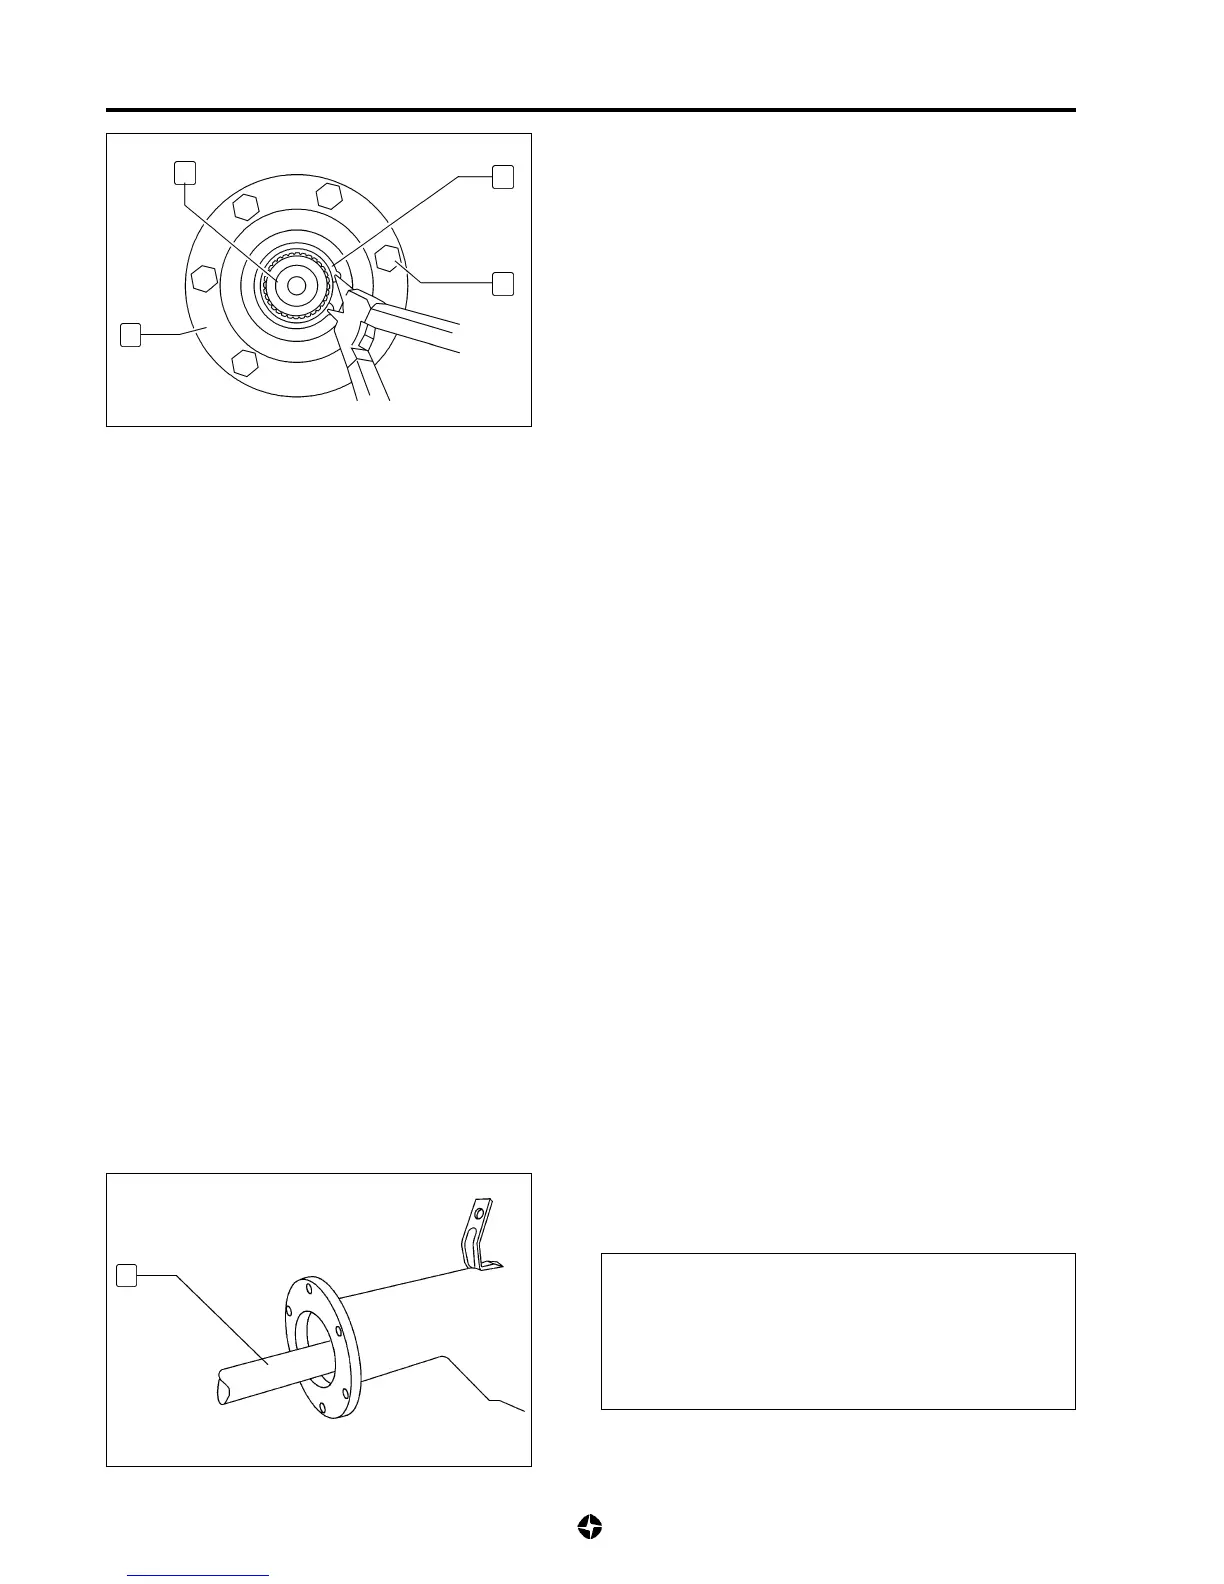
1) Remove flange hub cap.
2) Remove cir-clip (1) which blocks the rear shaft avoiding
getting displaced towards inside.
3) Remove screws (2), withdraw driving flange (3) and remove
rear shaft (4).
2
1
4
•• Remove also the opposite rear shaft and introduce an
appropriate rod through its lodging, to push out the
remaining rear shaft piece (5).
CAUTION:
If the rear shaft broke near the differential group, it
is probable there are metallic particles within the
oil of the group; this means that you should remove
the differential group, washing it thoroughly and
replace the oil (see 4B-3).
5

 Loading...