ENGINE REPAIR 6A-55
14) Remove screws (42) fixing cylinder head (43) and remove
the later with its gasket.
CAUTION:
Plug with appropriated caps air, fuel, oil and water
holes while openings keep appearing during
removal because the entry of alien bodies in the
conductions could seriously damage the component
in question.
42
43
Installation
NOTE:
• Clean thoroughly the contact coupling areas in
cylinder head and cylinders block.
• Check flatness and state of surfaces at the couplings
in the cylinder head and cylinders block (see 6A-93
and 6A-116).
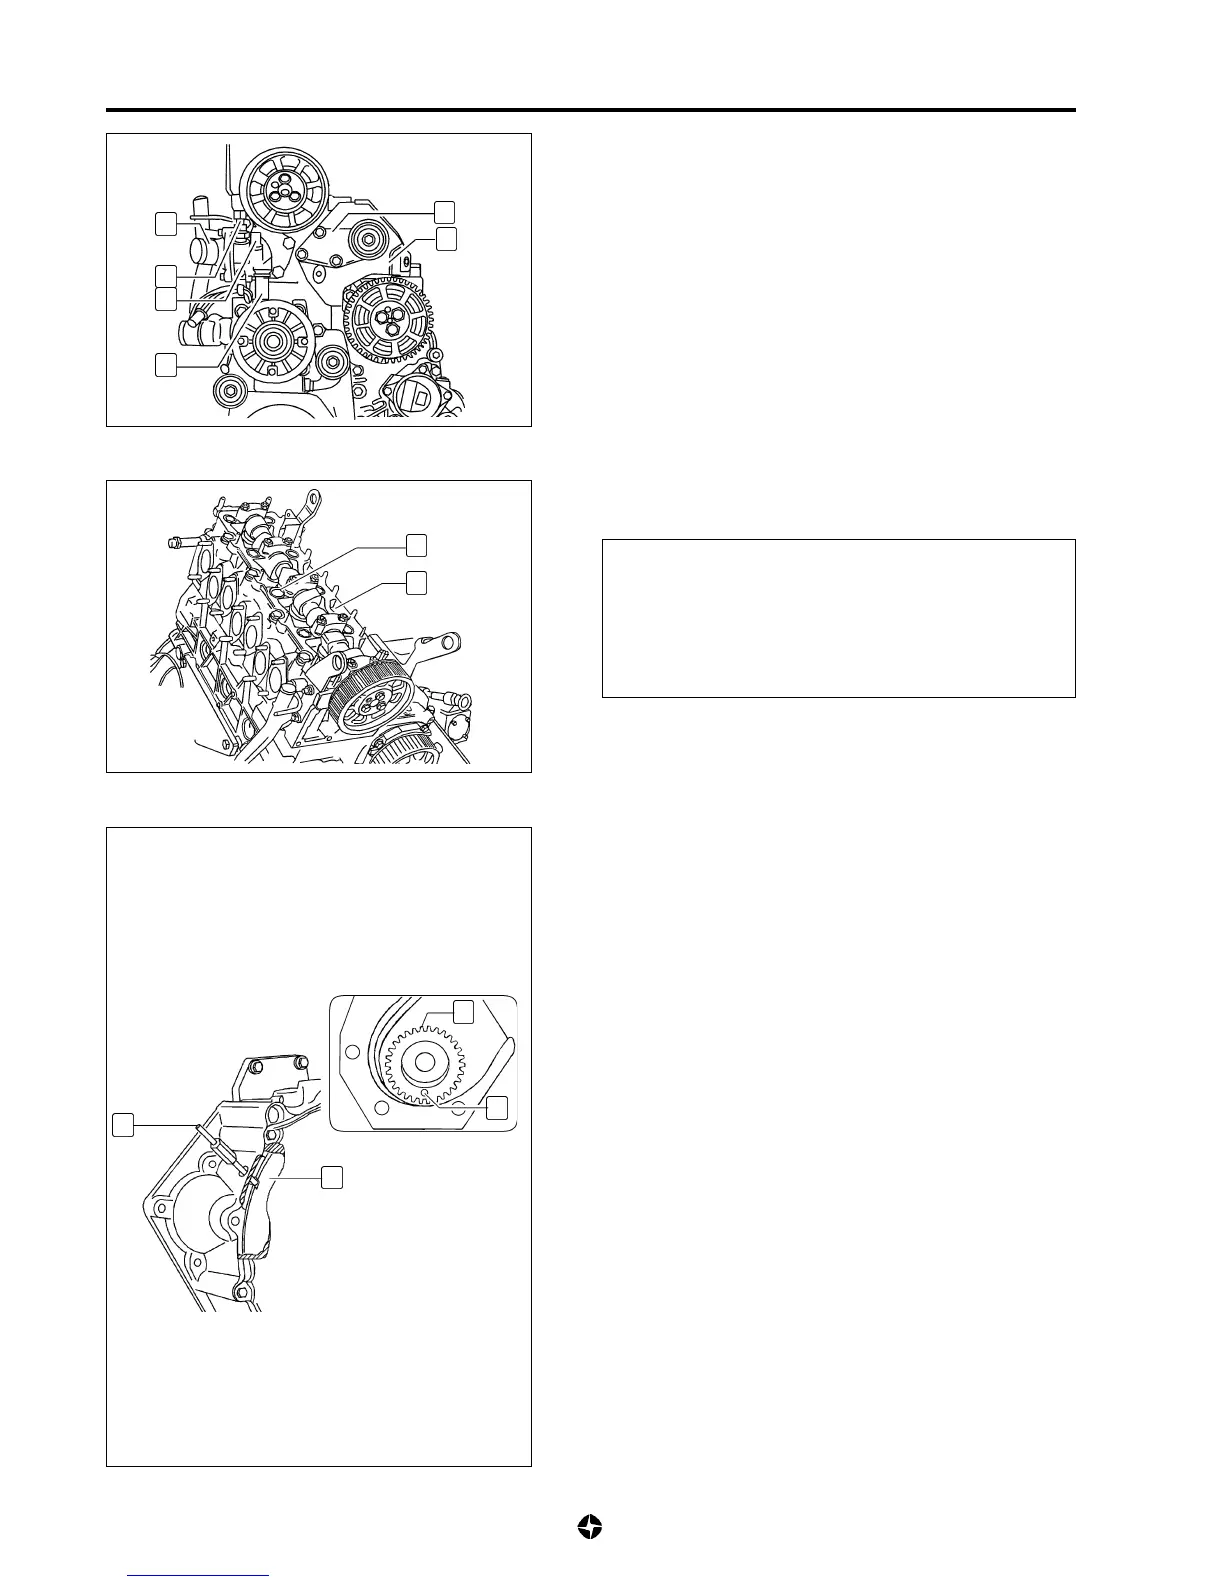
1) Proceed to installation reversing removal, and keeping in
mind the following remarks.
• Verify that piston n° 1 is in T.D.C. of compressure period,
sincronizing position of flywheel (44) with tool (C) ref. 790965,
as shown, and hole (48) of crankshaft driving pinion (47)
looking downwards.
• Verify that faces of coupling contact of cylinder head and
cylinders block are clean.
• Select appropriated thickness of cylinder head gasket (see
6A-133 "Protruding of pistons control and estimate of
cylinder head gasket thickness").
48
47
C
44
12) Remove support of fixed belt tensor (40) and protection (41)
located underneath .
13) Remove thermostate box (36) with thermistors (37) and
(38) and tube (39) connecting with water pump.
36
37
38
39
40
41

 Loading...