7E- 10 DIFFERENTIALS
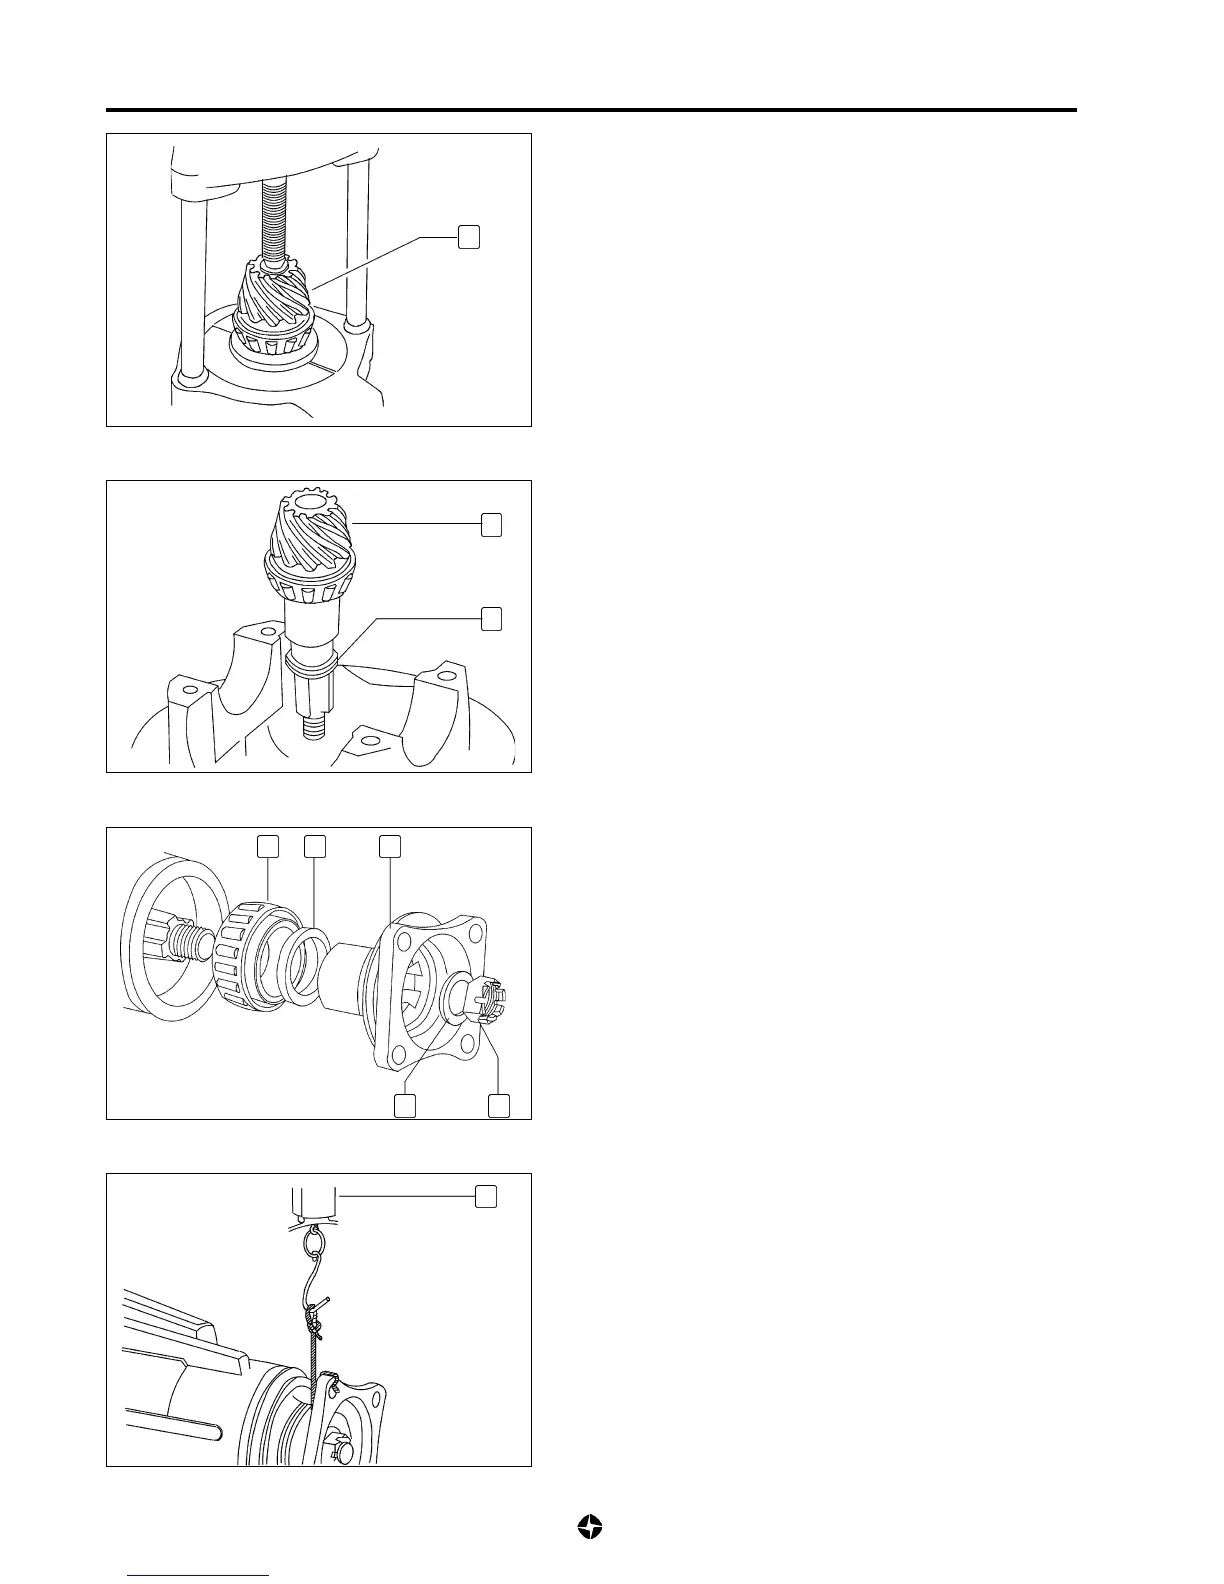
4) Assemble head roller (16) of pinion , using a press and
appropriate tools.
5) Place the ensemble engaging pinion (10) and its roller,
over the sump, placing in between the adjusting washers
(11).
NOTE:
Total thickness of adjusting washers (11) must be,
initially the same as the one dismantled. If this thickness
was lost, assemble initially a thickness of no less than
4.06 mm.
6) Assemble:
• Rear rolling element (9).
• Bushing of supplement (8).
• Flange (6).
• The nut (24) with its washer (25), tightened to the specified
torque.
Tightening torque nut fixing flange :
11,75 Kg-m (117,5 Nm)
NOTE:
• Lubricate rolling elements before assembling them
on the sump.
• Do not assemble oil seal jet.
7) Wrap a piece of string in the flange as shown and connect
a dynamometer (B).
16
10
11
6
8
9
2425
B

 Loading...