CONVEYOR ENHANCEMENTS
Inlet Conveyor Extension Installation
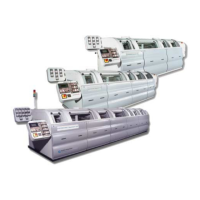
6-82 Aquastorm™ Series Options Guide Rev. 1
6
Procedure Refer to the following steps and Figure 6–3 on page 81 to complete the
installation process.
1. Locate and remove the mounting hardware and the adjustable inlet conveyor
extension from the contents of the shipping package.
2. Use a 13 mm box wrench to remove the following hardware from either end
of the idler shaft assembly to allow removal of the idler shaft assembly and
spacers:
• Hex head bolts
• Flat washers
• Lock washers
3. Carefully lift the inlet conveyor assembly and position it at the entrance end
of the Aquastorm system.
4. Install the end of the inlet conveyor, in which the shaft assembly was
removed, into the entrance end mounting bracket. Use the vertical slotted
mounting hole for installation.
5. Install one (1) spacer at either side of the inlet conveyor, between the inlet
conveyor and entrance end mounting bracket.
6. Reinstall the idler shaft assembly removed in Step 2.
7. Align the mounting holes, then reinstall the following hardware removed in
Step 2.
• Hex head bolts
• Flat washers
• Lock washers
8. Finger tighten the hex bolts at this time to hold the assembly in place. Make
angle adjustments later.
9. Locate the left and right threaded height adjustment rods and turnbuckles.
10.Use a 1/8 in. Allen wrench and an 3/8 in. box wrench to remove the shoulder
screws and hex nuts from the top ends of the left threaded adjustment rods.
11.Align the holes in the ends of the left threaded adjustment rods with the
mounting holes in the side panels of the inlet conveyor.
12.Install the threaded height adjustment rods and turnbuckles through the
threaded adjustment rods, to the side panels of the inlet conveyor with the
heads of the shoulder bolts facing out and the double hex nuts on the inside
of the inlet conveyor.
13. Tighten the hardware securely using a 1/8 in. Allen wrench and a 3/8 in. box
wrench.
14.Adjust the height of the Inlet Conveyor Extension to the required position by
turning the turnbuckles.
15.Once the inlet conveyor height adjustment for the required operating position
is complete, press the inlet conveyor assembly down to the bottom of the
vertical slotted mounting hole. Use a 13 mm box wrench to tighten the hard-
ware previously finger tightened in Step 8.
16.Install the conveyor wire belt. Refer to Conveyor Wire Belt Set Up on page
86.