. . . . .
CONVEYOR ENHANCEMENTS
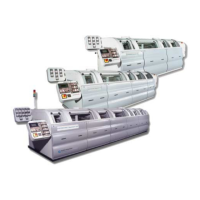
Exit Conveyor Extension Installation
2-9317-600-00-0 Aquastorm™ Series Options Guide 6-85
Tools Use the following tools to install exit conveyor extension:
• 10 mm Box Wrench
• 5 mm Allen Wrench
• Phillips screwdriver
• Pliers
Procedure Use the following steps and Figure 6–5 on page 84 to install exit conveyor
extension:
1. Locate and open the cardboard container labeled Documentation Package
Enclosed.
2. Remove the eight (8) sets of M6 hardware.
3. Locate the exit conveyor extension from the contents of the crate.
4. Position the exit conveyor extension at the exit end of the Aquastorm system
cabinet.
5. Use an Allen wrench to tighten the M6 hardware and attach the exit conveyor
extension to the exit end panel inside the bolt on sound enclosure.
6. Tighten all bolts securely.
Procedure Use the following steps to install the motor drive chain:
1. Locate the drive chain, master link set, and chain tensioner assembly in the
cardboard container
2. Refer to the Detail A section of Figure 6–5 on page 84. Feed the motor chain
around both sprockets. Insert and lock the master link in place.
3. Place the chain tensioner assembly around the motor chain between the two
(2) sprockets.
4. Adjust the chain tensioner assembly so the distance between the chains is
less than the diameter of the sprockets.
5. Latch the chain tensioner assembly in place.
6. Install grounding bracket:
7. Locate the grounding bracket, M4, and M5 mounting hardware.
8. Refer to the Detail B section of Figure 6–5 on page 84. Attach the grounding
bracket from the exit conveyor extension to the machine.
9. Tighten the bolts securely.
10.Install the conveyor wire belt. Refer to Conveyor Wire Belt Set Up on page
86.