RS-232 Interface
270
Scanning Sequence Examples
In most cases scanning one barcode sets the parameter value. For example, to set the baud rate to 19,200, scan
the Baud Rate 19,200 barcode under Baud Rate on page 276. The scanner issues a fast warble beep and the
LED turns green, signifying a successful parameter entry.
Other parameters require scanning several barcodes. See the parameter descriptions for this procedure.
Errors While Scanning
Unless otherwise specified, to correct an error during a scanning sequence, just re-scan the correct parameter.
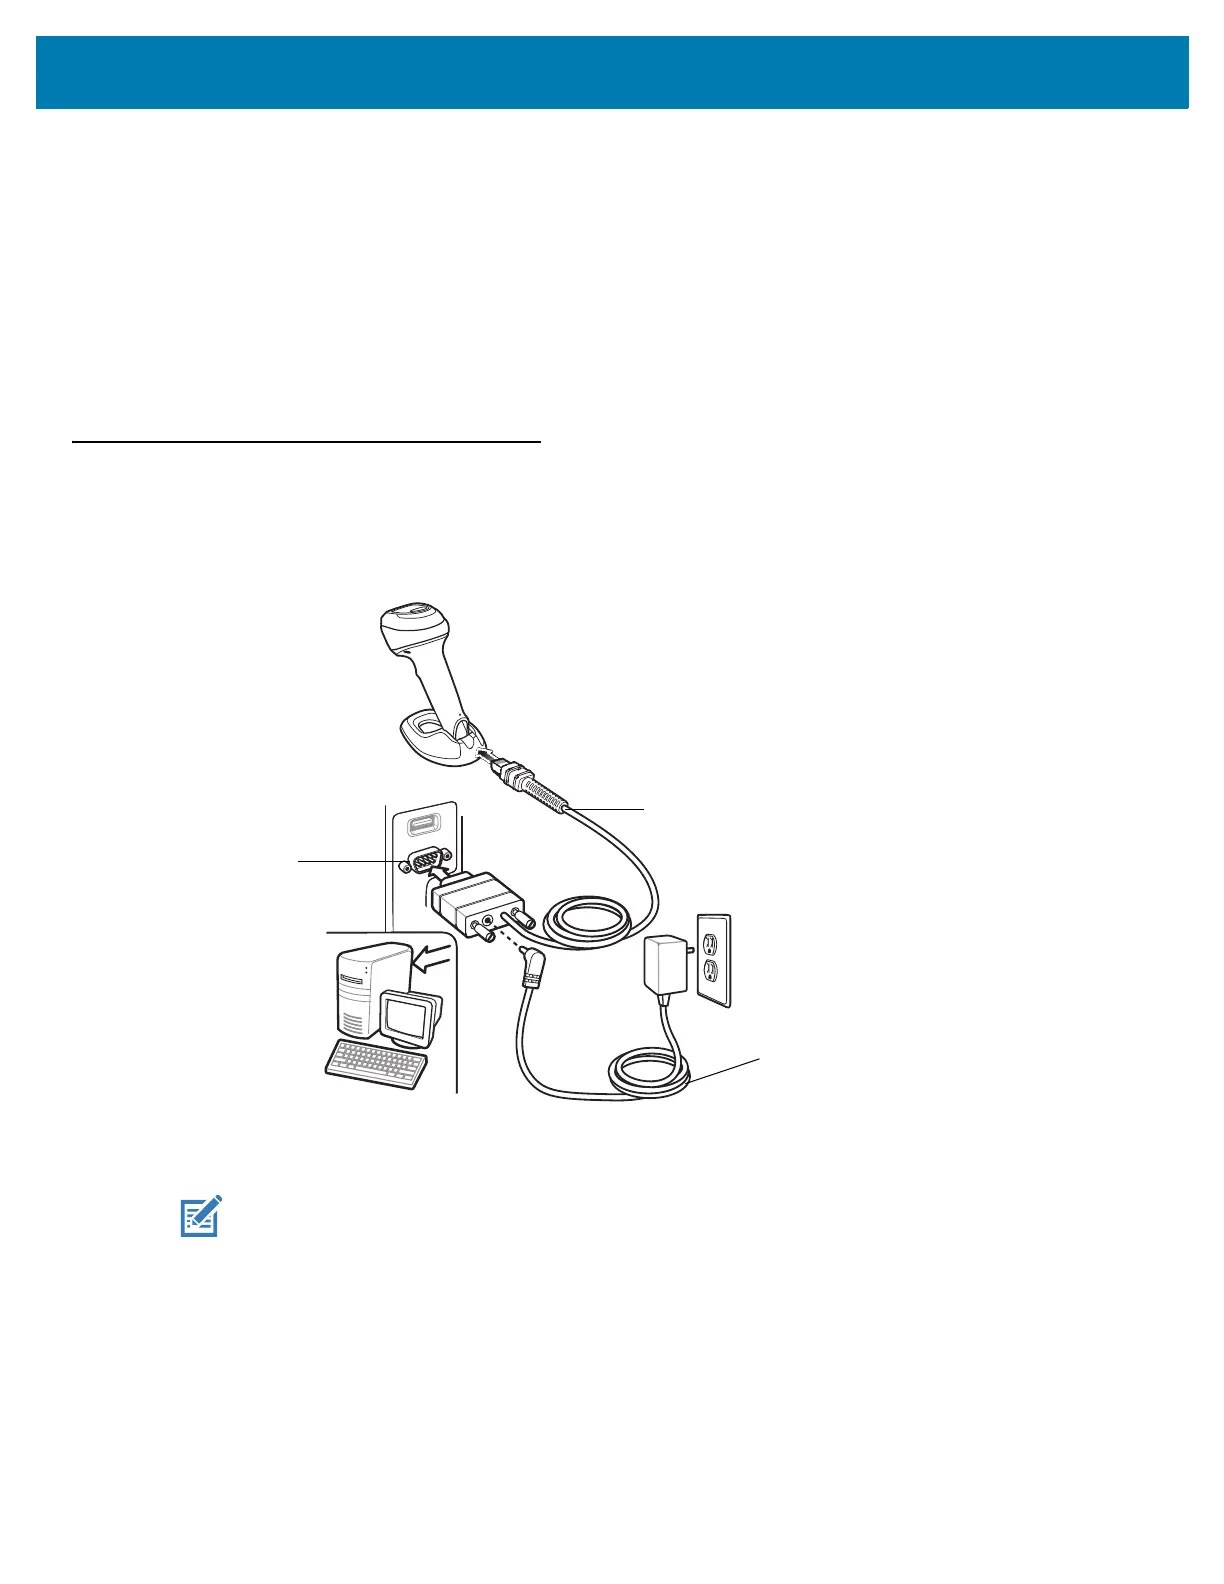
Connecting an RS-232 Interface
Connect the scanner directly to the host computer.
Figure 16 RS-232 Connection
1. Attach the modular connector of the RS-232 interface cable to the cable interface port on the scanner. See
Inserting the Interface Cable on page 31.
2. Connect the other end of the RS-232 interface cable to the serial port on the host.
3. If required, connect the power supply to the serial connector end of the RS-232 interface cable. Plug the power
supply into an appropriate outlet.
4. The scanner automatically detects the host interface type and uses the default setting. If the default (*) does
not meet your requirements, select another RS-232 host type by scanning the appropriate barcode from
RS-232 Host Types on page 274.
5. To modify any other parameter options, scan the appropriate barcodes in this chapter.
Interface Cable
Serial Port
Connector to Host
Power Supply
Cable
NOTE: Interface cables vary depending on configuration. The connectors can be different than those
illustrated in Figure 1, but the steps to connect the scanner are the same.