Getting Started
32
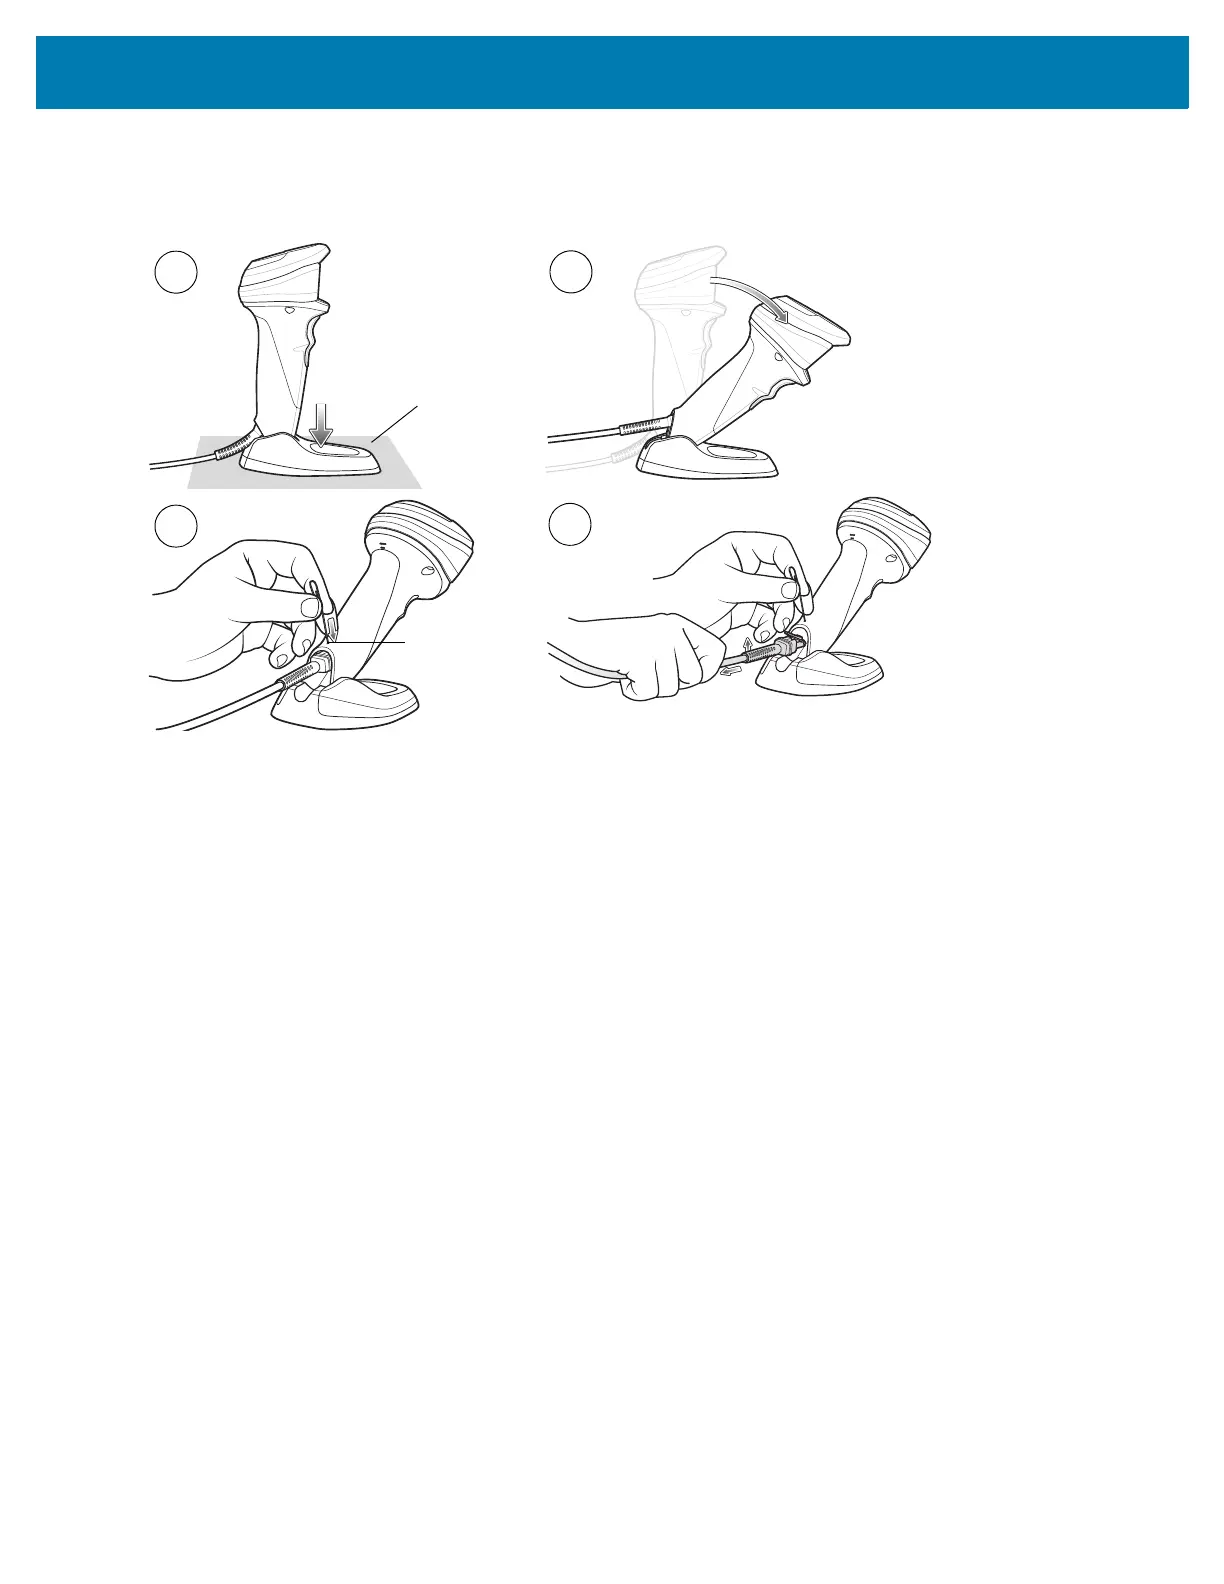
Removing the Interface Cable
Figure 4 Removing the Cable
1. Place the scanner on a flat surface.
2. Ratchet the scanner all the way forward.
3. Insert a paper clip into the circular cable release opening (pinhole) to compress the modular connector clip.
4. Pull the cable/connector UP and OUT of the connection and carefully slide out the cable.
5. Follow the steps for Inserting the Interface Cable
to connect a new cable.
Connecting Power (if required)
If the host does not provide power to the scanner, connect an external power supply:
1. Connect the interface cable to the base of the scanner, as described in Inserting the Interface Cable on page
31.
2. Connect the other end of the interface cable to the host (refer to the host manual to locate the correct port).
3. Plug the power supply into the power jack on the interface cable. Plug the other end of the power supply into
an AC outlet.
Configuring the Scanner
To configure the scanner use the barcodes included in this manual. See User Preferences & Miscellaneous
Options and Imager Preferences for information about programming the scanner using barcode menus. Also see
each host-specific chapter to set up connection to a specific host type.
1
2
4
3
Flat surface
Cable release
opening (pinhole)