3 - 87
Chapter 3 Removal and Replacement Procedures (RRPs)
Version 2 2007.03.20
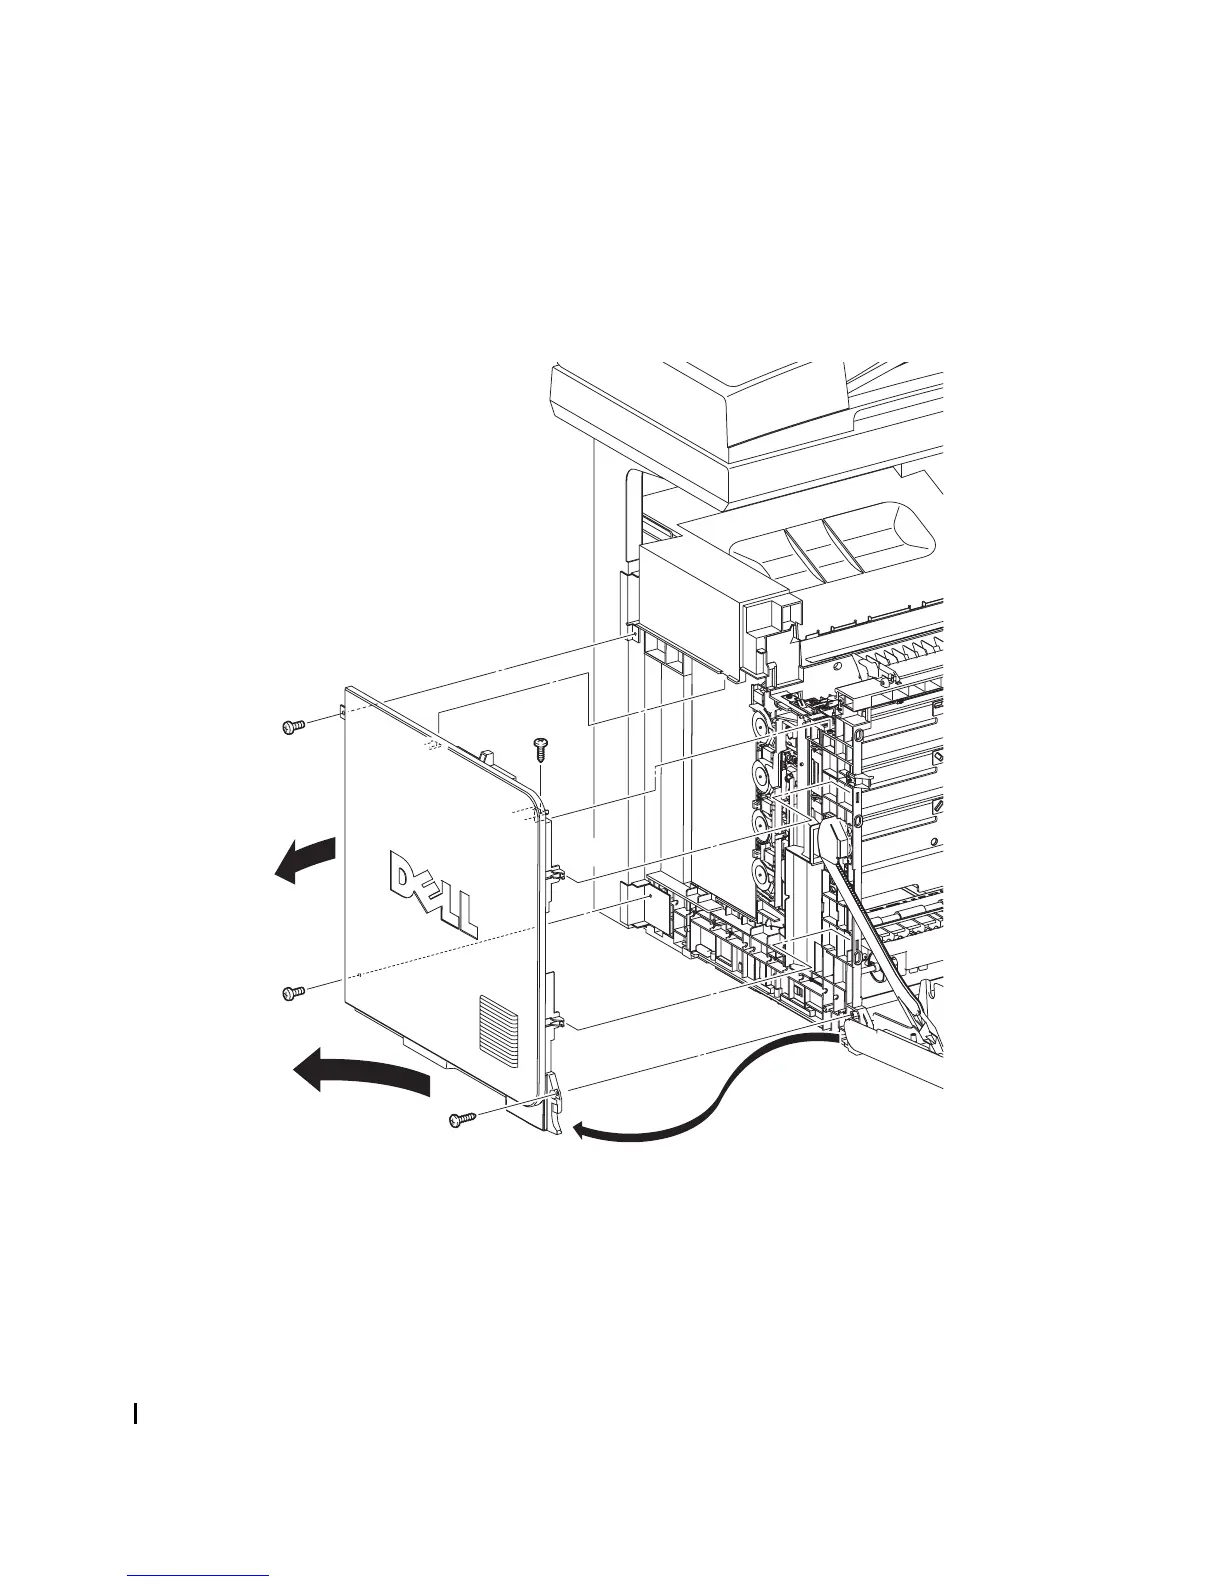
Removal 59 LEFT COVER (PL13.1.10)
Steps 1 through 6 are for reference. Before removing this component, check that Steps 1 through 6
have been performed.
1) Open FRONT COVER (PL13.2.1).
2) Remove the FUSER. (Removal 8)
3) Remove the REAR COVER. (Removal 49)
4) Remove the COVER BOTTOM. (Removal 50)
5) Remove the COVER POLE IN L. (Removal 57)
6) Remove the COVER POLE L. (Removal 58)
7) Remove the two screws (silver, tap, 10mm) and the two screws (silver, 6mm) that fix the LFTT
COVER (PL13.1.10) to the printer.
8) Release the holes on the screw mounting positions of the top side of the LEFT COVER from
the bosses on the printer.
9) Release from the printer the one hook on the rear side of the LEFT COVER by sliding the rear
section of the LEFT COVER outward.
10) Release the two hooks on the front section of the LEFT COVER by sliding the LEFT COVER
diagonally backward, and then remove the LEFT COVER.
Go to the next removal steps:
Removal 24 LEFT ARM ASSEMBLY (PL7.1.97), Removal 25 LED ASSEMBLY (PL5.1.15),
Removal 26 TONER DISPENSER MOTOR (PL5.1.12), Removal 60 BOX ASSY PRT AIO
(PL13.4.13) or Removal 68 TOP COVER (PL13.1.1)
Gnb03166KA
7)
7)
7)
7)
8)
10)-1
10)-1
9)-1
9)-2
10)-2