3 - 91
Chapter 3 Removal and Replacement Procedures (RRPs)
Version 2 2007.03.20
Removal 62 BOX ASSY FAX AIO (PL13.4.4)
Steps 1 through 5 are for reference. Before removing this component, check that Steps 1 through 5
have been performed.
1) Remove the REAR COVER. (Removal 49)
2) Remove the COVER BOTTOM. (Removal 50)
3) Remove the COVER POLE IN L. (Removal 57)
4) Remove the COVER POLE L. (Removal 58)
5) Remove the BOX ASSY PRT AIO. (Removal 60)
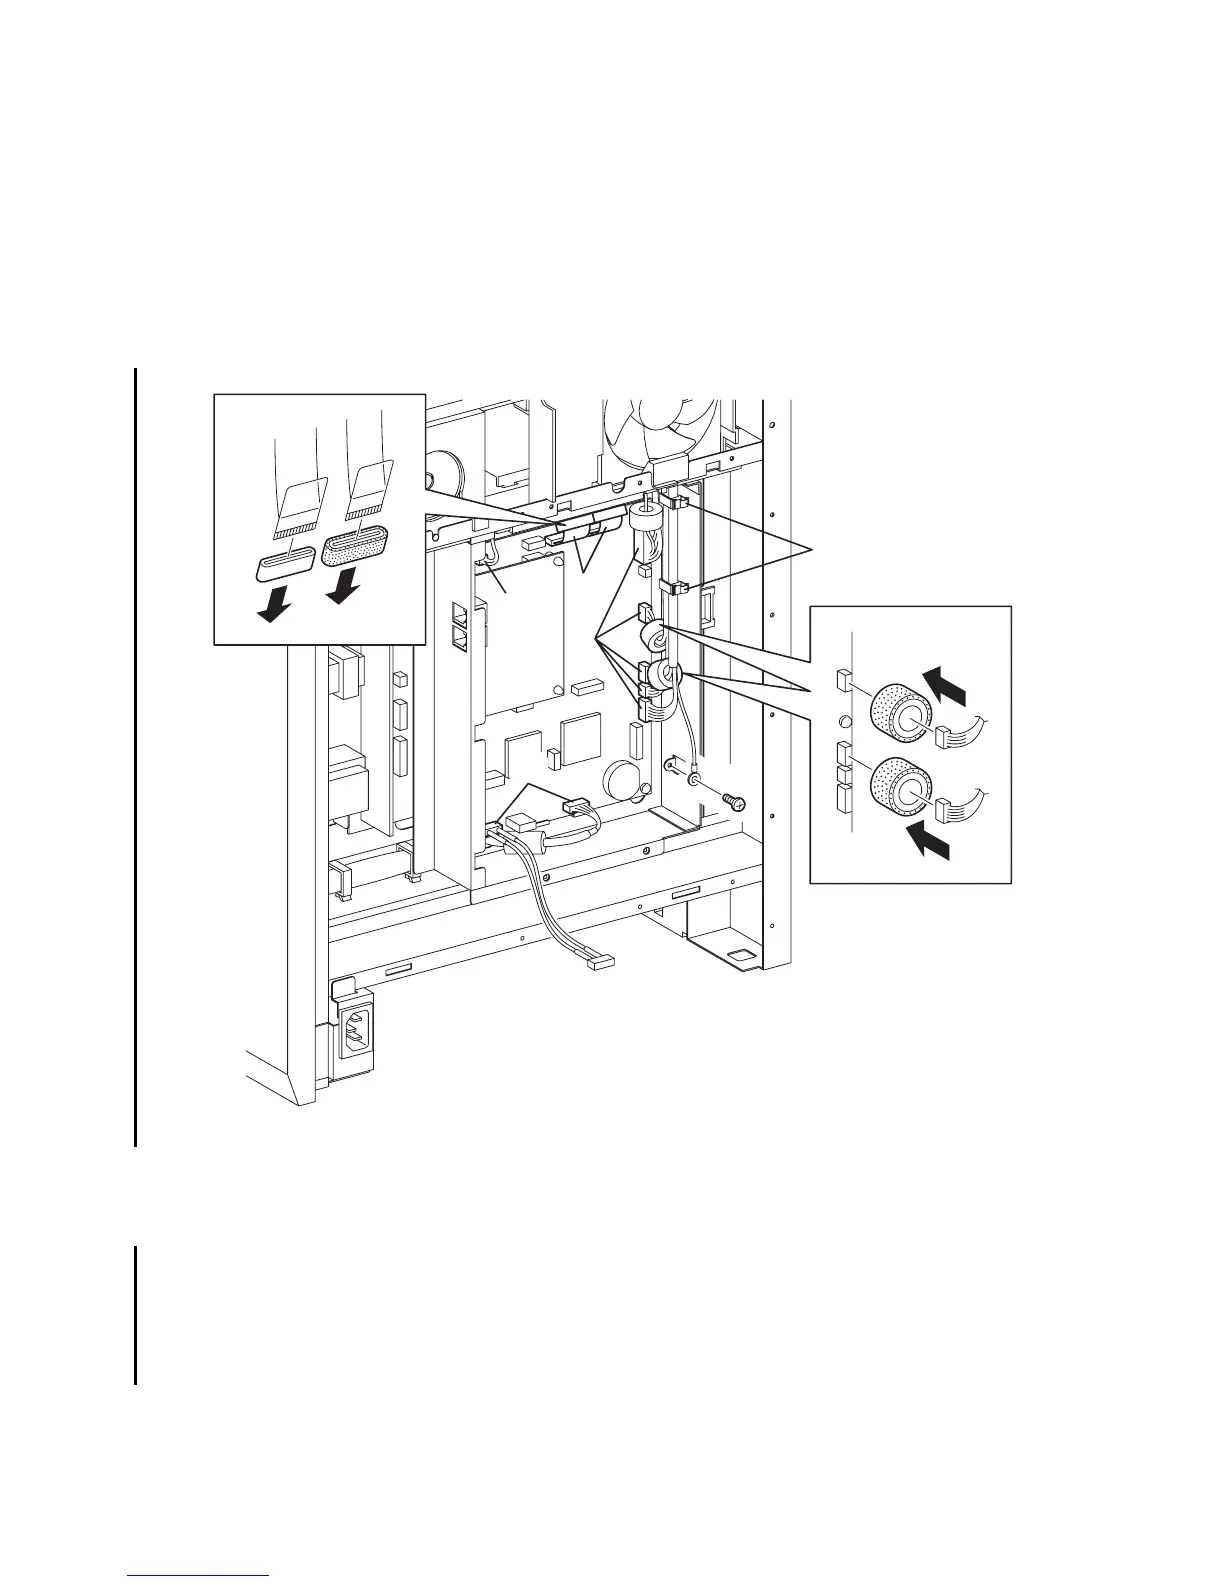
6) Disengage all the connectors of the PWBA HYUI (PL13.4.1).
7) Remove the one screw (silver, 6mm) that fixes the ground wire of the ADF SCANNER ASSY
(PL13.8.1) to the BOX ASSY FAX AIO (PL.13.4.4).
8) Remove the CORE FCR27-12-1.3 (PL13.8.13) and the CORE ASSY FCR27 (PL13.8.12) from
the two flat cables.
9) Remove the two CORE ASSY SC-18 (PL13.8.14) on the connectors (J62, J63) from the har-
ness.
10) Release the harnesses from the clamps.
Continues to the next page.
Gnb03170KB
6)
6)
6)
6)
7)
10)
9)
9)
8)
8)