3 - 206
Chapter 3 Removal and Replacement Procedures (RRPs)
Version 2 2007.03.20
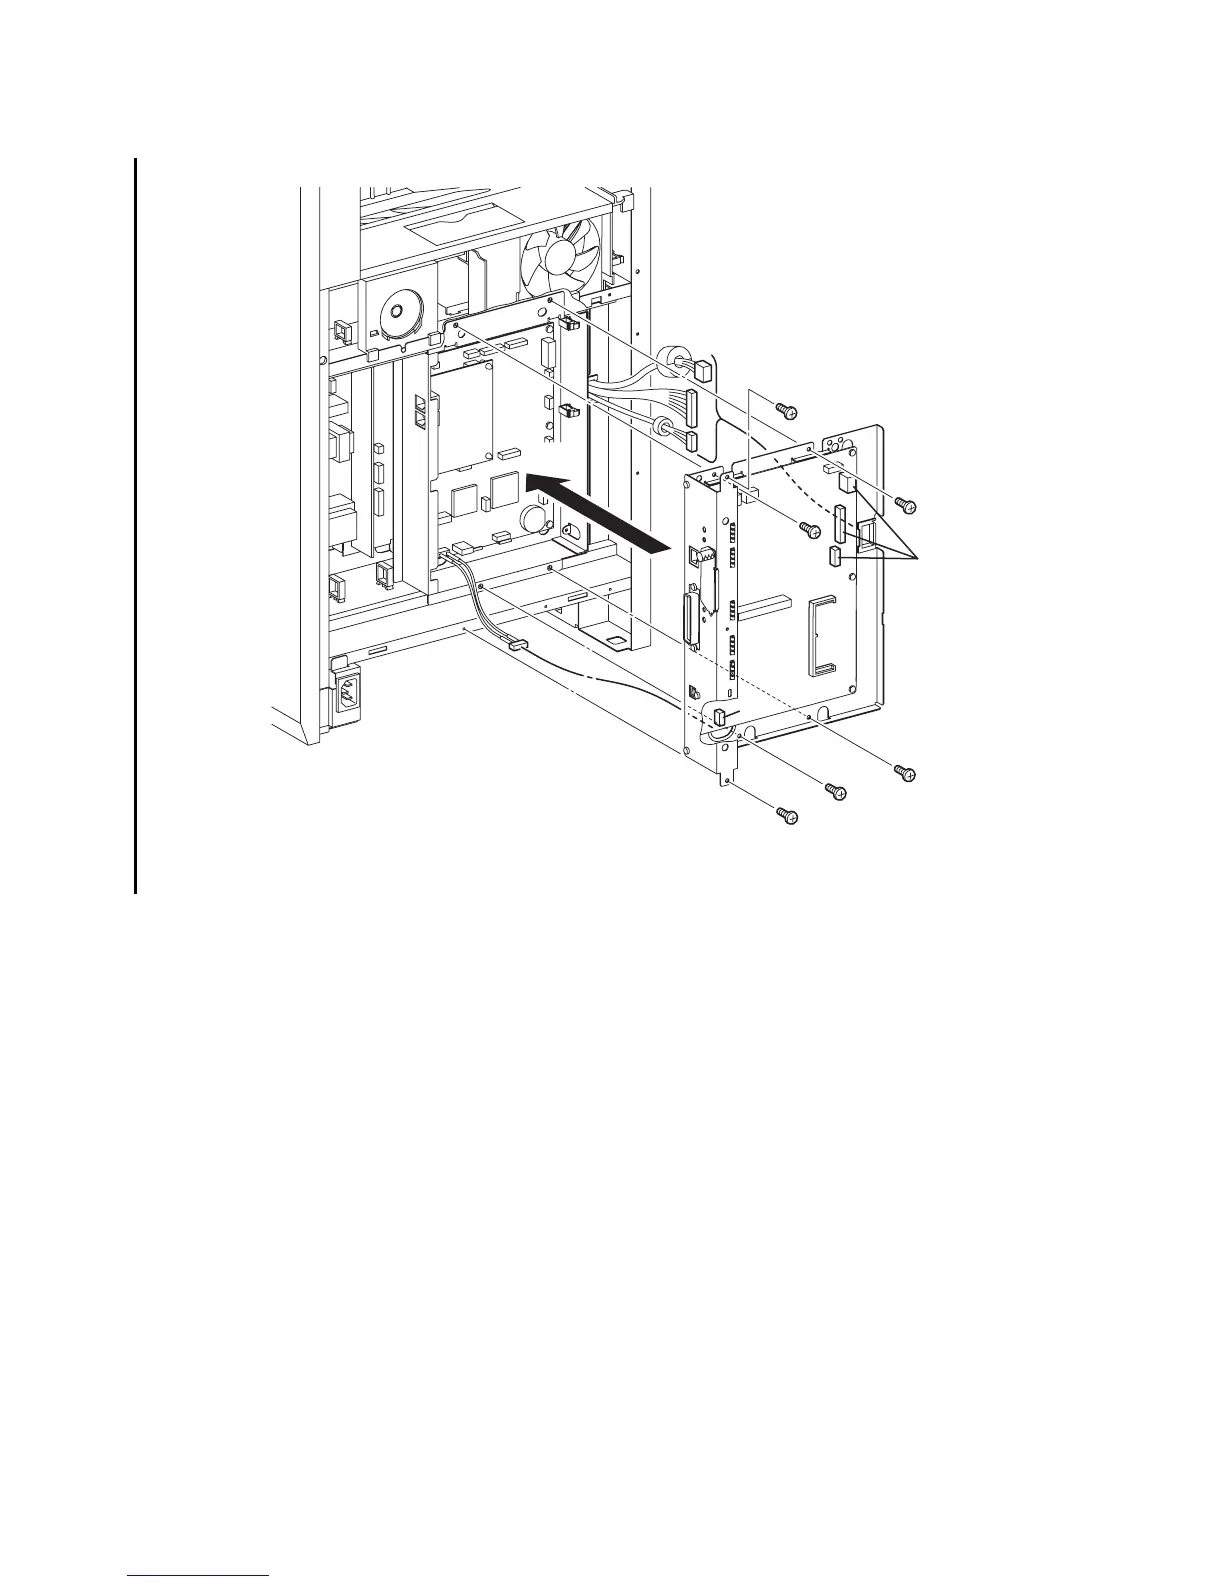
Replacement 62 BOX ASSY PRT AIO (PL13.4.13)
1) Route the HARNESS ASSY AIO-ESS (PL13.6.14) through the hole of the BOX ASSY PRT
AIO.
2) Route the two harness of the MACHINE CONTROL UNIT and the one harness of the LOW
VOLTAGE POWER SUPPLY though the CLAMP SADDLE LES-1017.
3) Replace the BOX ASSY PRT AIO and the ELECTRONIC SUB-SYSTEM CONTROL BOARD
to the printer by aligning the four holes of the BOX ASSY PRT AIO with the four holes of the
BOX ASSY FAX AIO.
4) Secure the BOX ASSY PRT AIO to the printer using the six screws (silver, 6mm).
5) Engage all the connectors of the ELECTRONIC SUB-SYSTEM CONTROL BOARD.
Continues to the next page.
Gnb03207KB
5)
4)
2)
4)
4)
4)
4)
4)
1)
3)
5)