38 Matrix ETERNITY NE System Manual
Connecting SPARSH VP248 as Extended SIP Extension
You are recommended to complete the following steps before connecting the Extended IP Phone to the ETERNITY
NENX:
• Decide the location of the Extended IP Phone—within the same network or outside—according to your
installation scenario.
• Log into Jeeves. See “System Configuration using the Web-based GUI”.
• Configure DHCP Server on the “Network Parameters” page under Basic Settings.
If you want to use the DHCP Server on your LAN for assigning IP Address to the Extended IP Phone,
select DHCP option 224 and Data Type as ‘String’ and program the Ethernet Port IP Address /Domain
Name and SPARSH Port in the format “Ethernet IP Address: SPARSH Port” in your LAN DHCP Server.
• Assign an extension number to the Extended IP Phone on the “Extension and Feature Codes” page under
Basic Settings.
• You must configure the necessary parameters in ETERNITY so that SPARSH VP248 can register as a SIP
Extension. For instructions, see “SIP Extensions” under Basic Settings.
Now, follow the steps described below to install the Extended IP Phone. The instructions are common for all models
of the SPARSH VP248. For the purpose of illustration, the premium model, SPARSH VP248P, has been used.
• Unpack the SPARSH VP248 box and verify package contents
5
.
• Mount the phone on a desk or wall at a location convenient to you.
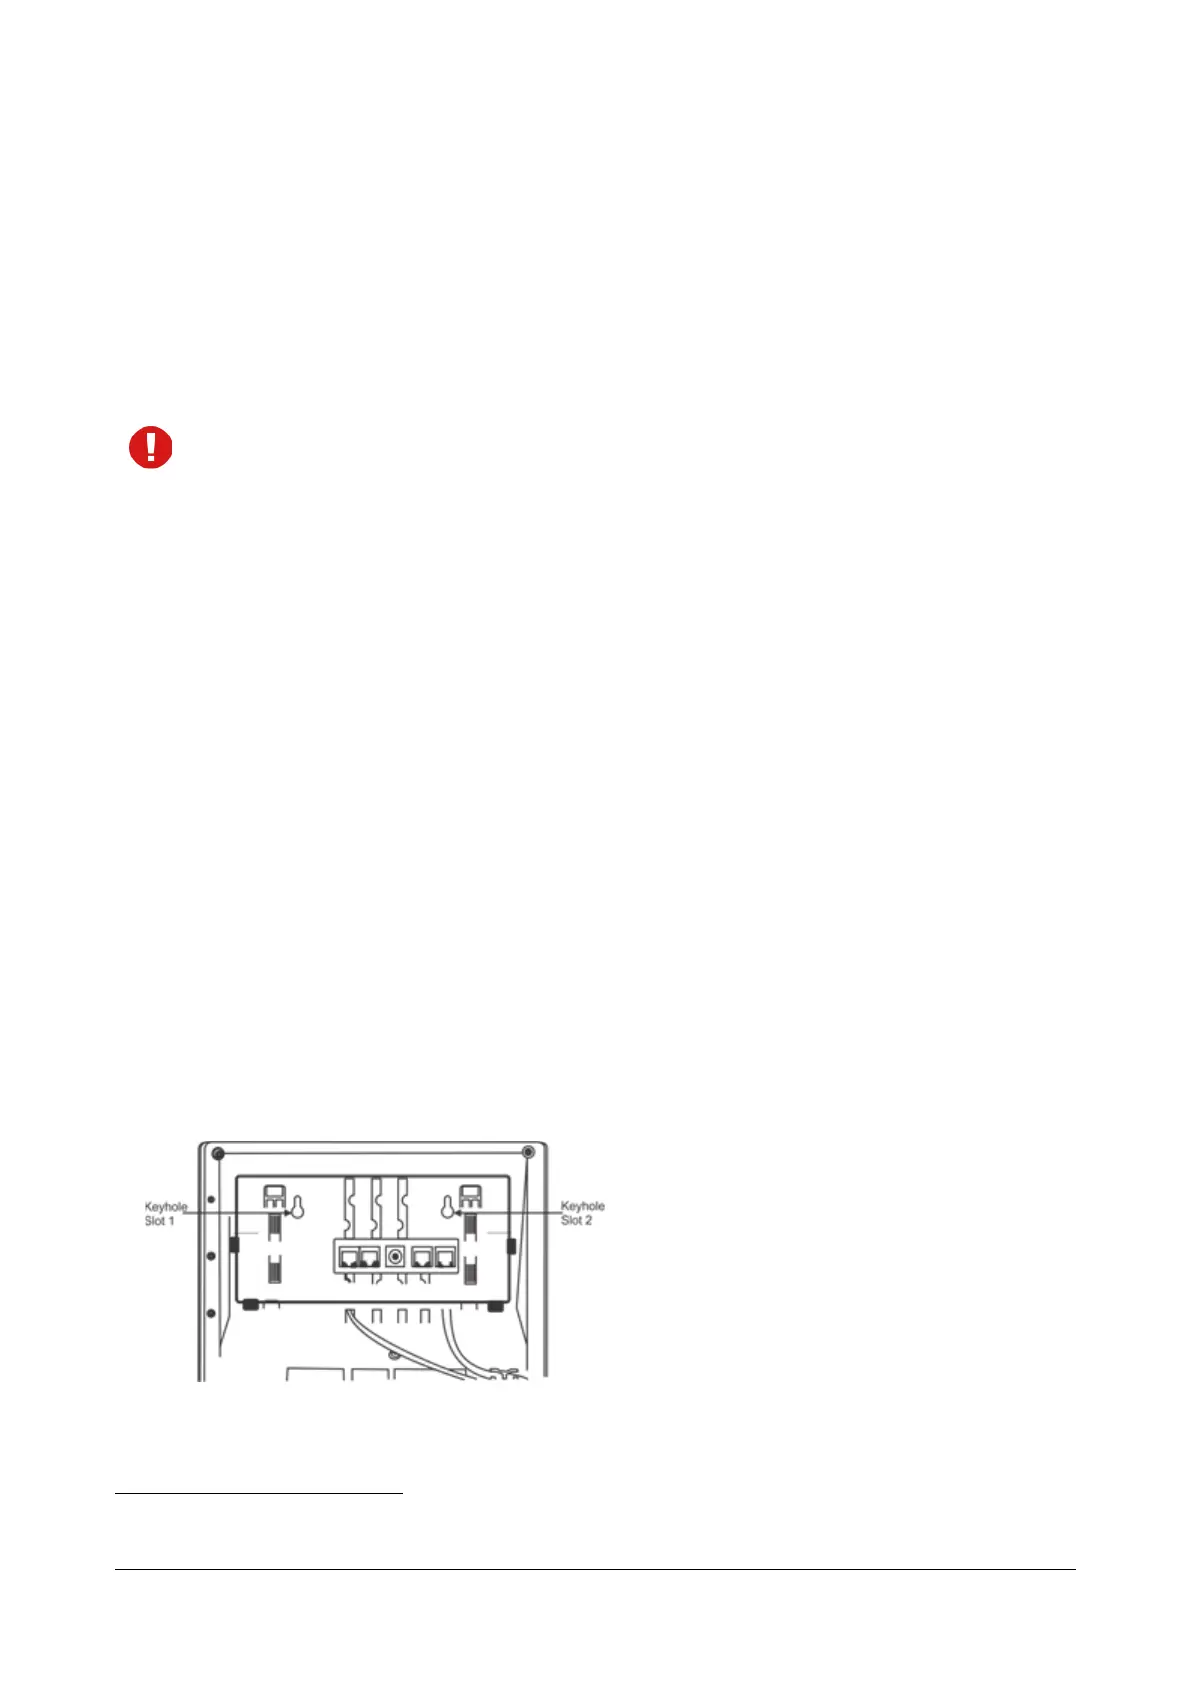
• To mount the phone on the wall,
• Use the mounting template to drill holes of appropriate size and distance. Fix the screw grips in the
holes you drilled.
• Fix two screws in the holes on the wall. Ensure that they are aligned with the Keyhole Slots 1 and 2.
• Use wall plugs, if required, to fix the screws. Leave the screw heads protruding from the wall to fit
into the Keyholes.
• Now, mount the phone on the wall, with the screws fitting into the Keyhole slots.
5. See “Packing List” in the Appendix topic.