Software Reference 237
V4.2 LabChip GX User Manual PerkinElmer
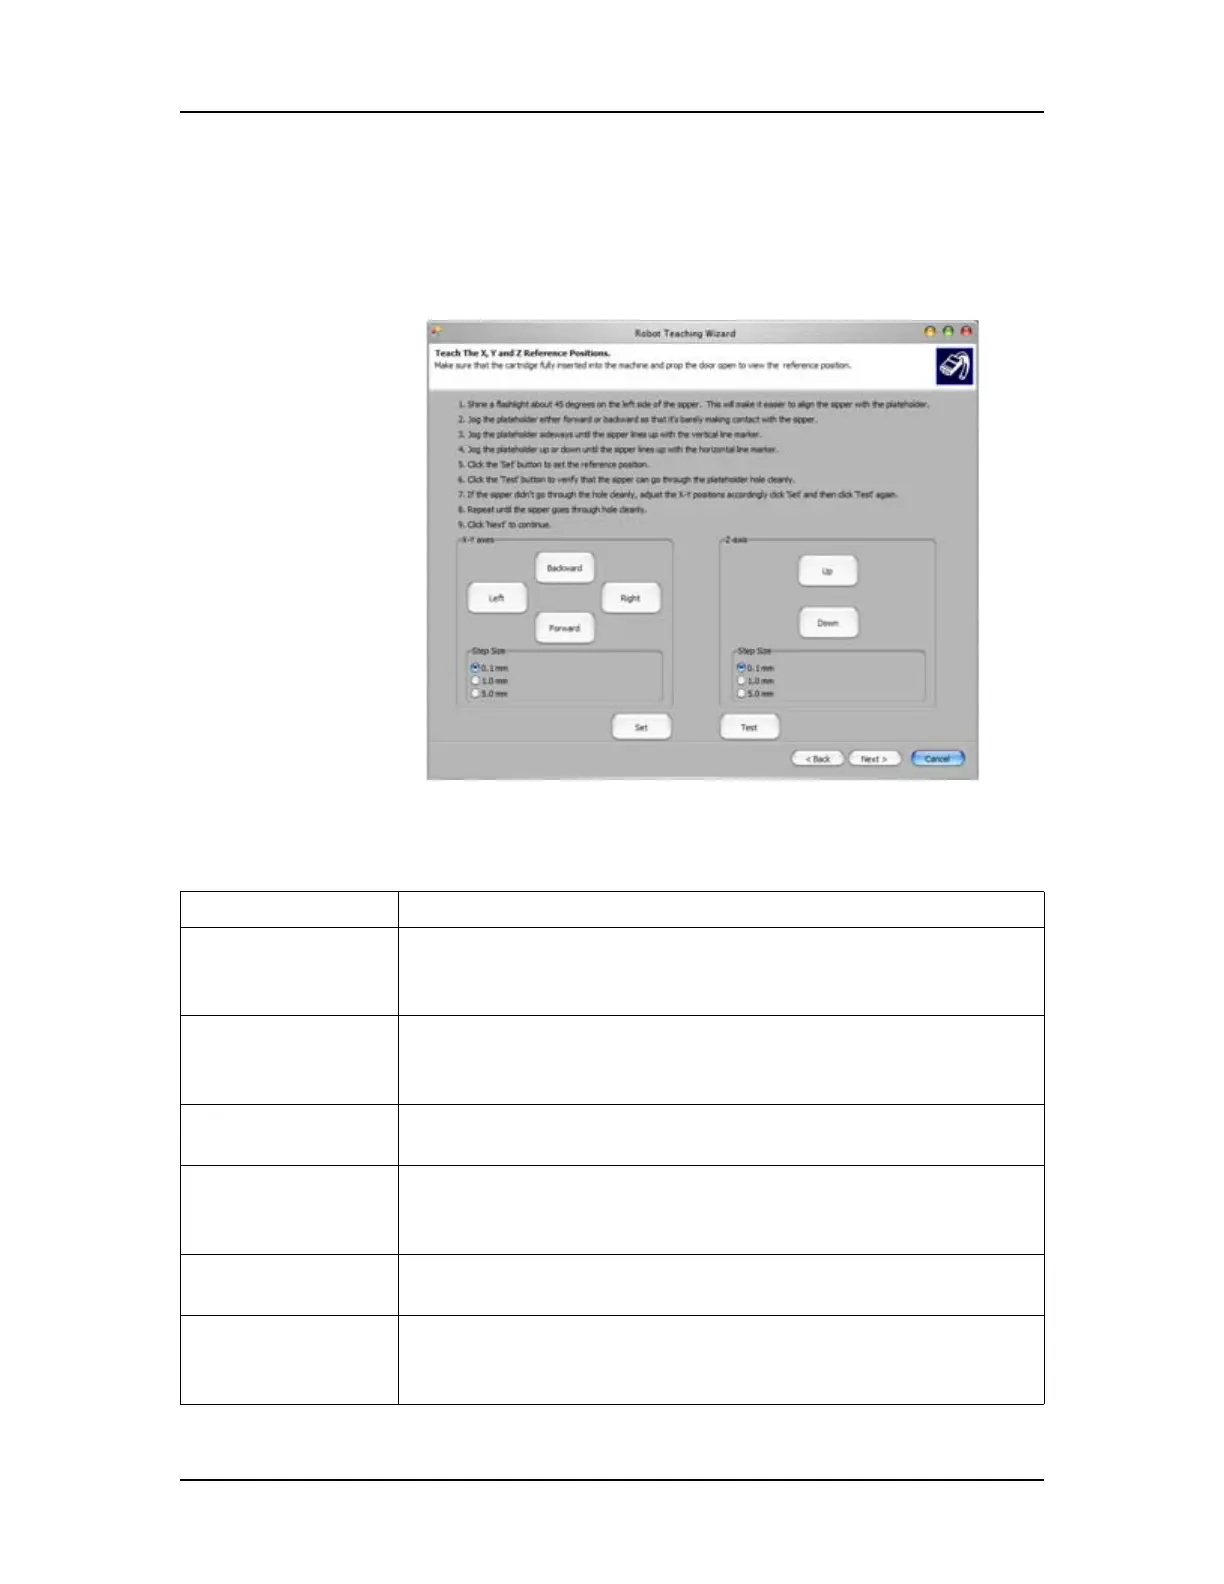
Teach the X, Y and Z Reference Positions Window
Use the Teach X, Y, and Z Reference Positions Window to align the
sipper at the reference position, save the reference position, and
test the alignment.
Figure 104. Teach the X, Y and Z Reference Positions Window
The Teach the X, Y, and Z Reference Positions Window contains
the following options and buttons:
Option/Button Function
Left/Right buttons Moves the plate holder toward the left or right side of the
instrument. The distance the plate holder moves is set in the
Step Size option below the buttons.
Forward/Backward
buttons
Moves the plate holder toward the front or back of the
instrument. The distance the plate holder moves is set in the
Step Size option below the buttons.
Up/Down buttons Moves the plate holder up toward the top of the instrument or
down toward the bottom of the instrument.
Step Size options Select the desired distance to move the plate holder each time
the positioning buttons are clicked. Use the Step size buttons
under the positioning buttons for the axis that is being moved.
Set button Sets the current position of the plate holder as the reference
position.
Test button Moves the plate holder to verify that the reference position is
set properly. If set properly, the sipper moves into the hole on
the plate holder without hitting the sides of the hole.

 Loading...


