LabChip GX Instrument Description 271
V4.2 LabChip GX User Manual PerkinElmer
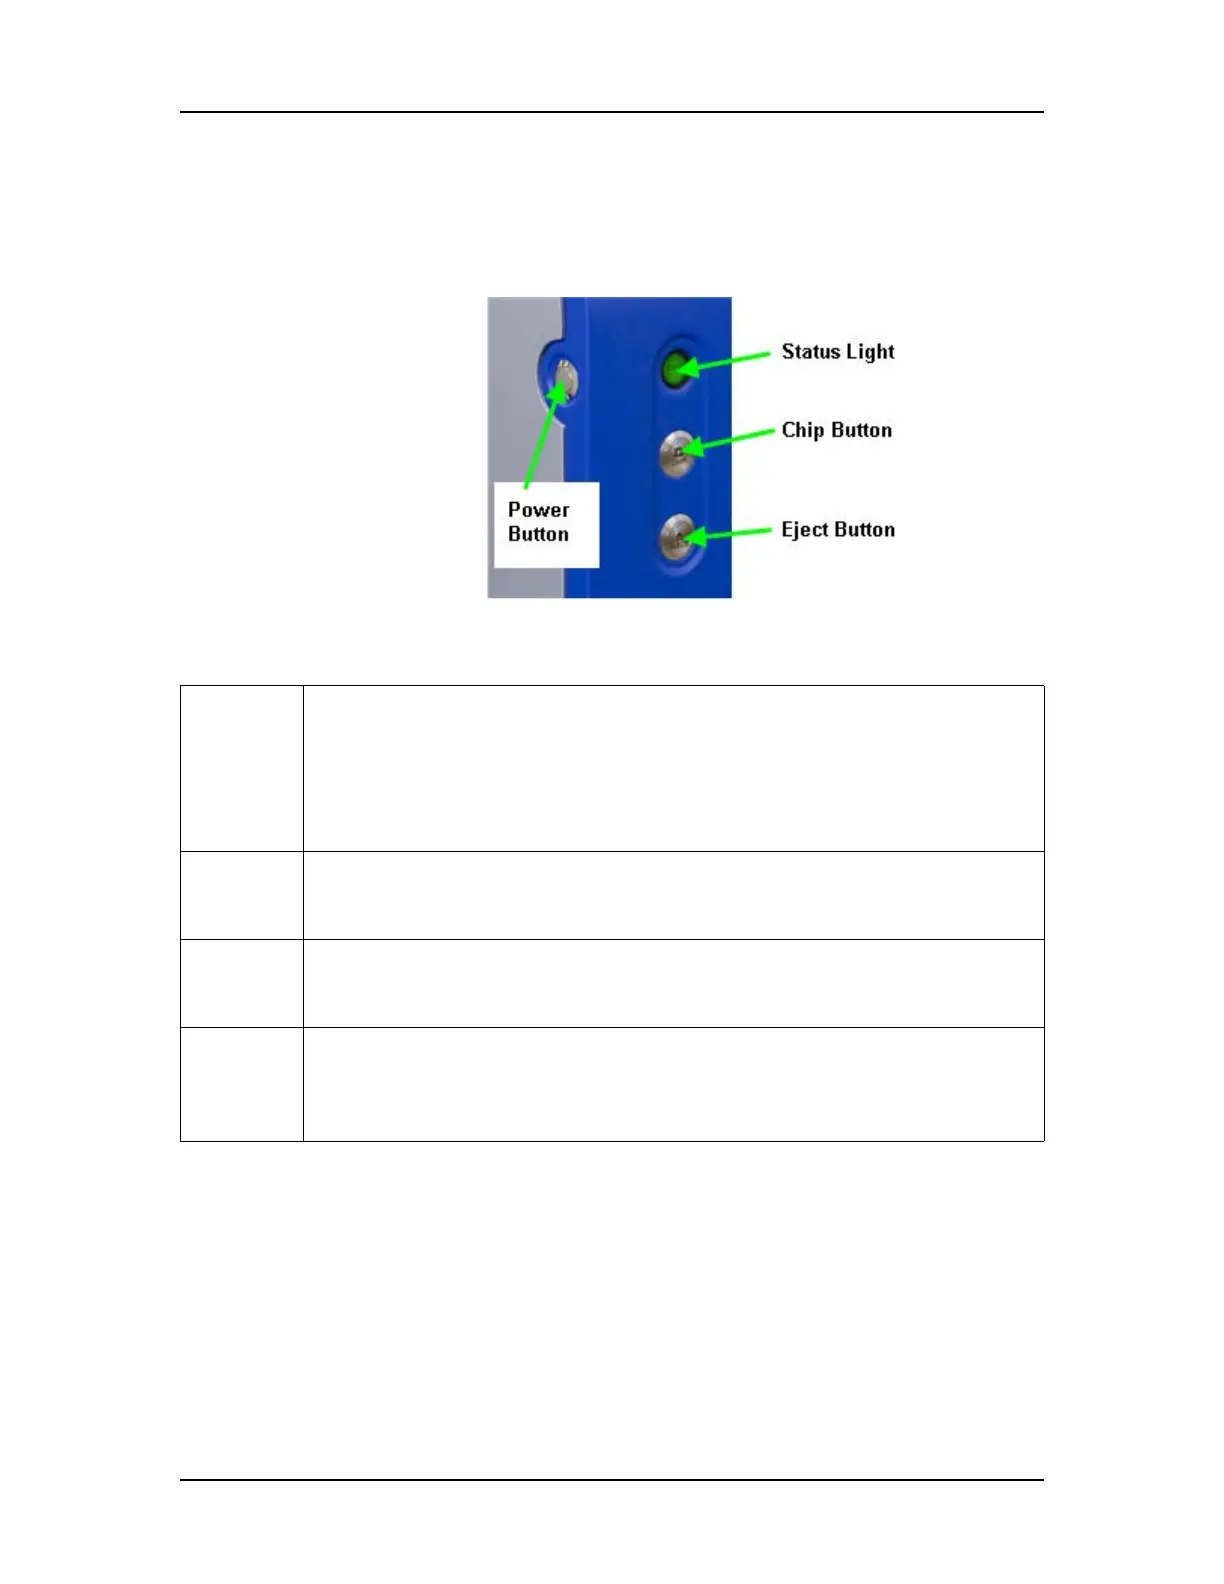
Front Panel
The controls on the front panel open the front door, eject the chip
cartridge, and indicate the status of the instrument.
Figure 130. Front Panel
The front panel contains the following parts:
Status
Light
Indicates the state of the instrument:
Dark (not lit) - Power is off.
Solid green - Power is on and instrument is idle.
Flashing green - Running a plate.
Red - Power is on, cannot communicate with software.
Flashing Red - Error detected.
Chip
button
Moves the robot to open the door and releases the chip cartridge to
access the chip. This button is illuminated when this function is
available and flashes when movement is in progress.
Eject
button
Moves the robot and opens the door to access the plate in the
microplate carrier. This button is illuminated when this function is
available and flashes when movement is in progress.
Power
Button
Turns the LabChip GX instrument On (Run) or Off (Standby). Note that
power is still supplied to the power supply fans when the power switch
is in the Standby position. Turning the instrument on reloads the system
firmware and homes the robot.

 Loading...


