Operation 36
V4.2 LabChip GX User Manual PerkinElmer
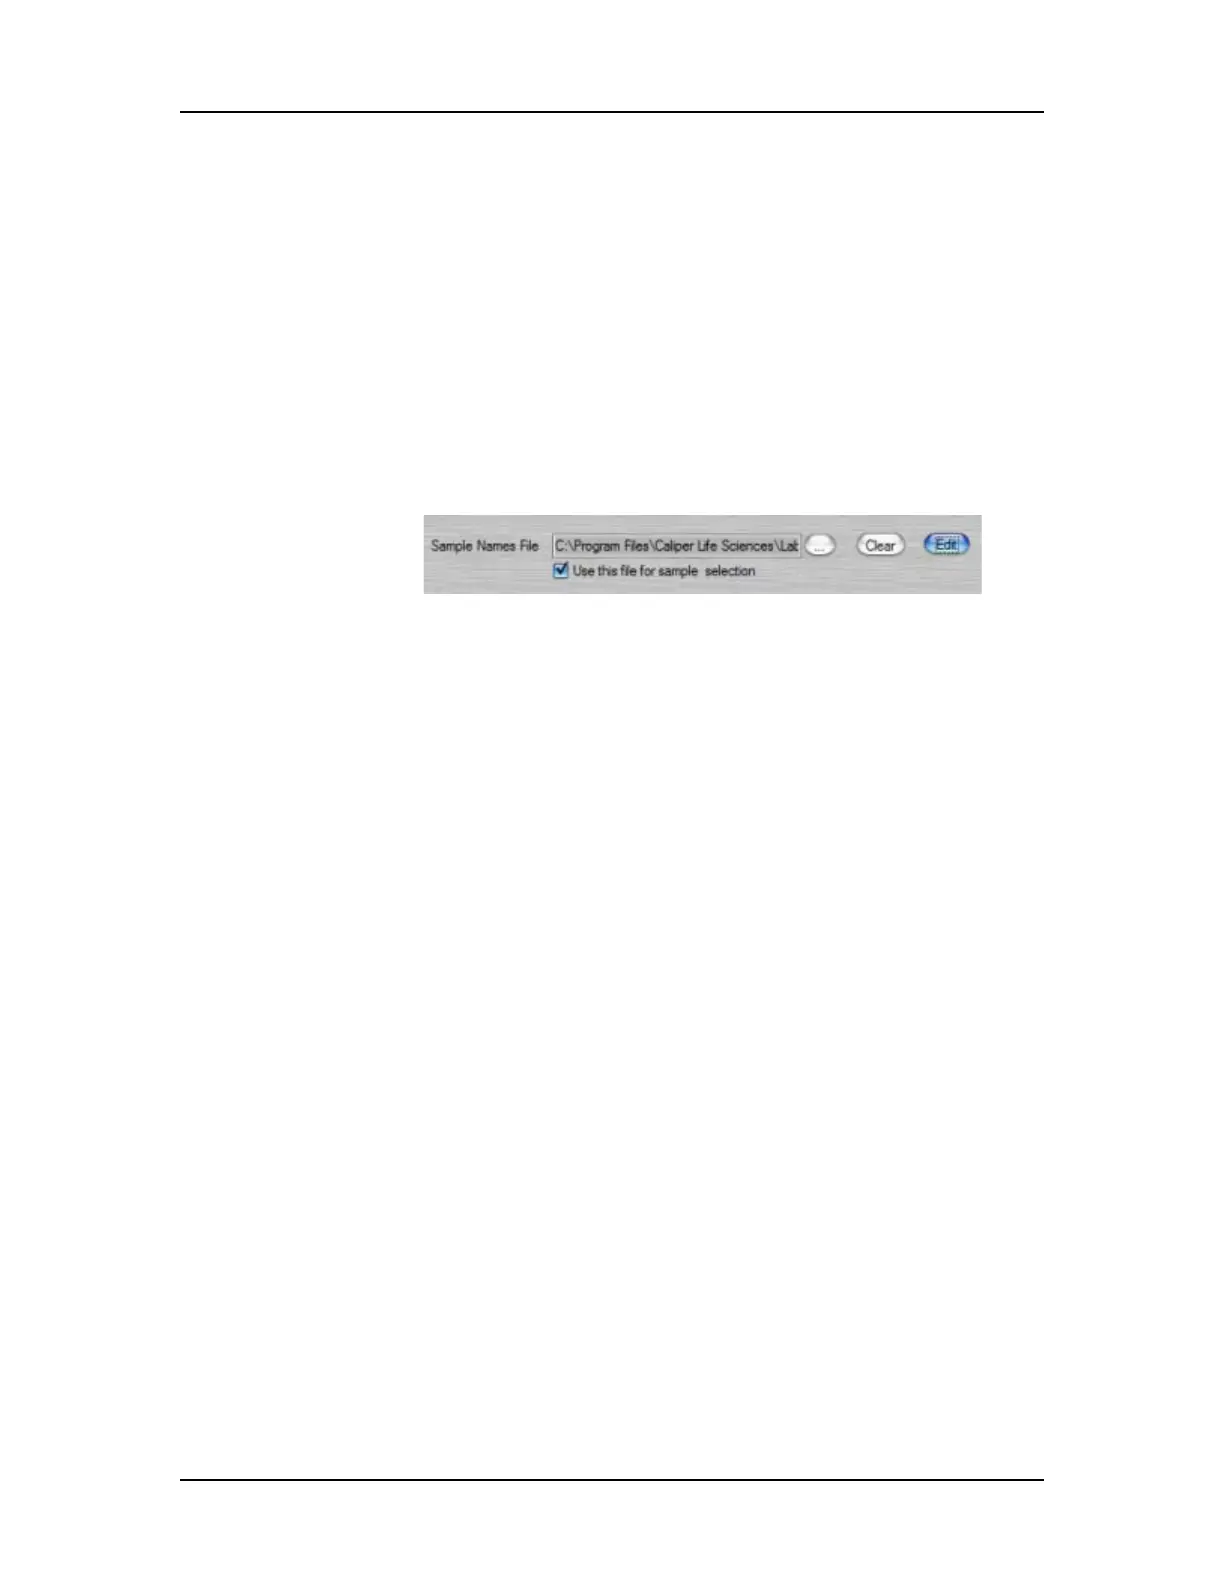
To select the wells using a Sample Names file:
1 Create the sample names file with one row for each well to be
sampled.
2 Click the Run button on the LabChip GX Main Window. The
Start Run Window opens.
3 Click the Advanced Tab.
4 Click the Browse button (...) next to the Sample Names text
box, select the sample names file, and click the Open button.
5 Select the Use this file for sample selection check box.
Figure 6. Use This File For Sample Selection
6 Click the Run Tab.
7 Select the desired Sipping Order: Row-wise, Column-wise, or
File Order. (See page 250 for details.)
8 Select any other run parameters as desired, and then start the
run.
Using a Barcode to Specify the Sample Names File
When using a LIMS, a Sample Names File can be specified by
using the plate barcode as the name of the file. The Sample Names
file is read at run-time, after reading the plate barcode.
To use the plate barcode as the name of the Sample Names file:
1 Decide on a location and file name format for the Sample
Names files. For example, the Sample Names files can be
named “Sample Names” followed immediately by the barcode
on the plate.
2 Create a temporary CSV file, using “%barcode%” as a
placeholder for the barcode string. For example, create a
temporary file named “Sample Names%barcode%.csv” and
save it in the location where the actual sample names files for
the runs will be saved.
3 In the Run File Editor Window, select the desired run
parameters.
 Loading...


