Maintenance1112−1/A1 RT-flex50-D
Wärtsilä Switzerland Ltd
2/ 3
2. Checking the pre-tension
⇒ Clean the threads of the foundation bolts and the seating surfaces. Subse-
quently apply MOLYKOTE G paste to the threads.
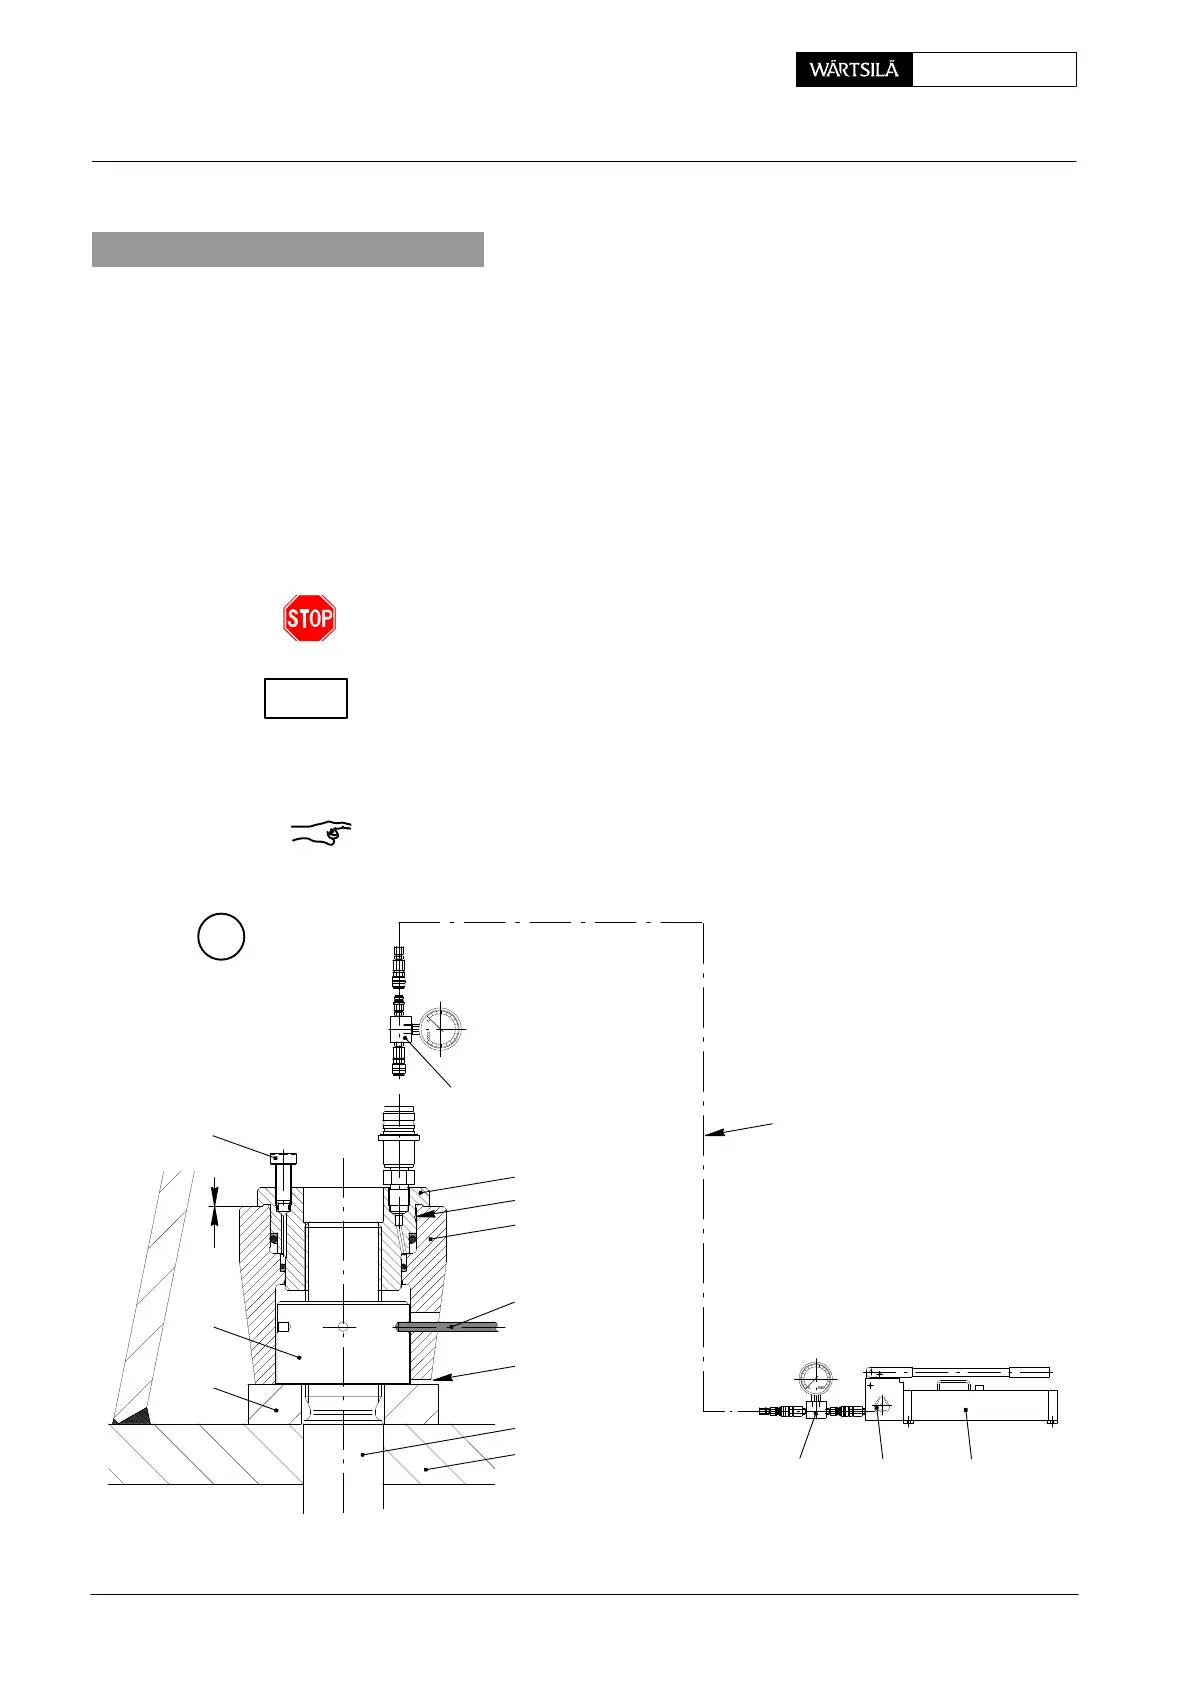
⇒ Place pre-tensioning jack 94145 on foundation bolt 6 or fitted stud 7 to be
checked, and screw it completely down with vent screw 1 open until there is
only little or no clearance at ’x’ (Fig. ’D’).
⇒ Connect pre-tensioning jack to HP oil pump 94931 as shown in Fig. ’D’.
⇒ Shut relief valve ’EV’ and actuate HP oil pump till oil flows bubble-free at vent
screw 1.
⇒ Close vent screw, tension foundation bolt with 1500 bar and keep pressure
constant.
Piston 3 of the pre-tensioning jack must never exceed the red limiting groove ’BN’
(Fig. ’D’).
Check with feeler gauge through slot ’KO’ if there is any clearance between nut 4
and bedplate 5.
Should a clearance be found, nut 4 must be tightened down onto its seating with
round bar ’RS’ while the pressure is kept at 1500 bar (check with feeler gauge).
Subsequently lower the pressure to ’0’ and remove the pre-tensioning jack.
Remark: If all foundation bolts have completely loosened and have to be ten-
sioned again, then follow as described in section 4.
RS
KO
6/7
D
94934a
3
x
94931
EV
94934a
012.949/05
2
5
4
13
BN
1
94935
Checking the Foundation Bolts
2010
CHECK