Maintenance
1132−1/A1
RT-flex50-D
Wärtsilä Switzerland Ltd
3/ 3
4. Tensioning the waisted studs
After fitting the main bearing cover (1132−2), waisted studs 3 are to be tensioned
as follows:
⇒ Set-up double pre-tensioning jacks 94114b as described in section 2.
⇒ Start up hydraulic unit 94942.
⇒ Close vent screws 6 on the jacks as soon as oil flows bubble-free.
⇒ Actuate hydraulic unit, adjust pressure to 1000 bar and keep it constant.
⇒ Tighten all nuts 4 with round bar ’RS’ till firmly seated.
No clearance must be at hand between main bearing girder 1 and main bearing
cover 2 (Fig. ’B’)!
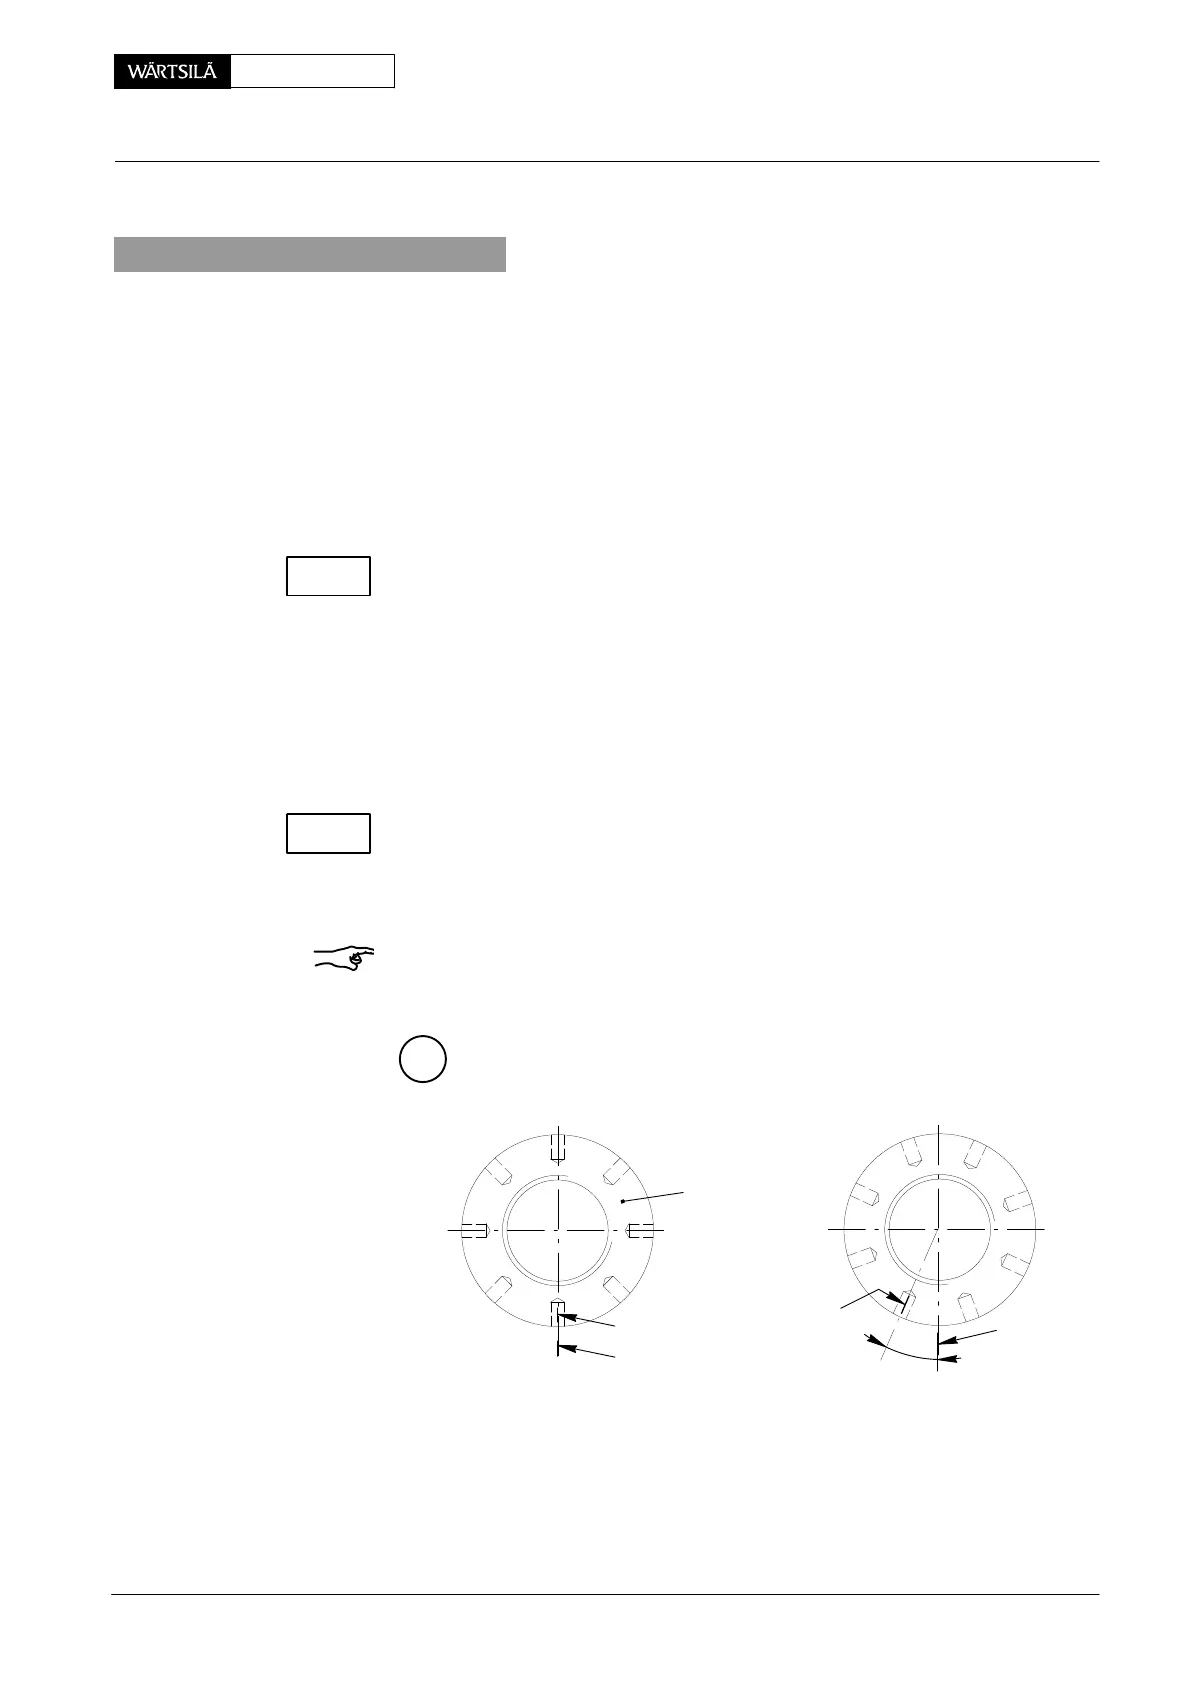
⇒ Mark the position of nuts 4 against bearing cover = 1
st
step.
⇒ Raise pressure to 1500 bar at the hydraulic unit and keep it constant.
⇒ Tighten all nuts 4 with round bar ’RS’ till firmly seated; check through slot ’KO’
using feeler gauge 94122.
⇒ Release pressure to zero at the hydraulic unit and then remove both double
pre-tensioning jacks.
Check if all the nuts have been turned by approx. the same value, i.e. the tigh-
tening angle should be 20_ between the 1
st
and 2
nd
step. If bigger differences
occur the tensioning procedure must be repeated.
Finally check the vertical clearance by means of special feeler gauge 94123 (see
Clearance Table 0330−1 ’Crankshaft and main bearing’).
Remark: All main bearing clearance values are valid only with tightened tie rods
and waisted studs.
1
ST
STEP
2
ND
STEP
D
y
x
4
013.432/0
009.758/02
y
TIGHTENING
ANGLE
x
50−D / 2010
Main Bearing: Loosening and Tensioning of Waisted Studs
CHECK
CHECK