Maintenance2722−1/A1 RT-flex50-D
Wärtsilä Switzerland Ltd
2/ 8
2. Checking an injection valve
Before commissioning the instructions and directions of the test bench manufac-
turer must be observed.
Remark: The work station must be clean; welding and grinding should not be done
nearby!
From time to time check the pressure gauges of the test bench with a master pres-
sure gauge and adjust them if necessary.
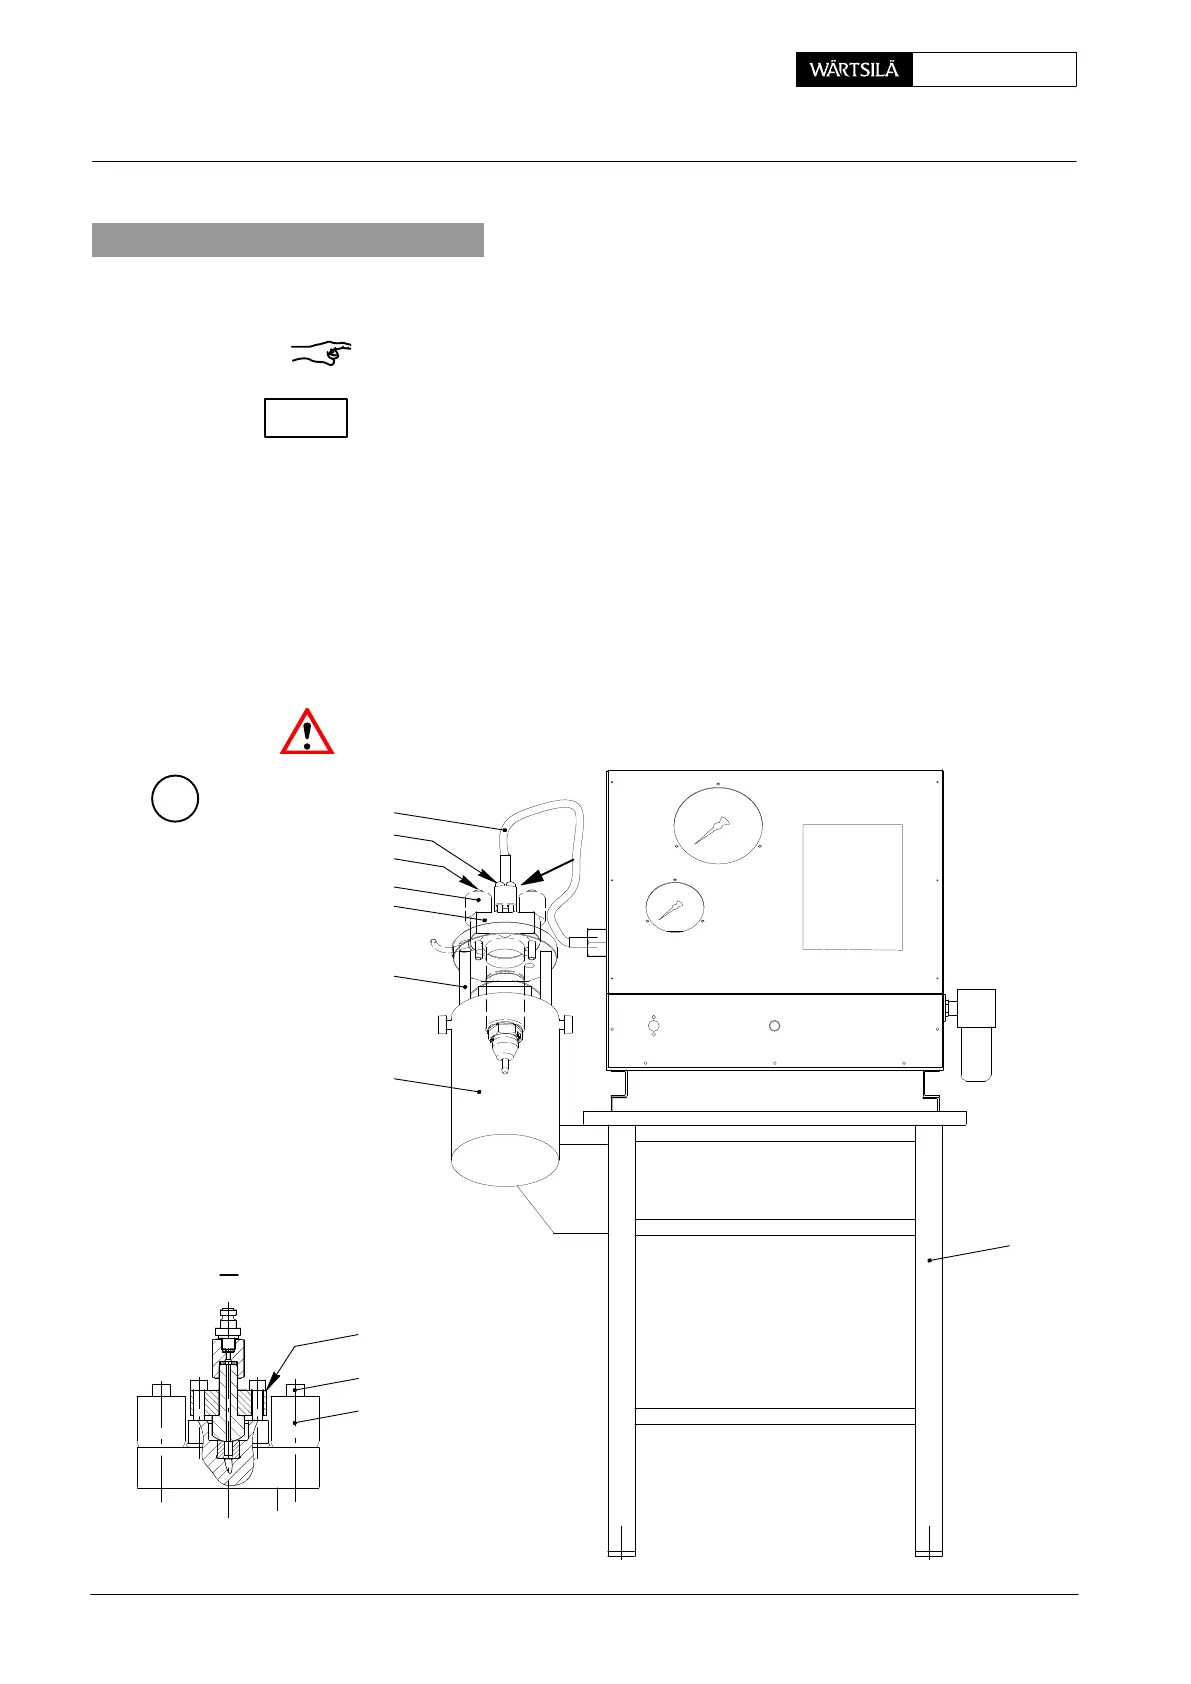
⇒ Remove combustion residues and clean nozzle tip externally with a brass
wire brush.
⇒ Place injection valve 1 with nozzle tip pointing downwards into support 19 of
test bench 94272 and fasten it with two Allen screws 2 and spring cages 23.
⇒ Tighten HP hose 20 of test bench with connecting piece 94272b.
⇒ Start the test bench following the proper manufacturer’s instructions.
⇒ Bring the injection valve to spray with a few short pump jerks, and then ob-
serve at what pressure the injection valve opens, applying slow, equal pump
jerks.
Danger of injuries! Never hold fingers or hands directly before the spray holes of
the nozzle tip!
A
20
9427
013.488/05
2
23
1
19
21
I
94272b
017.670/08
I
94272b
23
2
2011-12
Injection Valve: Checking, Dismantling, Assembling and Adjusting
CHECK