Maintenance
3403−3/A1
RT-flex50-D
Wärtsilä Switzerland Ltd
3/ 6
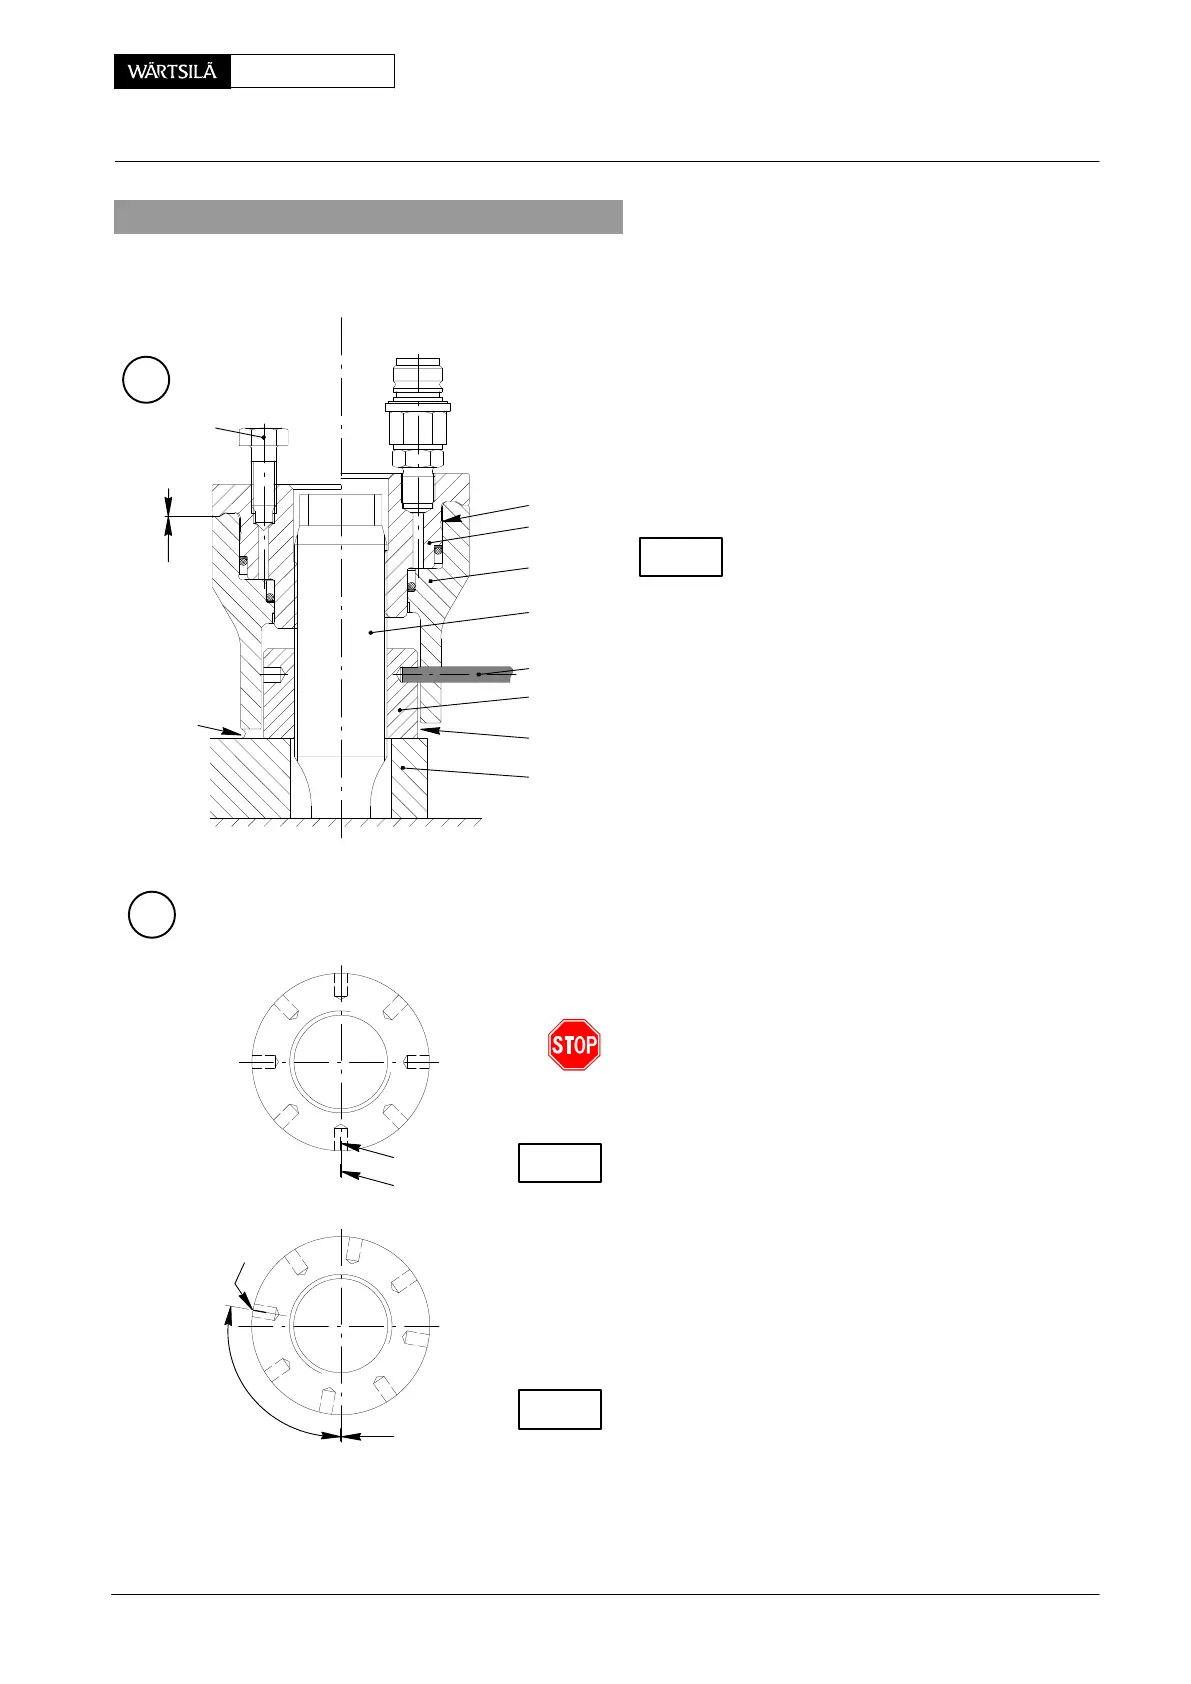
3. Tensioning waisted studs of piston crown
⇒ Clean the threads of waisted studs
and the area around nuts 13.
⇒ Apply oil to the threads of waiste
studs and screw on the nuts.
⇒ Tighten the nuts with round bar ’R
by hand.
Using a feeler gauge, check whether th
nuts rest without clearance.
⇒ Mark position of nuts to seating su
face with a felt tipped pen (Fig. ’a’)
⇒ Place pre-tensioning jacks 9434
crosswise on the waisted studs a
shown in Fig. ’A’, and complete
screw them on with opened ve
screws 16 till there is no or little clea
ance at ’x’.
⇒ Connect the pre-tensioning jacks
the hydraulic unit 94942.
⇒ Start up hydraulic unit.
⇒ Close vent screws 16 as soon as oil flows o
bubble-free.
⇒ Operate the hydraulic unit till a pressure of 1500 ba
is reached.
Pistons 14 of the pre-tensioning jacks must never e
ceed the red limiting grooves ’BN’ (Fig. ’B’).
⇒ Keep the pressure of 1500 bar constant and tighte
nuts 13 with round bar ’RS’ till firmly seated.
After tensioning the nuts check their seatings with
feeler gauge through slot ’KO’.
⇒ Always the same procedure is to be applied cros
wise according to the sequence for tensioning th
remaining waisted studs.
⇒ Remove pre-tensioning jacks.
After tensioning the nuts check if these have bee
turned by about the same angle, i.e. approx. 115_
compared with the marks previously made (Fig. ’b’).
CHECK
CHECK
PRE-TENSIONING JACK PLACED FOR
TENSIONING
LOOSENING
x
Fig. ’a’
Fig. ’b’
y
x
011.675/04
y
TIGHTENING
ANGLE
CHECK
B
015.888/07
C
SA
x
16
5
13
RS
14
BN
15
KO
4
2010
Piston: Removal and Fitting