Maintenance
3403−1/A1
RT-flex50-D
Wärtsilä Switzerland Ltd
3/ 8
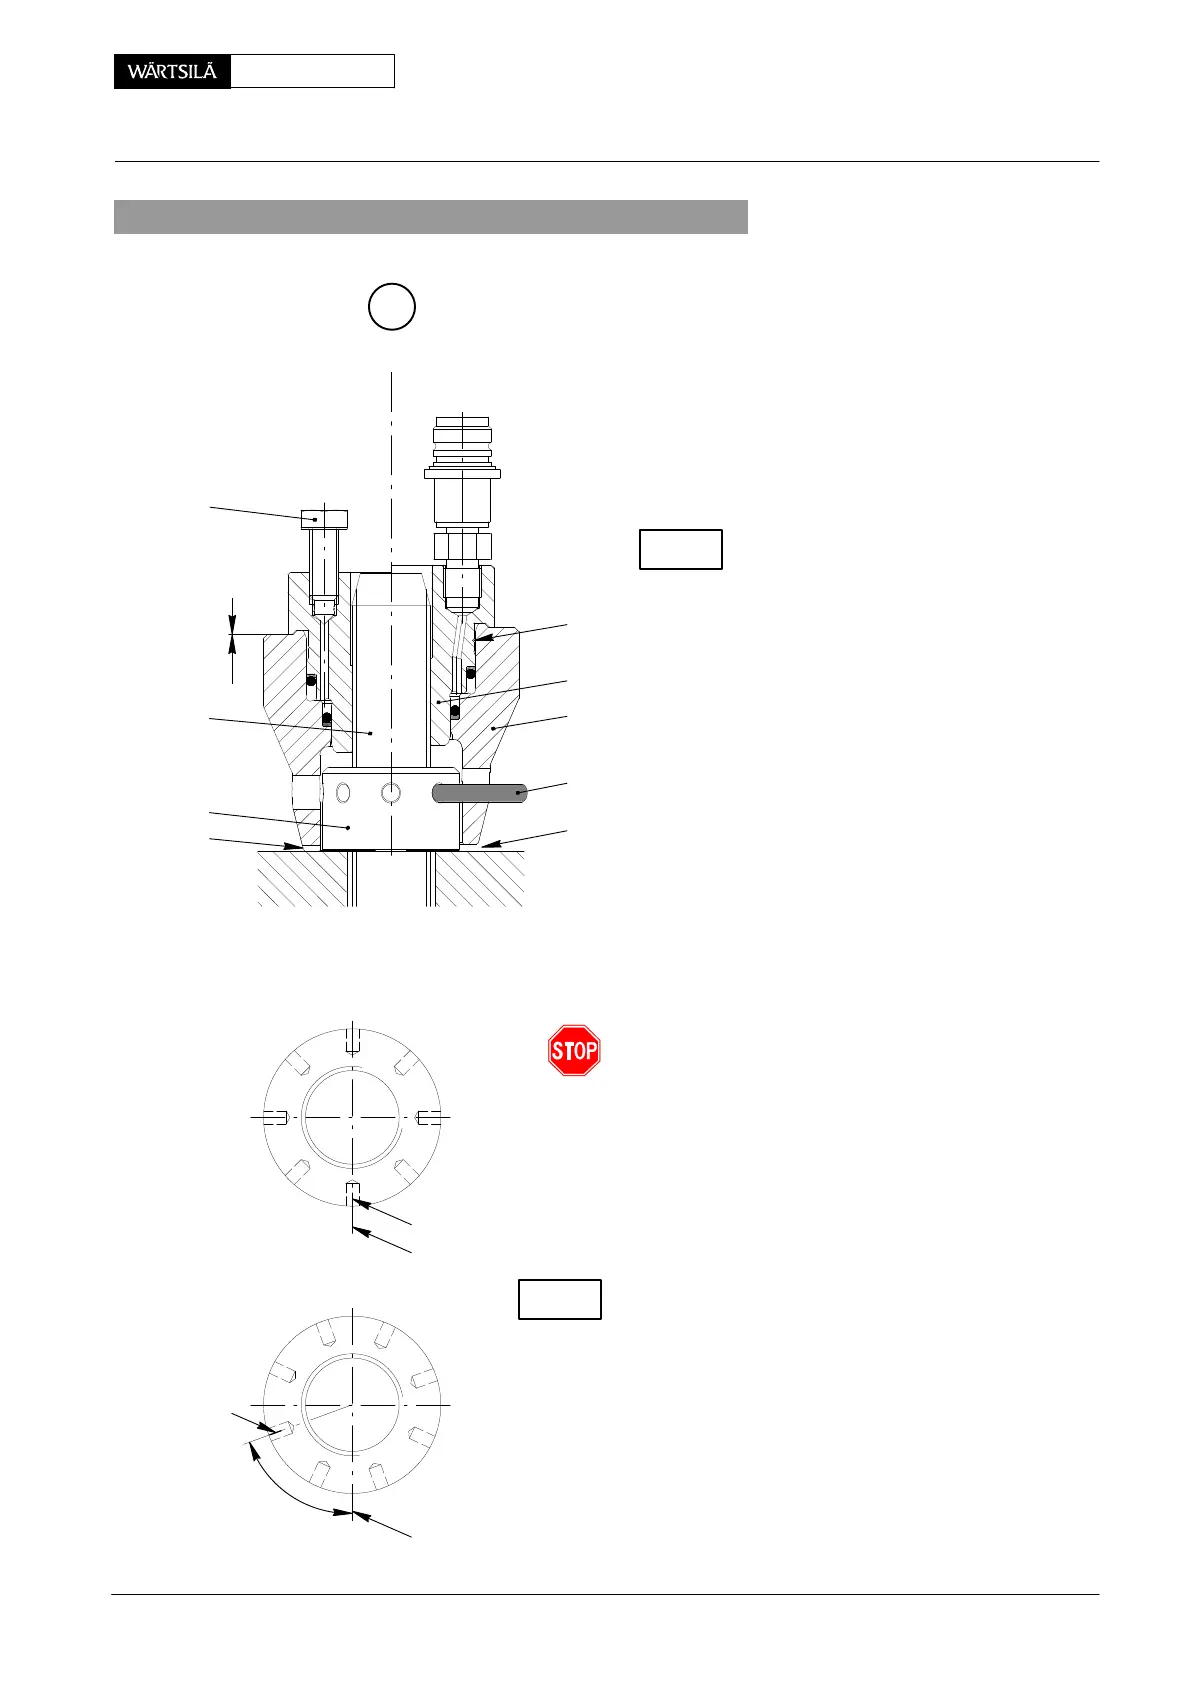
3. Tensioning the waisted studs of piston foot fastening
⇒ Clean the threads of waisted studs
and the area around nuts 4.
⇒ Apply oil to the threads of the waiste
studs and screw on the nuts.
⇒ Tighten the nuts with round bar ’RS
by hand.
Using a feeler gauge, check whether th
nuts rest without clearance.
⇒ Mark position of nuts to seating su
face with a felt tipped pen (Fig. ’a’)
⇒ Completely screw the pre-tensionin
jacks diagonally onto waisted studs
(Fig. ’A’). Moreover, vent screws
are to be opened slightly so that pis
tons 7 can slide back to their initi
position i.e. there is no or very litt
clearance at ’x’ (Fig. ’B’).
⇒ Connect both pre-tensioning jacks
HP oil pump 94931 as shown in Fig
’A’.
⇒ Shut relief valve ’EV’ and start up HP oil pum
94931 till bubble-free oil flows out through ven
screws 5. Shut the vent screws.
⇒ Slowly raise the pressure to 1500 bar.
Pistons 7 of the pre-tensioning jacks must never excee
the red limiting grooves ’BN’ (Fig. ’B’).
⇒ Keep the pressure of 1500 bar constant and tighte
nuts 4 with round bar ’RS’ till firmly seated.
⇒ Release pressure to zero with the aid of relief valv
’EV’ at the HP oil pump and then screw the pre-ten
sioning jacks onto the other two waisted stud
These are to be tensioned in the same sequence a
described above.
After tensioning the nuts check their seatings with
feeler gauge through slot ’KO’.
After tensioning the nuts check again if these have bee
turned by about the same angle i.e. about 80_
compared with the marks previously made (Fig. ’b’).
CHECK
CHECK
B
x
Fig. ’a’
y
Fig. ’b’
y
009.752/02
x
010.031/02
PRE-TENSIONING JACK PLACED FOR
TENSIONING LOOSENING
TIGHTENING ANGLE
SA
x
8
RS
7
BN
013.254/05
3
4
KO
5
2010
Piston: Removal and Fitting