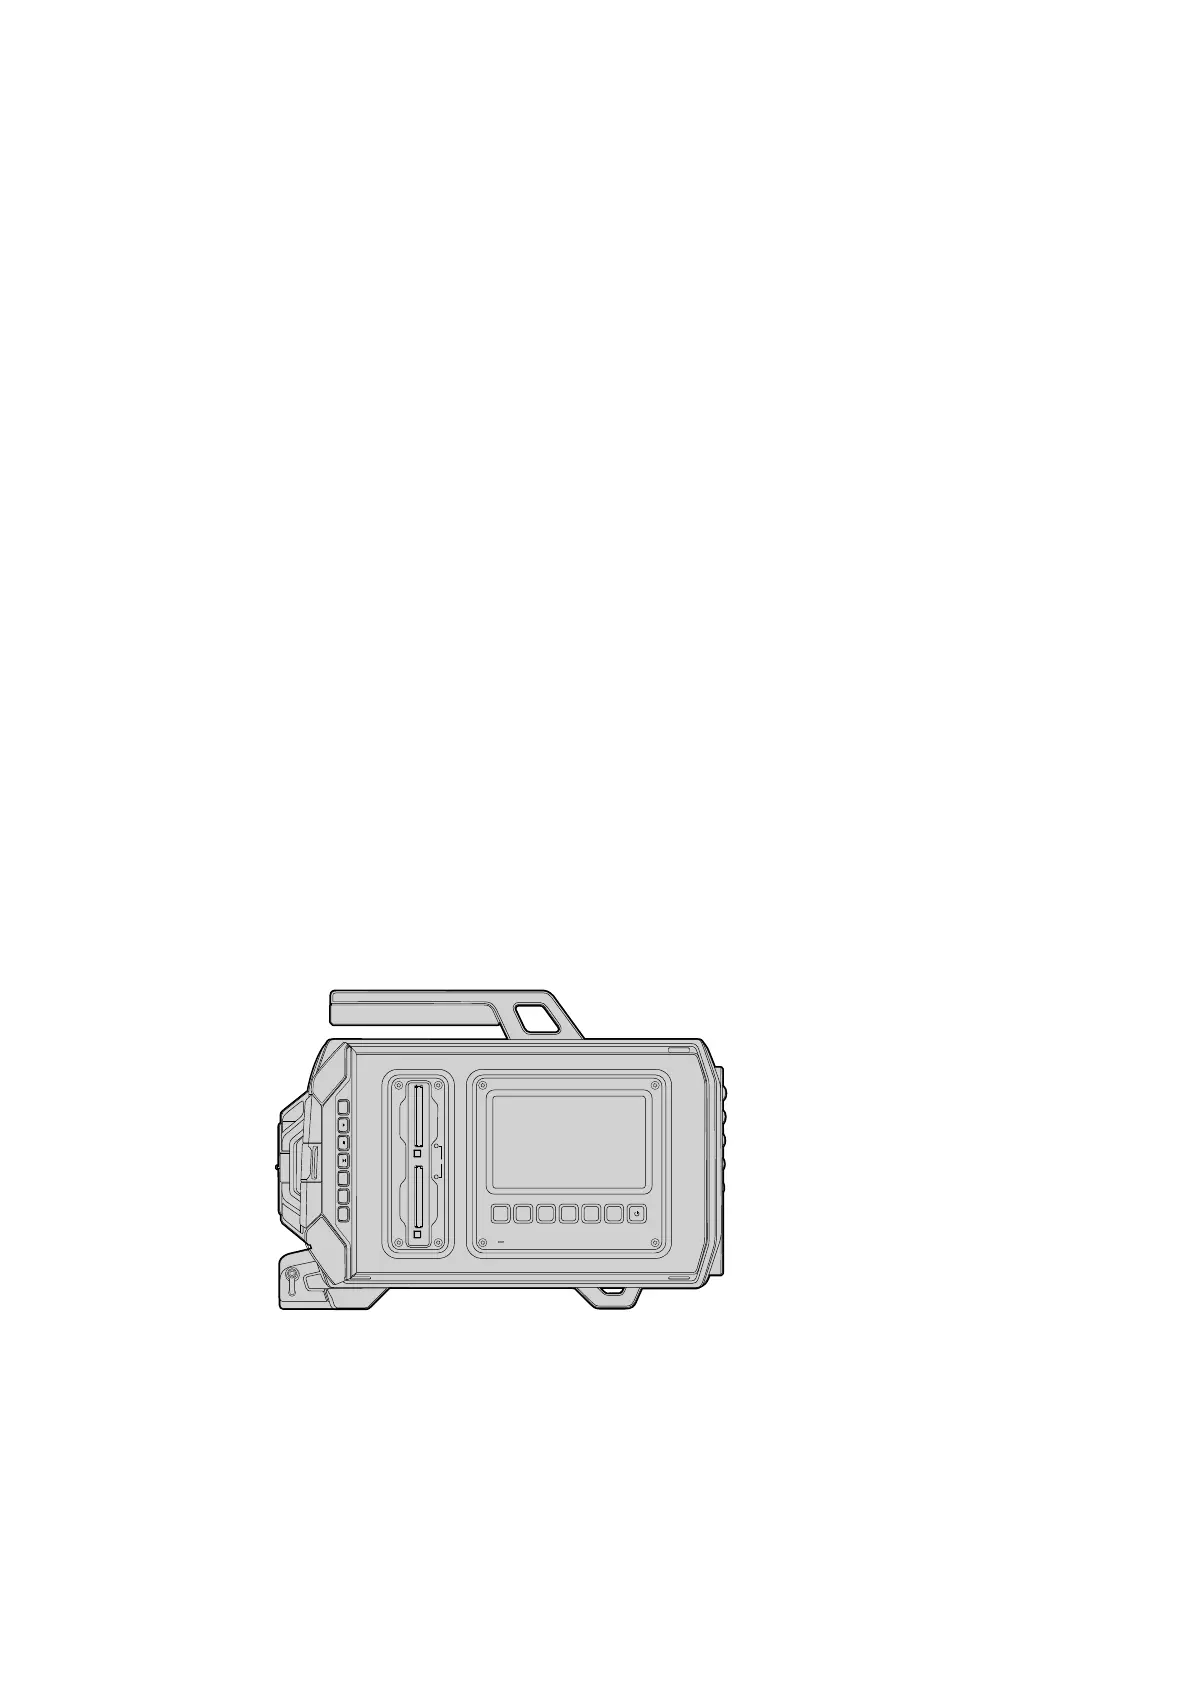
Iris Button
The ‘iris’ button activates the automatic aperture setting on compatible EFlenses.
When using video dynamic range settings, a single press of the iris button will set an
average exposure based on the highlights and shadows in your shot. Whenusing film
dynamic range settings, pressing the iris button sets your exposure so the brightest
highlight in your shot isn’t clipped.
To set your aperture electronically when using compatible EF lenses, press the forward
and reverse skip transport buttons on the fold out monitor.
Focus Button
When using an EF mount with an EF lens that supports electronic focus adjustments,
press the ‘focus’ button to activate auto focus. A white focus square will appear on the
fold out monitor. Anything within the square will be correctly focused. When the lens is
focused, the square will disappear. It’s important to know that while most lenses
support electronic focus, some lenses can be set to manual or auto focus modes, and
so you need to ensure your lens is set to auto focus mode.
Peak Button
Press the ‘peak’ button to activate focus peaking. The focus peaking feature creates a
green edge around the sharpest parts of the image so you can easily confirm your
focus. Focus peaking is not recorded to the CFast 2.0 cards, but can be displayed via
the monitoring SDI output, and on URSA’s fold out monitor, by activating overlays using
the touchscreen menu.
Display Button
Press the display button marked DISP to cycle through the display modes on each
touchscreen. For example, pressing the display button lets you view the camera’s
status and scopes, view your clips during recording and playback, and access camera
features and settings via the dashboard.
Menu Button
Press the ‘menu’ button to open the dashboard on the touchscreen. Ifyou want to
quickly adjust a specific setting, you can press and hold to bypass the dashboard and
go straight to the settings menu. Press the menu button again to close.
Slate Button
Press the ‘slate’ button to activate the slate feature on the touchscreen. Press slate
again to close. The slate feature lets you enter metadata for your clips and set your
camera ID. See the ‘entering metadata’ section of this manual for more information.
Power Button
Promptly press and release the ‘power’ button to turn on your Blackmagic URSA. Press
and hold to turn your camera off.
REC
ZOOM
DISP
PGM
1
CFAST
IRIS
FOCUS PEAK DISP MENU SLATE
2
IRIS
SDI OUT
0
-6
-12
-18
-24
-30
-36
-42
-48
L R
SDI IN
REF IN
TIMECODE IN
TIMECODE OUT
12V
CH1
SOLO
CH1
MUTE
CH2
MUTE
CH2
SOLO
FOCUS PEAK DISP MENU SLATE
PUSH PUSHPUSH
2020Blackmagic URSA Overviewand Connectors