Shimming the PL Mount
What is a Shim?
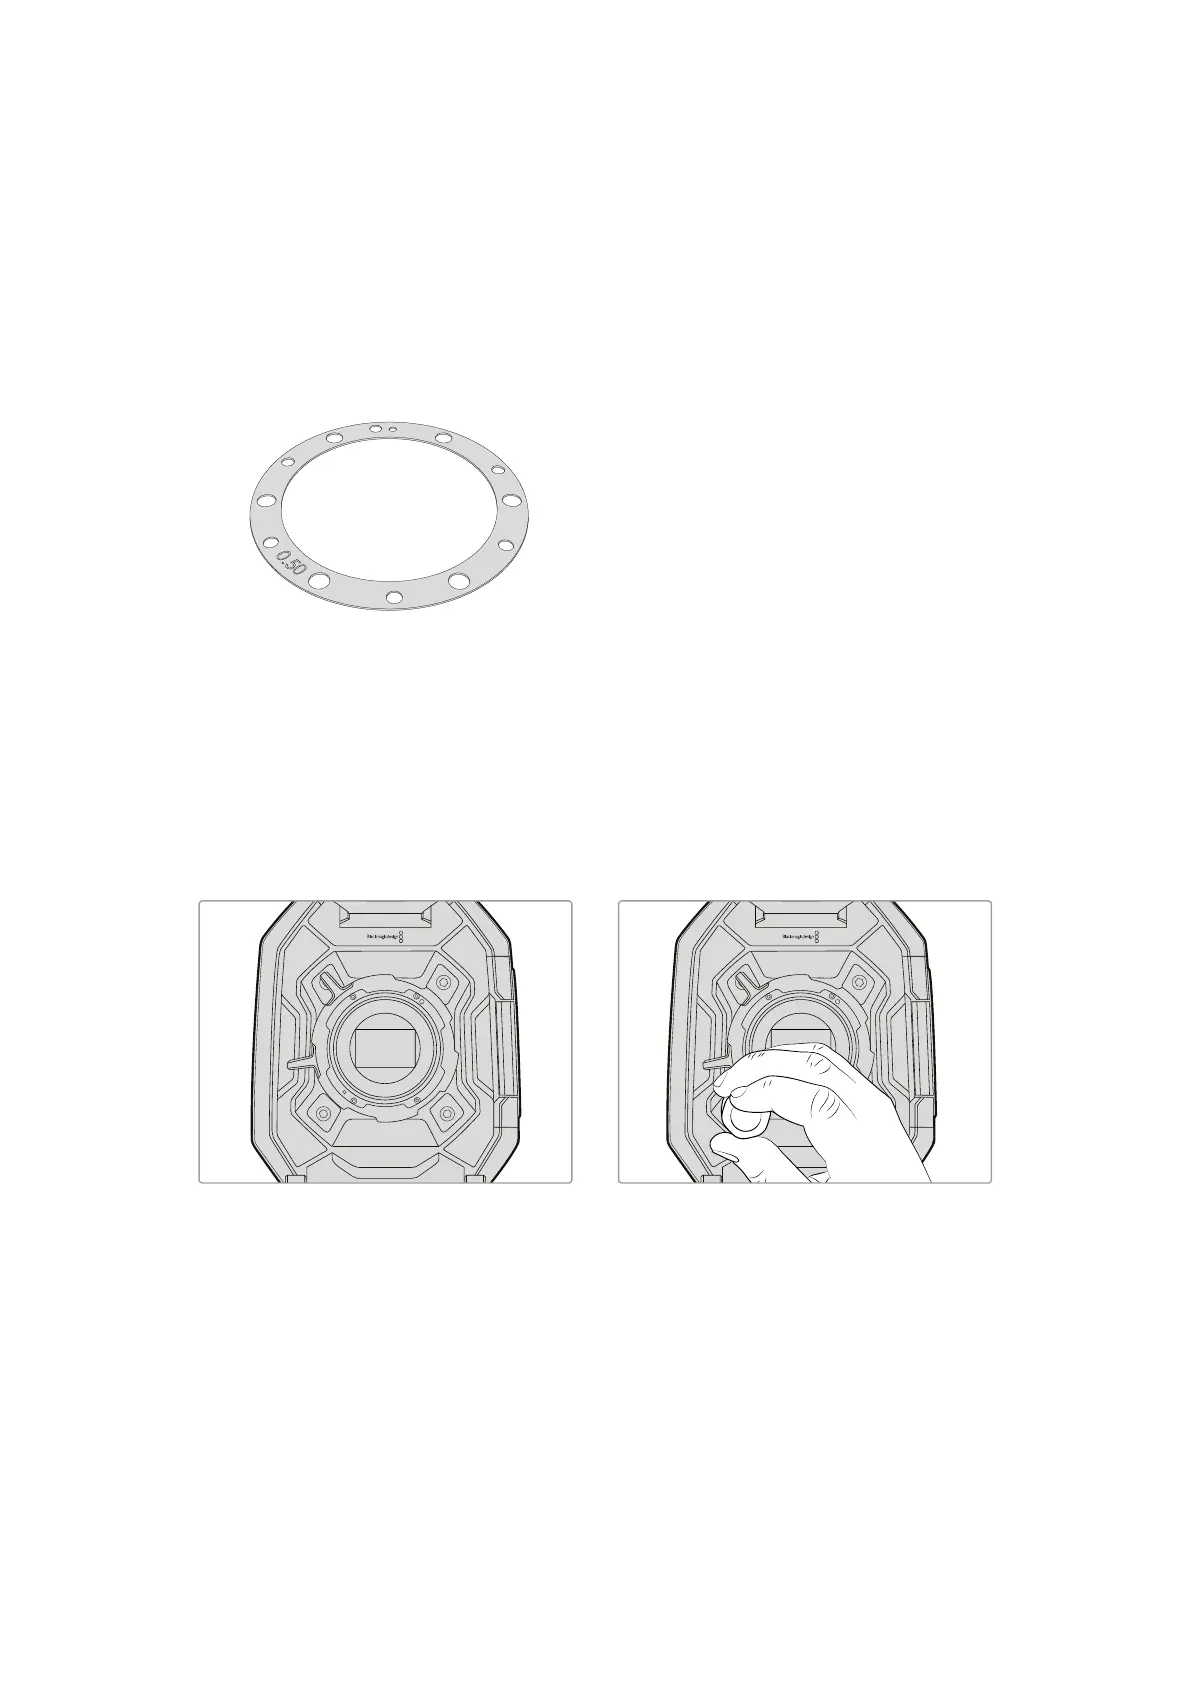
Blackmagic Shims are thin disks of varying thickness that let you make fine adjustments to the
distance between your PL lens and Blackmagic URSA's sensor. This distance is commonly
known as the flange focal distance, or back focus, and can change slightly due to variables
such as lens age and the environmental conditions of your shoot. The PL mount is designed so
you can easily adjust the back focus using shims.
Shims are placed between the PL mount and the camera body so the distance from your
subject to the sensor matches the focus marks on your lens. Your Blackmagic URSA is supplied
with a 0.50mm shim already installed. You can purchase shim sets of varying thickness from
your local Blackmagic Design reseller. Use shim thicknesses depending on your back focus
requirements.
To shim your camera’s PL mount you’ll need a torque wrench able to accurately set a maximum
torque of 0.45Nm, with a 2.0mm hex key and driver.
Removing and replacing the PL Mount
1
Place Blackmagic URSA on a solid, clean
bench top and remove your lens or dust cap.
The glass filter covering the sensor will be
exposed for the duration of the shimming
process, so it’s important to keep the filter as
clean as possible. Be careful not to touch the
filter while shimming the PL mount.
2
Remove the six PL mount screws using the
2.0mm hex driver. You may need to
occasionally rotate the PL locking ring
clockwise or counterclockwise to access
the screws.
71Shimming the PL Mount