To attach a PL mount lens:
1 Open your camera’s PL locking ring by rotating it counterclockwise until it stops.
2 Align one of the lens’ four flange notches with the locating pin on the camera mount.
Be sure to align the lens for easy viewing of the lens marks.
3 Tighten the PL locking ring by rotating it clockwise.
4 To remove the lens, rotate the locking ring counterclockwise until it stops, then gently
remove the lens.
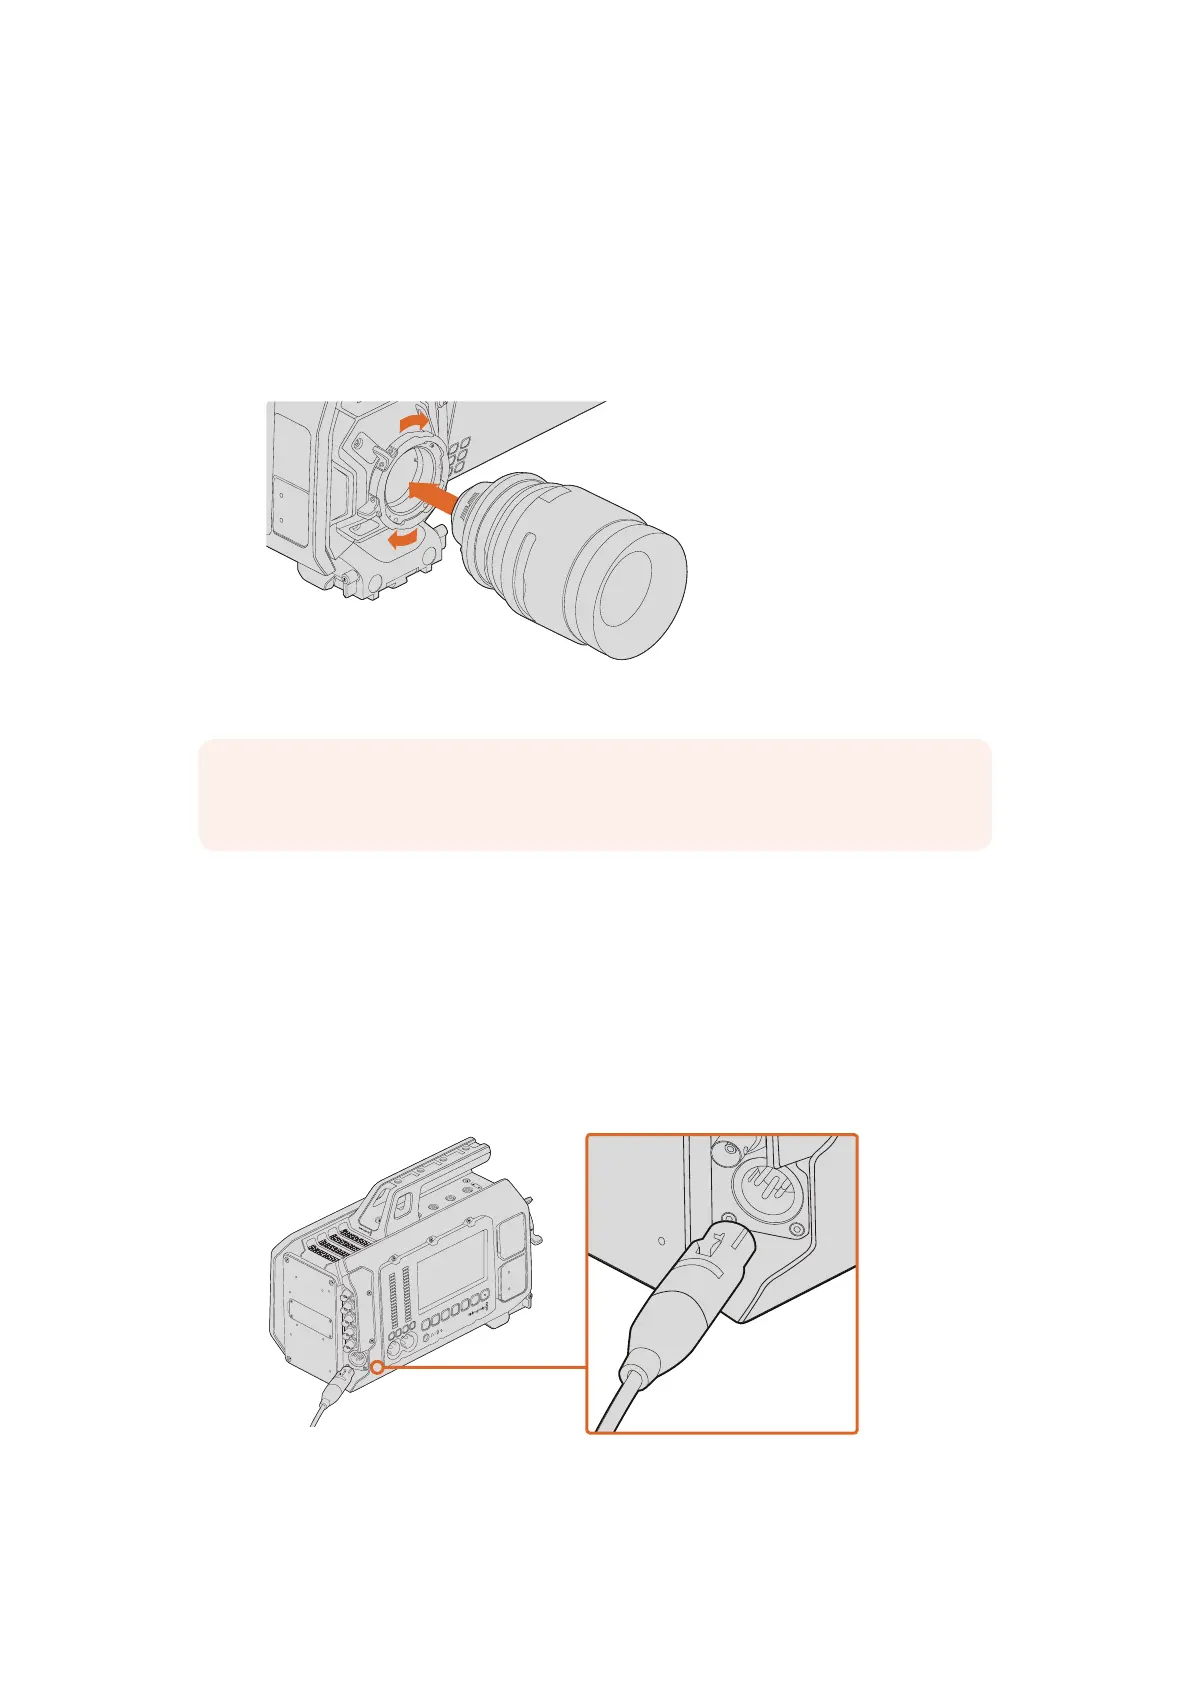
Attaching and removing a PL lens on Blackmagic URSA.
Turning Your Camera On
Now that you have attached a lens, you’ll need to supply power. The quickest way to power
your camera is to connect external power using the supplied AC to 12V DC adapter.
To plug in external power:
1 Connect the AC to 12V DC adapter plug to your mains power socket.
2 Connect the AC to 12V DC adapter’s 4 pin XLR connector to the 12-20V DC power
connector on the camera.
Use the supplied AC to 12V DC adapter to power your Blackmagic URSA
If you have both external and battery power connected, only external power will be used. If you
remove external power while a charged battery is connected, your camera will switch to battery
power without interruption.
SDI OUT
SDI IN
REF IN
+12V
TIMECODE IN
CH1
SOLO
CH2
SOLO
CH1
MUTE
CH2
MUTE
IRIS
FOCUS
PEAK
DISP
MENU
AUDIO IN
SDI OUT
+12V OUT
SLATE
TIMECODE OUT
0
-6
-12
-18
-24
-30
-36
-42
-48
NOTE When no lens is attached to the camera, the glass filter covering the sensor
isexposed to dust and other debris so you should keep the dust cap on whenever possible.
IRIS
SDI OUT
SDI IN
REF IN
TIMECODE IN
L
R
TIMECODE OUT
+12V
CH1
SOLO
CH1
MUTE
CH2
SOLO
CH2
MUTE
FOCUS
PEAK
DISP
AUDIO IN
12V OUT
SDI OUT
MENU
SLATE
0
-6
-12
-18
-24
-30
-36
-42
-48
IRIS
SDI OUT
SDI IN
REF IN
TIMECODE IN
L
R
TIMECODE OUT
+12V
CH1
SOLO
CH1
MUTE
CH2
SOLO
CH2
MUTE
FOCUS
PEAK
DISP
AUDIO IN
12V OUT
SDI OUT
MENU
SLATE
0
-6
-12
-18
-24
-30
-36
-42
-48
88Getting Started