4 To insert the clip onto the timeline, click inside the source viewer then drag the mouse
pointer across to the timeline viewer. A list of edit options will appear. Select the type of
edit you want.
Your clip will be placed onto the timeline using the edit type you selected. You’ll find a
description of each edit type and how to use them in the DaVinci Resolve manual.
A faster way to add clips to your edit is by dragging them from the media pool and dropping
them directly onto the timeline where you can adjust your in and out points, position your clips,
try different plug in effects, titles, and more. This particular workflow is like using the timeline as
an artist’s palette.
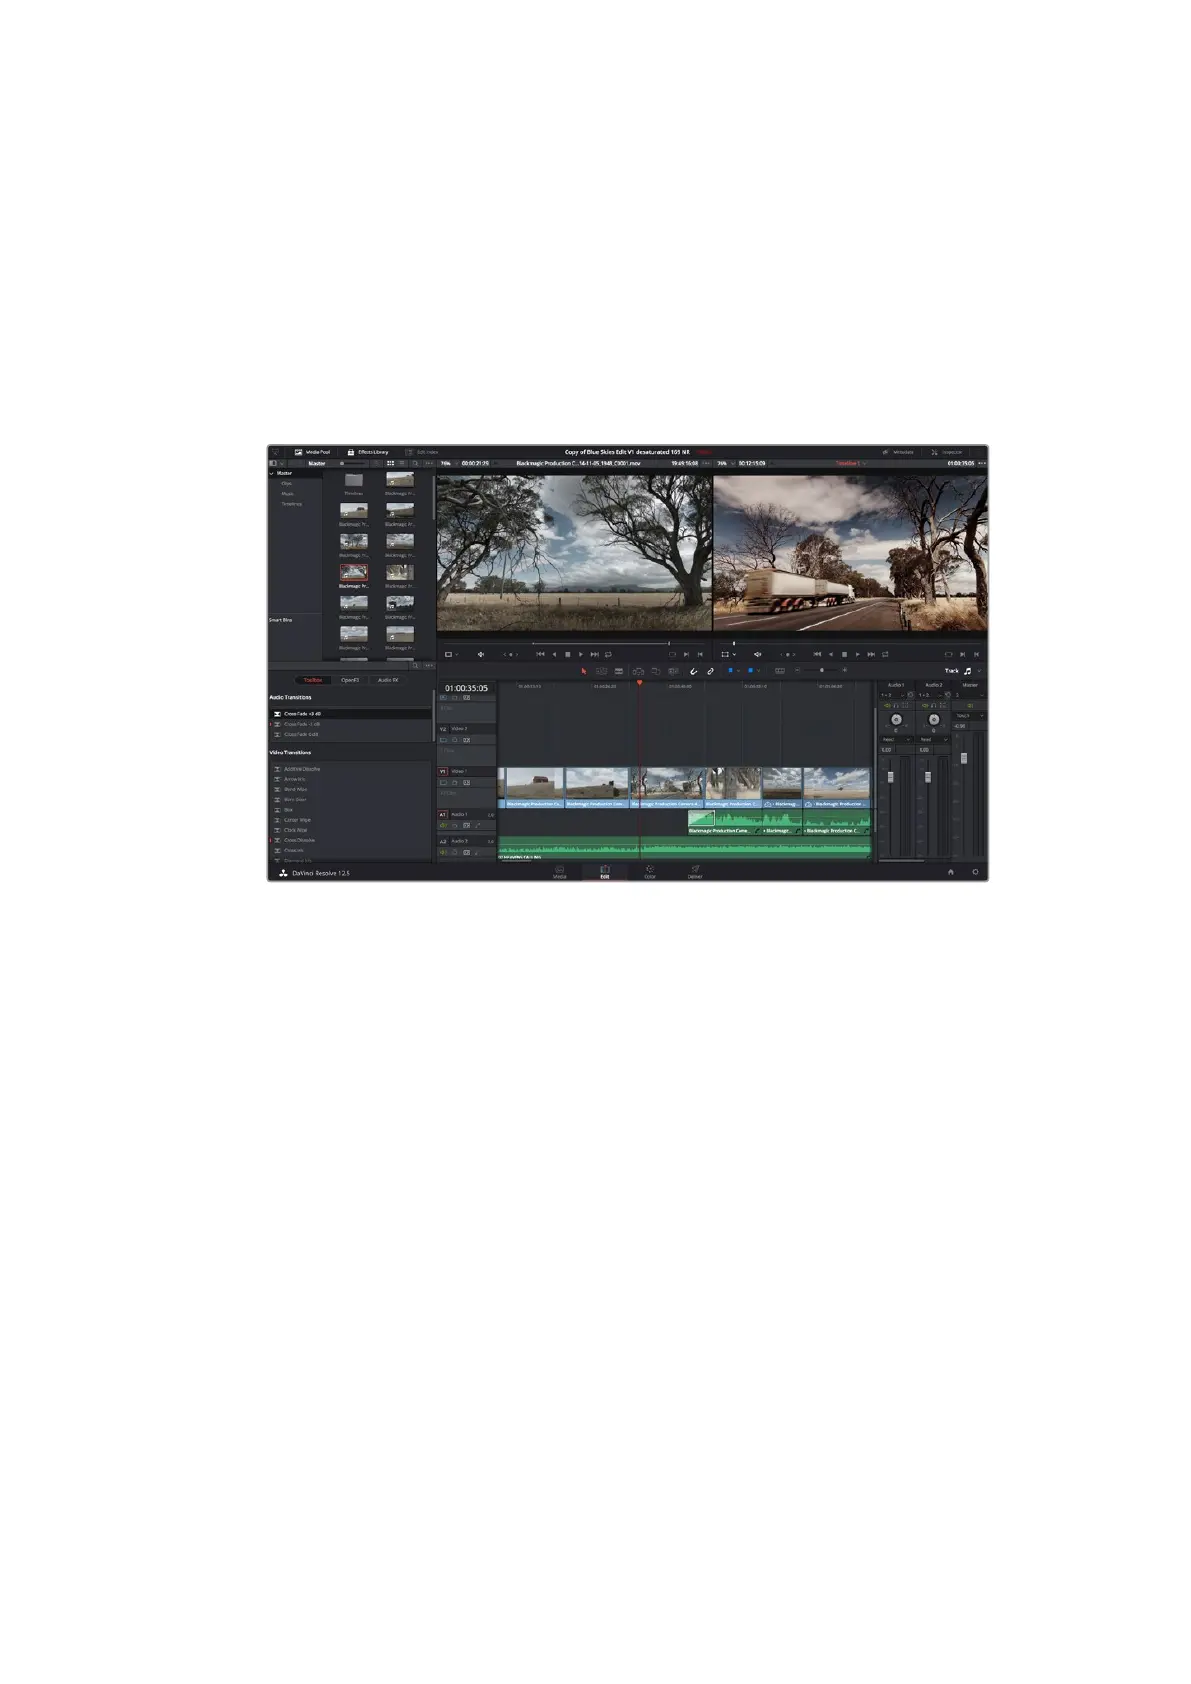
The ‘edit’ page. You can trim your clips, change their order, move them
around and add transitions between them using the timeline editor.
Trimming Clips
When editing clips you’ll want to trim them to include only the specific actions you want in each
shot. There are various ways, but the easiest is to adjust the clips’ in and out points on
the timeline:
1 After adding clips to your timeline, hover your mouse pointer over the start of a clip until
the pointer becomes a ‘trim’ icon.
2 When the ‘trim’ icon appears, click on the start of your clip and drag it forwards or
backwards to trim the in point. Watch the timeline monitor as you trim to find the
edit point.
3 Now click and drag the end of your clip to adjust the out point.
The zoom slider is located above the timeline, to the right of the tools that are centered in the
toolbar. By dragging the slider left and right you can zoom in and out of your timeline to make
fine adjustments.
Turning the ‘snapping’ feature off is handy when fine tuning edits, but it’s a helpful feature to
keep your clips held tightly against each other, so it’s worth turning back on once you’re done.
Press the ’N’ key to quickly turn snapping on or off.
55Using DaVinci Resolve