Mastering your Edit
So now you’ve edited, color corrected and graded your clips you’ll want to export a render of
your edit in the ‘deliver’ page. This page lets you select the range of clips you want to export,
plus the format, codec and resolution you want. You can export in many types of formats such
as QuickTime, AVI, MXF and DPX using codecs such as 8-bit or 10-bit uncompressed RGB/YUV,
ProRes, DNxHD, H.264 and more.
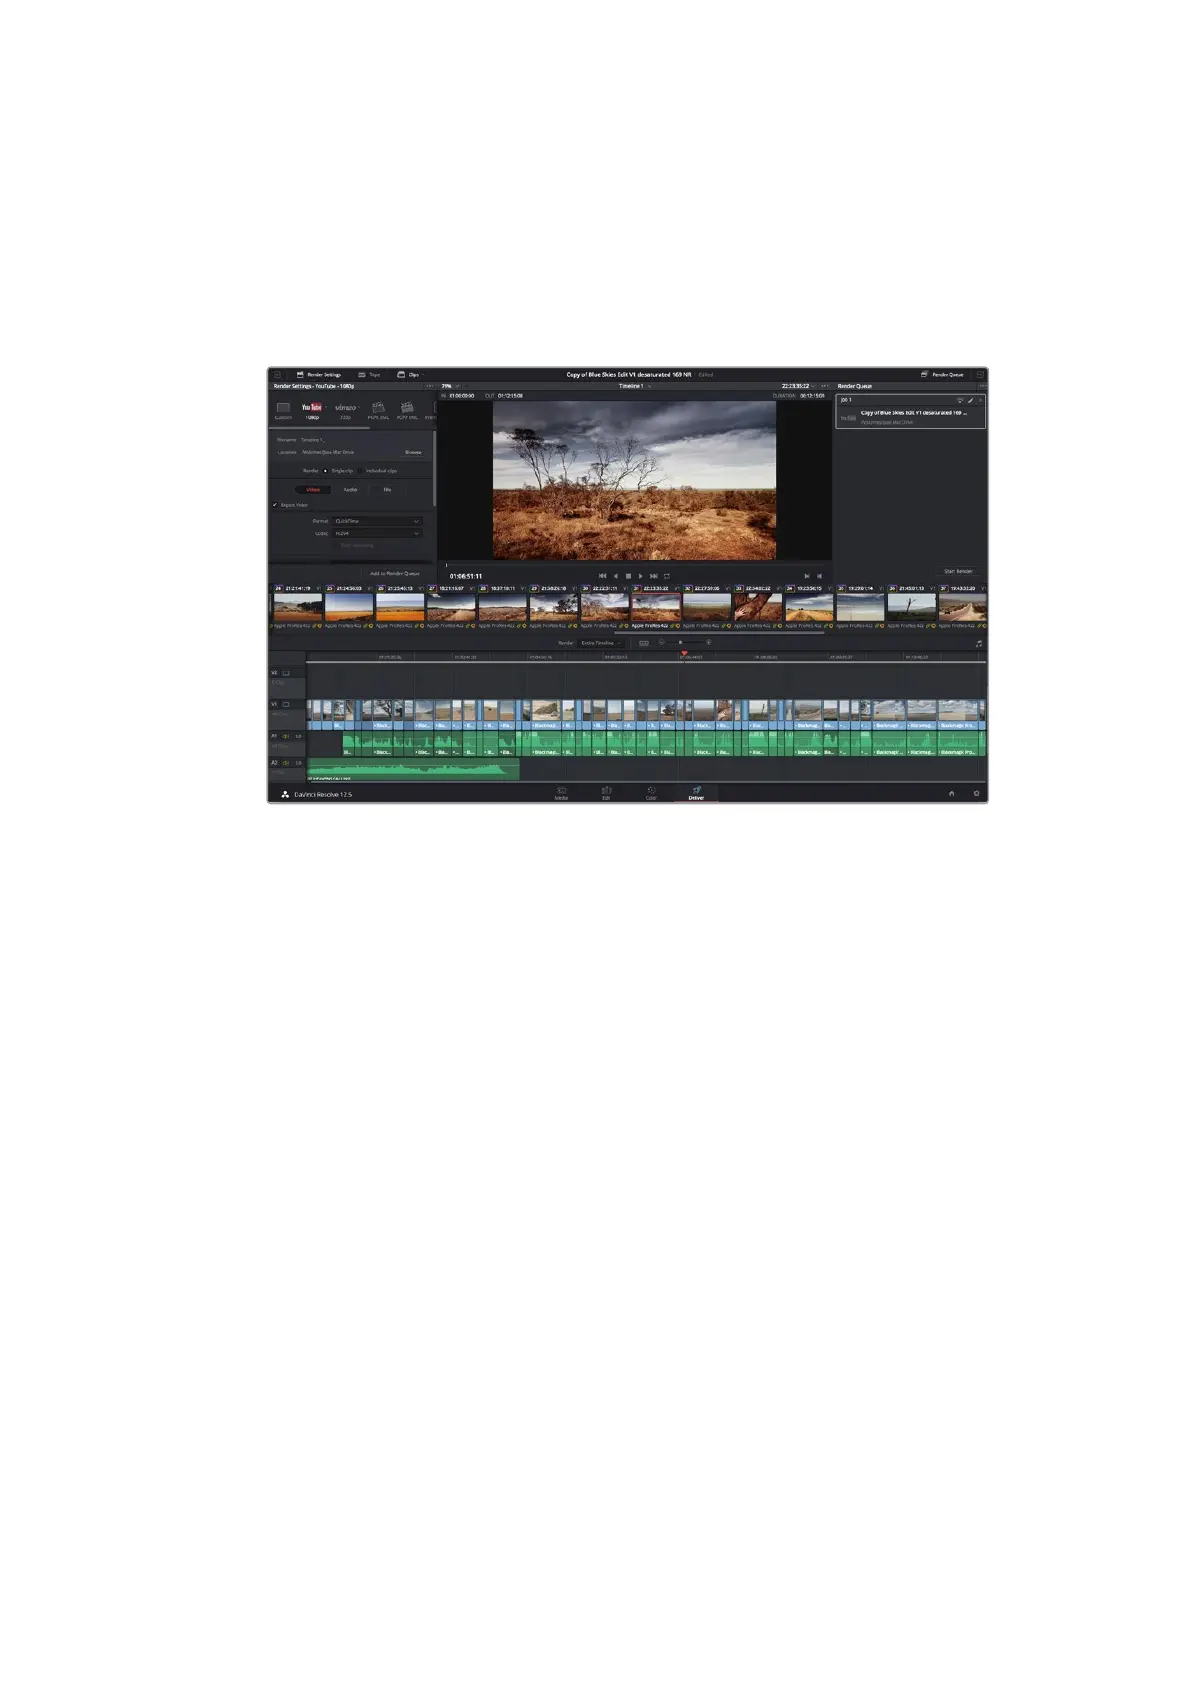
The ‘deliver’ page is where you export your edit. You can select
from many different video formats and codecs
To export a single clip of your edit:
1 Click on the ‘deliver’ tab to open the deliver page.
2 Go to the ‘render settings’ window on the top left of the page. In the ‘format’ settings,
select ‘single clip’. You can now choose from a number of export presets, for example
YouTube, Vimeo and audio presets, or you can set your own export settings manually
by leaving it set to the default ‘custom’ preset and entering your own parameters. For
this example, select YouTube, then click on the arrow next to the preset and select
the 1080p video format.
The frame rate will be locked to your project frame rate setting.
3 Underneath the presets you will see the timeline filename and the target location for
your exported video. Click the ‘browse’ button and choose the location where you want
to save your exported file.
4 Immediately above the timeline, you’ll see an options box with ‘entire timeline’ selected.
This will export the entire timeline, however you can select a range of the timeline if
you want to. Simply choose ‘in/out range’ and then use the ‘i’ and ‘o’ hot key shortcuts
to choose the in and out points in your timeline.
5 Go to the bottom of the ‘render settings’ and click on the ‘add to render queue’ button.
Your render settings will be added to the render queue on the right side of the page. Now all you
have to do is click ‘start render’ and monitor the progress of your render in the render queue.
When your render is complete you can open the folder location, double click on your new
rendered clip and watch your finished edit.
65Using DaVinci Resolve
 Loading...