Getting Started
Getting started with your Blackmagic URSA is as simple as attaching the handle, mounting a
lens, and powering your camera.
Attaching the Handle
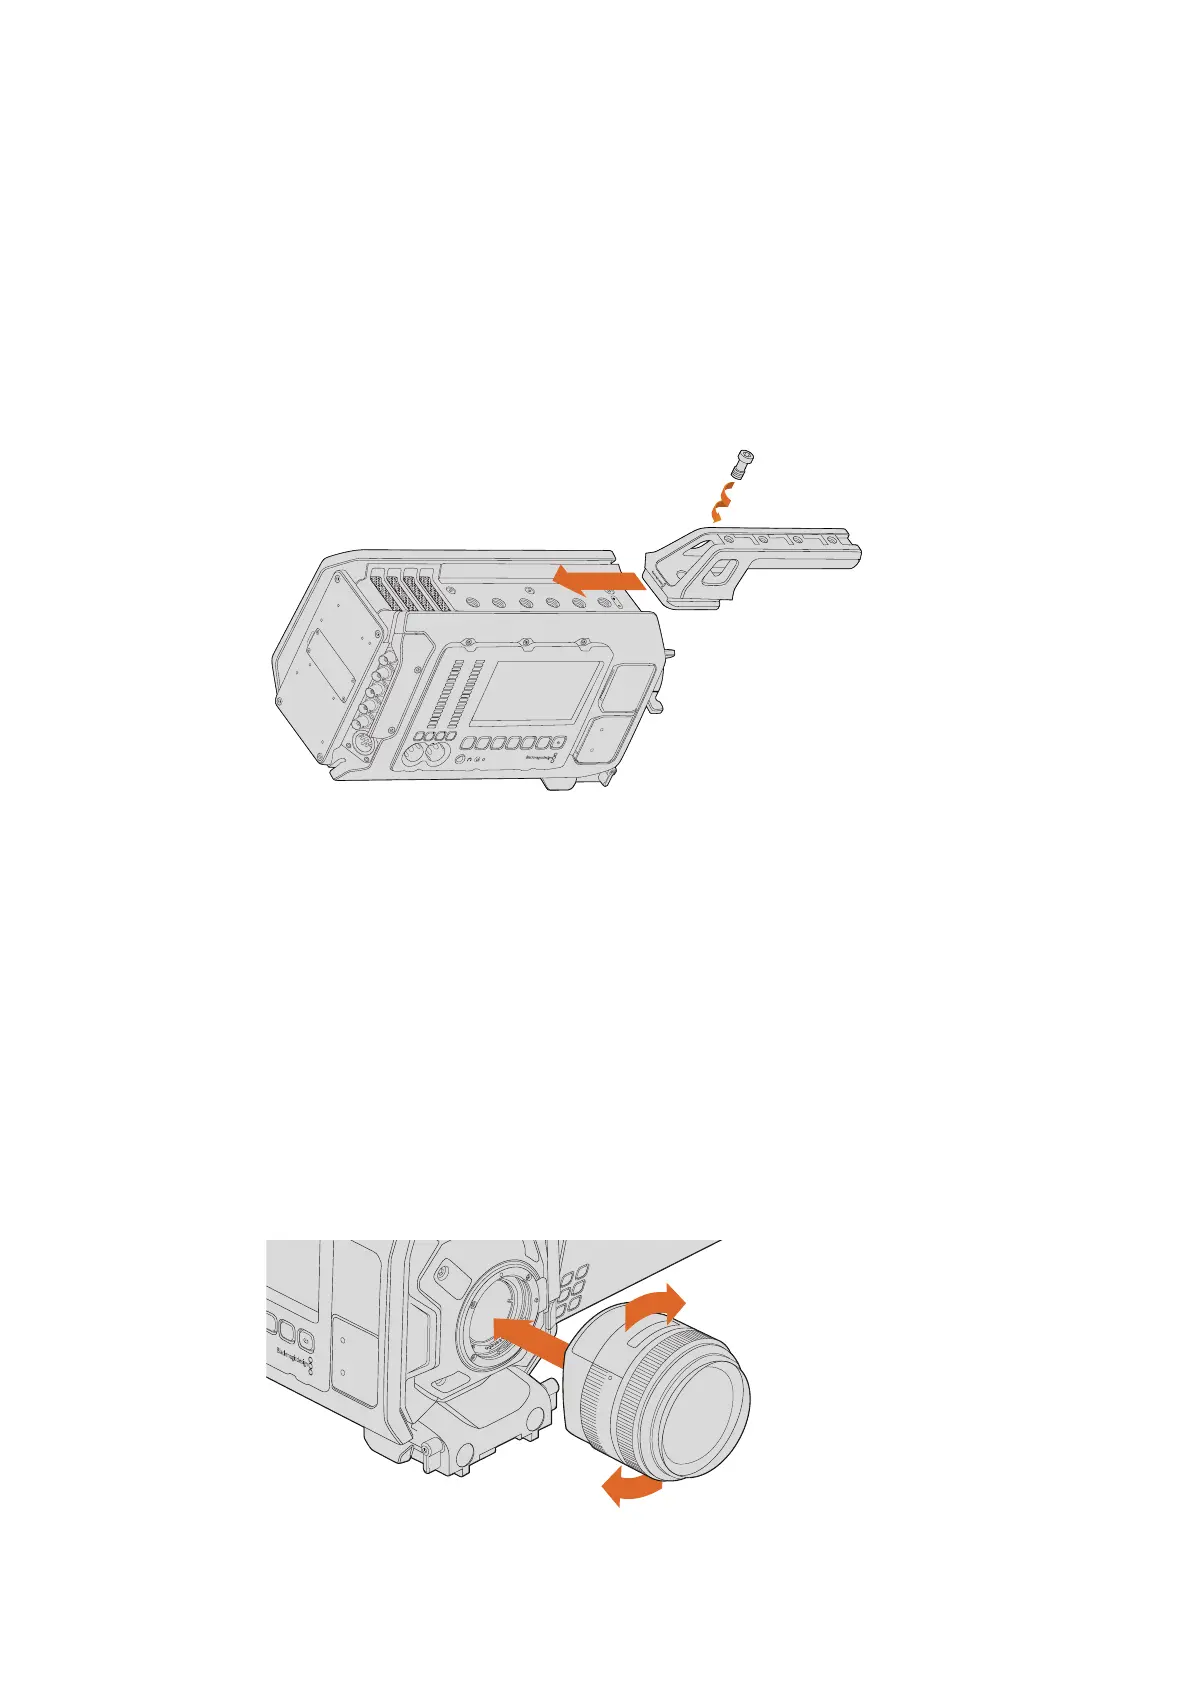
To attach Blackmagic URSA’s handle to the camera body, simply slide the base of the handle
along Blackmagic URSA’s handle ridges and screw the handle to one of the 3/8” mounting
points. Choose a mounting point that provides the best weight balance for your camera.
Attaching the top handle to Blackmagic URSA.
Attaching a Lens
To remove the protective dust cap from the EF lens mount, hold down the locking button and
rotate the cap counterclockwise until it is released. For the PL mount, rotate the PL locking ring
counterclockwise.
To attach an EF mount lens:
1 Align the dot on your lens with the dot on the camera mount. Many lenses have a visual
indicator, for example a blue, red or white dot.
2 Press the lens mount against the camera mount and twist the lens clockwise until it
locks into place.
3 To remove the lens, hold down the locking button, rotate the lens counterclockwise
until its dot or indicator reaches the 12 o’clock position, and gently remove.
Attaching and removing an EF mount lens on Blackmagic URSA EF.
IRIS
SDI OUT
SDI OUT
REF IN
TIMECODE IN
L
R
TIMECODE OUT
+12V
CH1
SOLO
CH1
MUTE
CH2
SOLO
CH2
MUTE
FOCUS
PEAK
DISP
AUDIO IN
12V OUT
SDI OUT
MENU
SLATE
0
-6
-12
-18
-24
-30
-36
-42
-48
REF IN
+12V
TIMECODE IN
CH2
MUTE
IRIS
FOCUS
PEAK
DISP
MENU
AUDIO IN
SDI OUT
+12V OUT
SLATE
TIMECODE OUT
0
-6
-12
-18
-24
-30
-36
-42
-48
SDI OUT
SDI IN
CH1
SOLO
CH2
SOLO
CH1
MUTE
77Getting Started